

Installing a hitch on a Lucid Air might sound intimidating, after all, it’s a high-end EV with tight tolerances and sleek design. But with the right approach and a little patience, this is a very manageable install that delivers a clean, factory-style result.
In this guide, I’ll walk you through the process step-by-step, just like we would in the shop, so you can tackle this install with confidence.
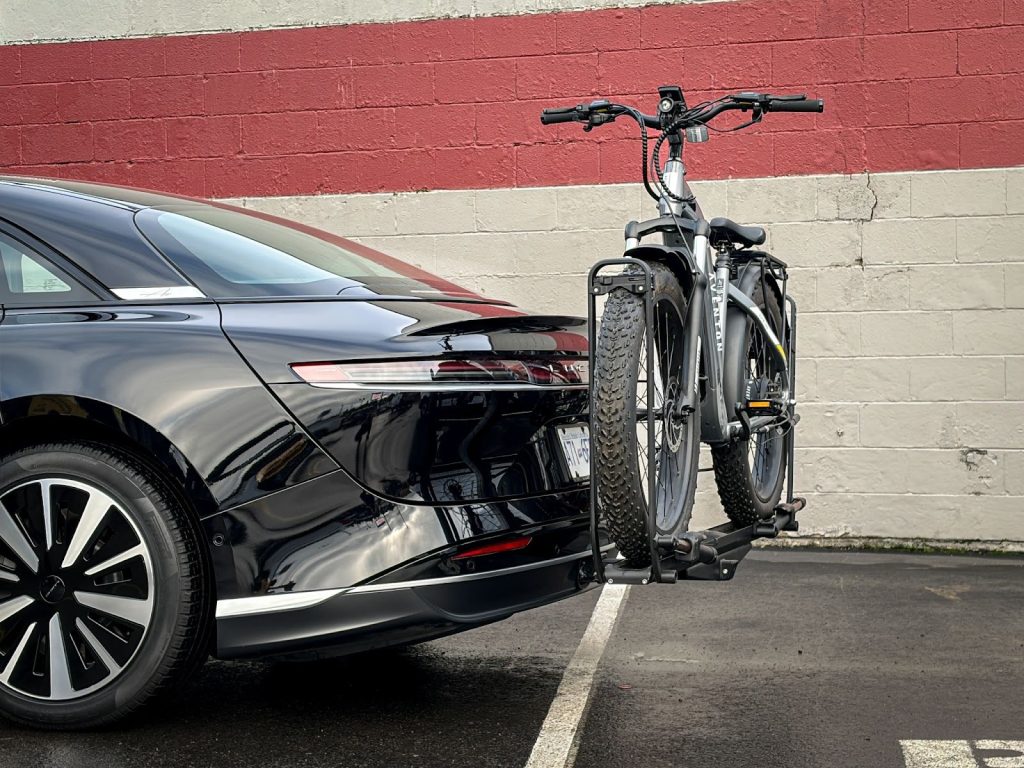
Before You Start
Recommended Tools:
- Trim removal tools
- Torx bit set
- Socket set
- Torque wrench
- Reciprocating saw or trimming tool
- Marker and masking tape
Pro Tip: Having a second person for bumper removal makes this job much easier and safer.
Step 1: Remove Fender Liner and Access Hardware
We’ll start by opening up access points around the rear bumper.
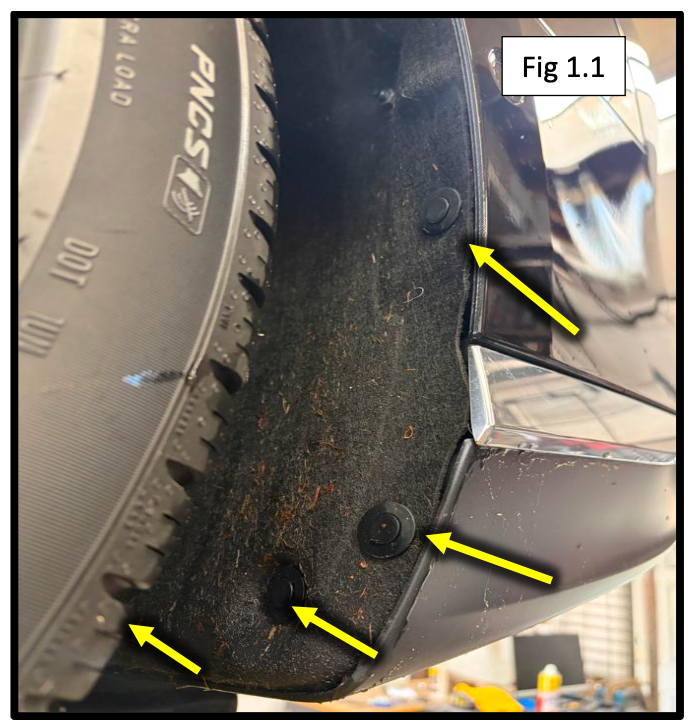
- Remove four plastic push clips in each rear fender well
- Peel back the inner fender liner
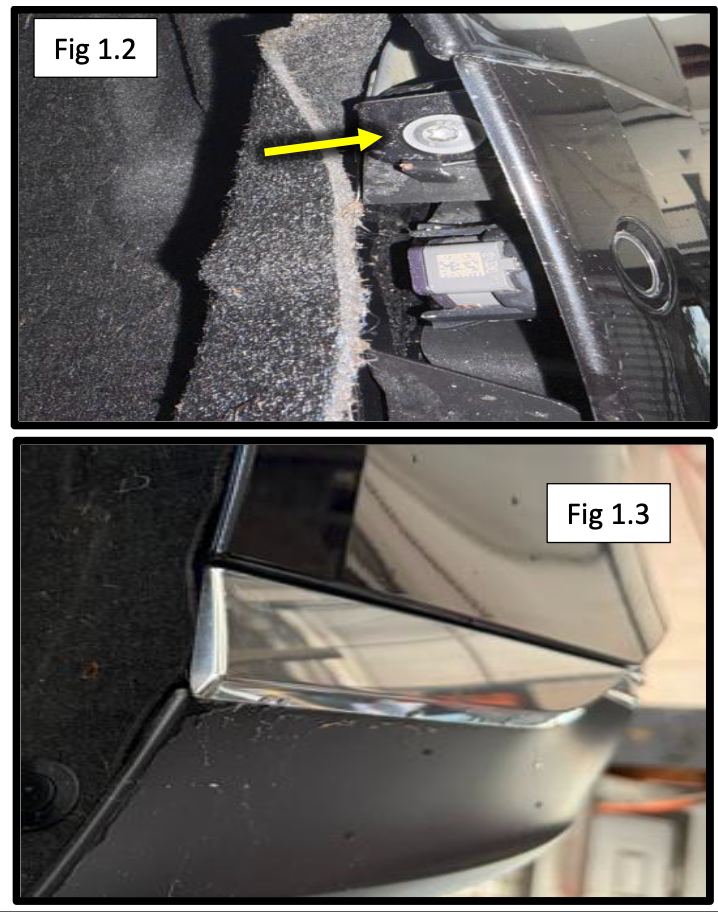
- Remove the Torx screws behind the liner
- Carefully unclip the chrome trim to expose an additional Torx screw
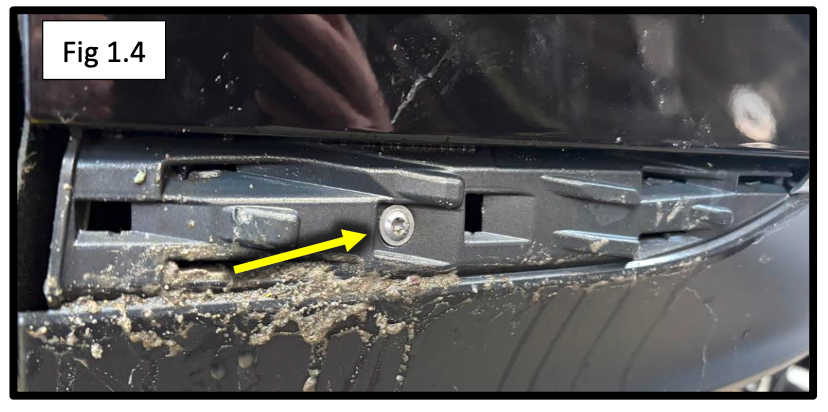
- Open the trunk and remove one Torx screw per side
Repeat this process on both the driver and passenger sides.
Take your time with the trim, these clips are tight, and you want to avoid scratching or breaking anything.
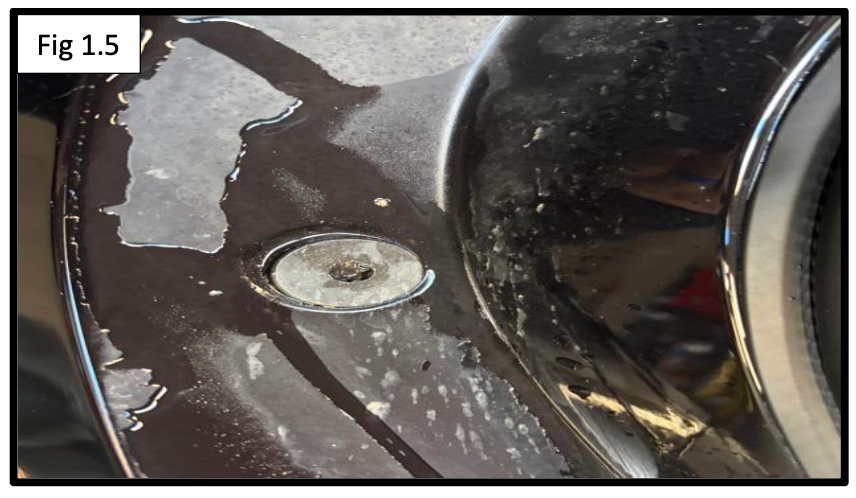
Step 2: Remove the Rear Bumper
Now we’ll remove the bumper assembly.
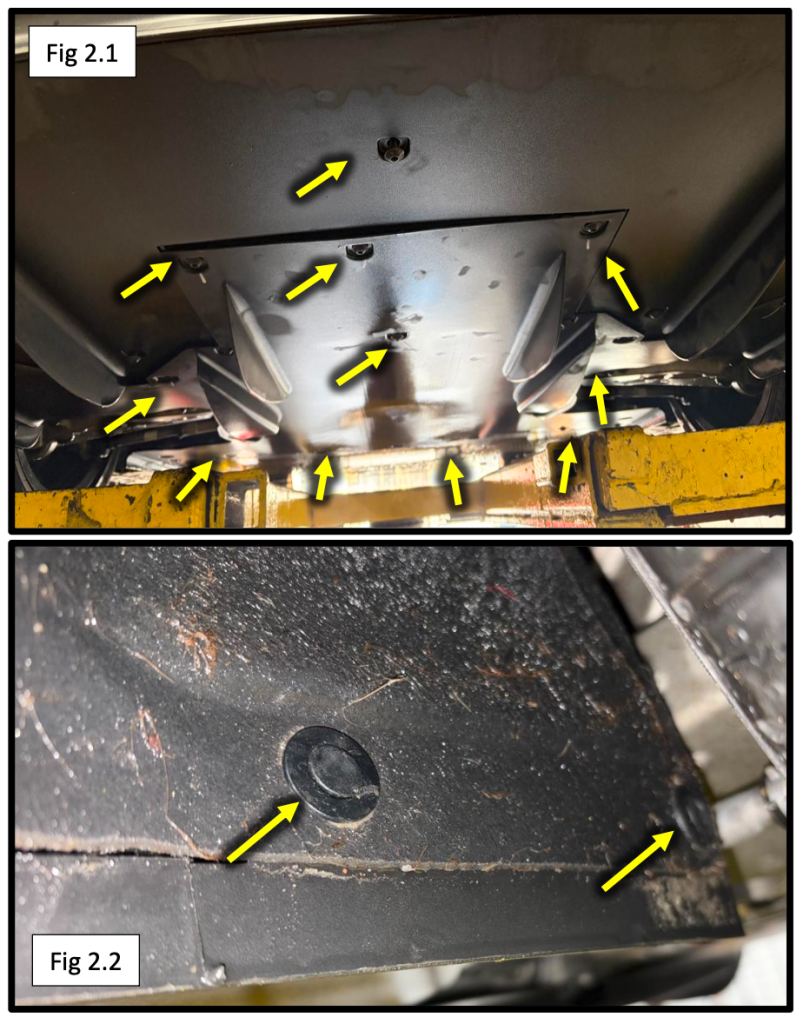
- Remove:
- Four plastic clips
- Eighteen Torx screws securing the lower bumper panels
- Starting at the wheel wells, gently unclip the bumper, working toward the center
- Disconnect the wiring harness on the driver side
- Carefully remove the bumper and set it aside in a safe place
Lay the bumper on a soft surface to prevent scratches.
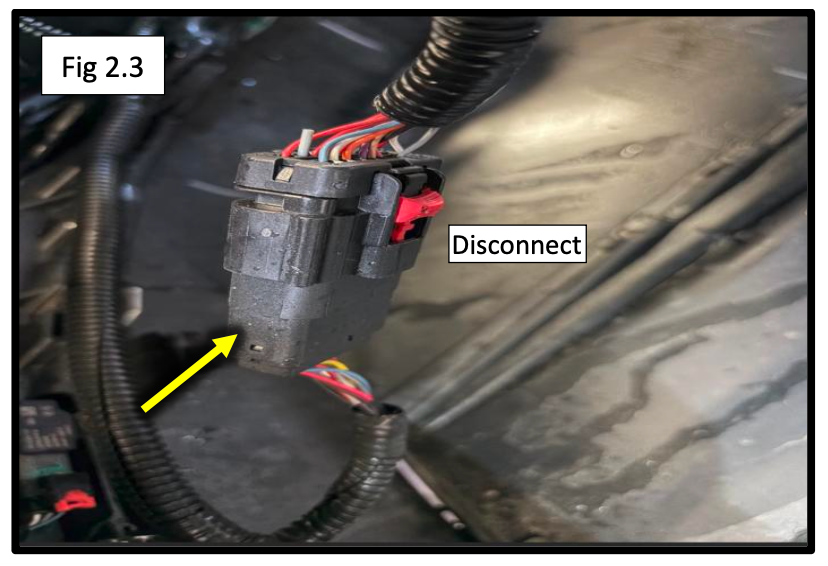
Step 3: Remove Factory Crossmember & Install Hitch
With the bumper off, you’ll have access to the factory crossmember.
- Remove:
- Eight Torx screws
- Four hex bolts per side
- Remove the crossmember (it will not be reused)
Install the EcoHitch:
- Position the hitch in place of the crossmember
- Install:
- Outer holes: M8 x 40mm bolts
- Inner holes: M8 x 50mm bolts
- Each bolt uses:
- Lock washer
- M8 flat washer
- 5/16” flat washer
- Center the hitch and torque all bolts to:
25 ft-lbs (33.9 Nm)
Make sure everything is aligned before final torque, this ensures a clean fit.
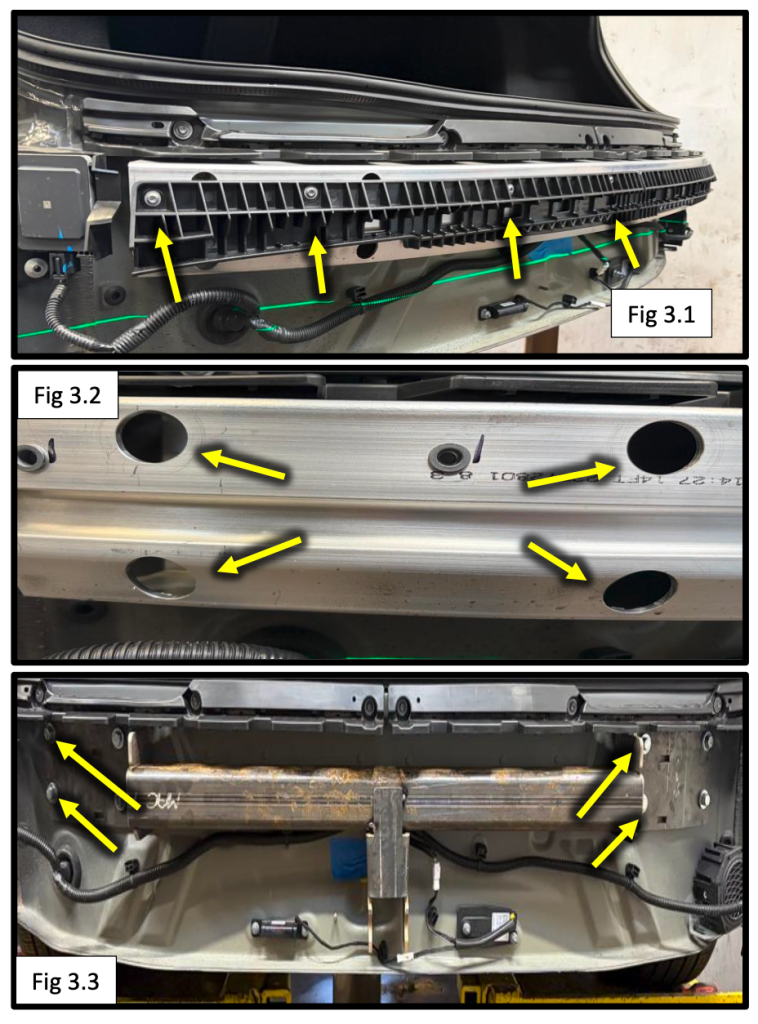
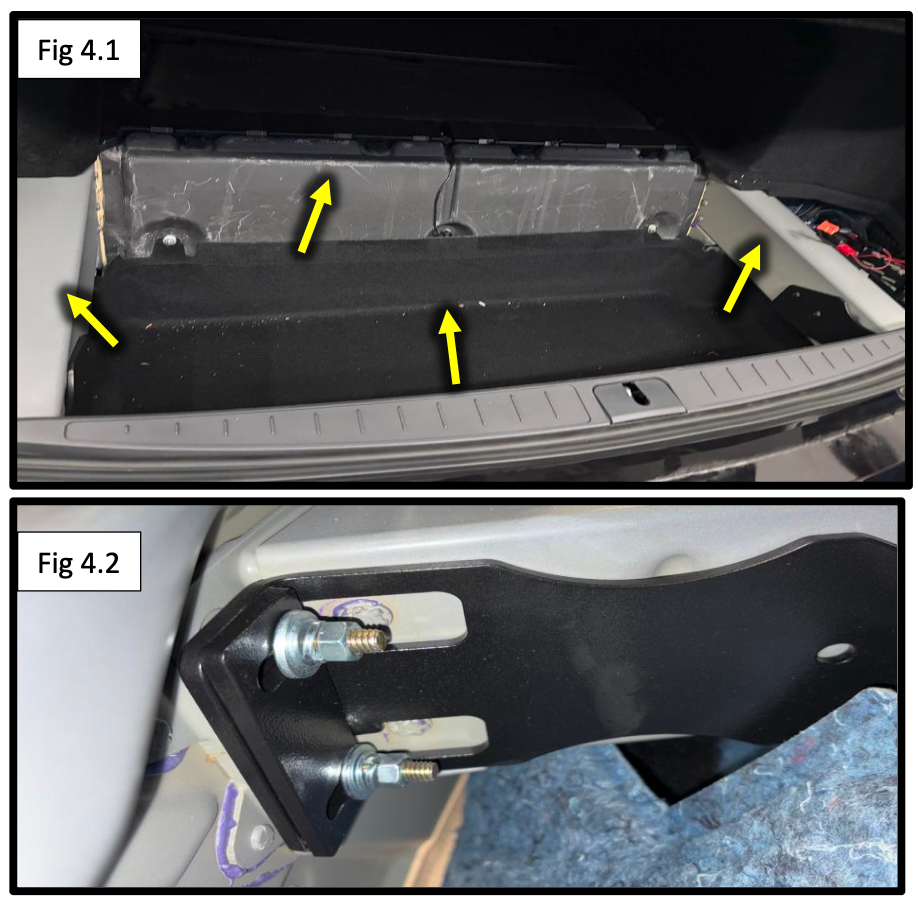
Step 4: Install Internal Support Straps
Now we reinforce the install from inside the trunk.
- Open the trunk and remove the carpet flooring covering the frame rails
- Slide the inner support straps and spacers over the inner bolts
- Secure each side using:
- Two 5/16” flat washers
- Lock washer
- Hex nut
- Torque to:
25 ft-lbs (33.9 Nm) - Reinstall the carpet
- Trim slightly if needed to clear the bolts
This step adds strength and stability, don’t skip it.
Step 5: Trim Bumper Opening for Receiver
This is what gives your install that clean, finished look.
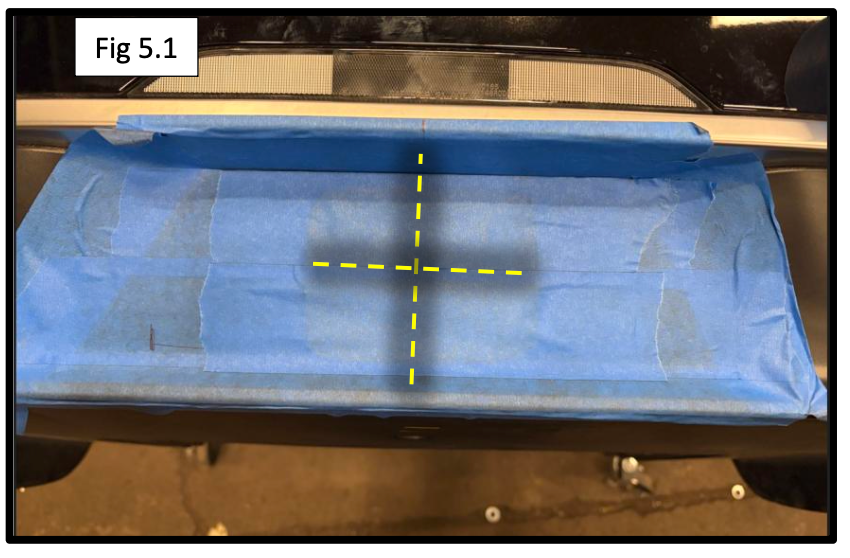
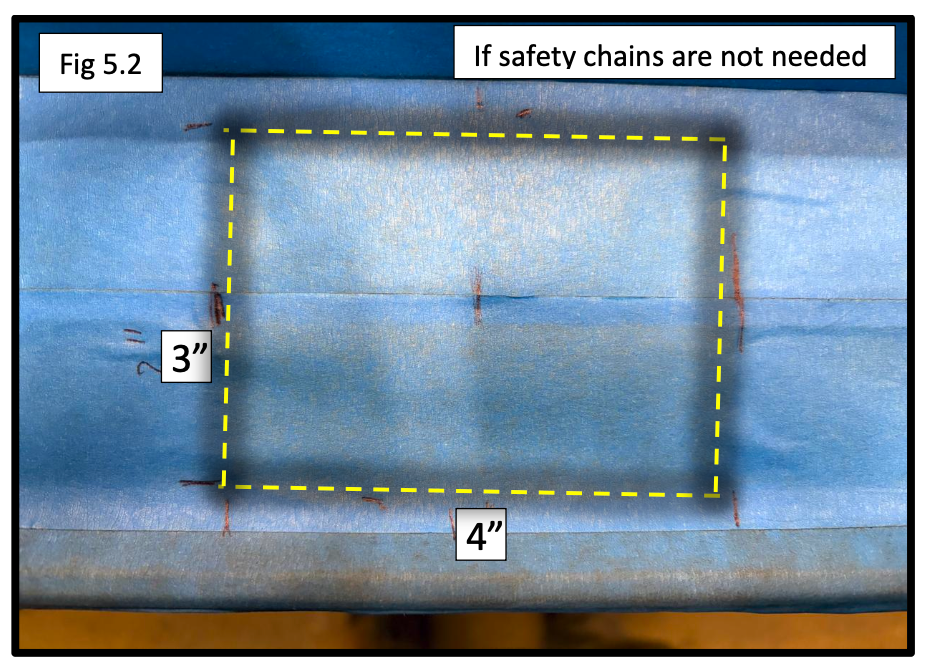
- Locate the center of the lower bumper fascia
- Mark a 3” x 4” rectangle
- Carefully trim using a reciprocating saw or similar tool
- Clean up the edges for a smooth finish
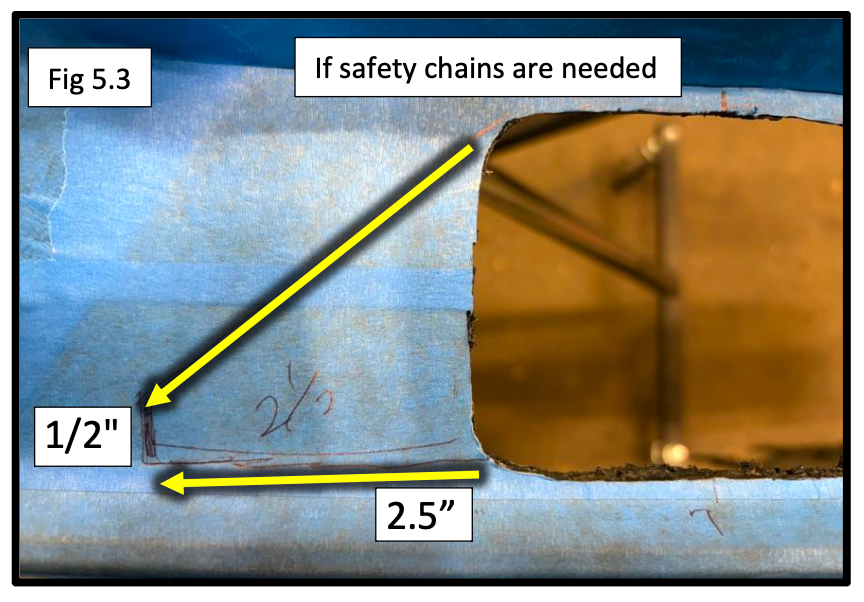
Optional: Safety Chain Access (For Towing)
If you plan to tow:
- Enlarge the opening slightly to allow access for safety chains
- Follow the additional clearance dimensions provided
Measure twice, trim once. Start small and test fit before enlarging.
Step 6: Reinstall the Bumper
- Reinstall the bumper in reverse order:
- Reconnect wiring harness
- Snap bumper back into clips
- Reinstall all screws and clips
- Reinstall trim and panels
- Test:
- Taillights
- Signals
- Backup lights
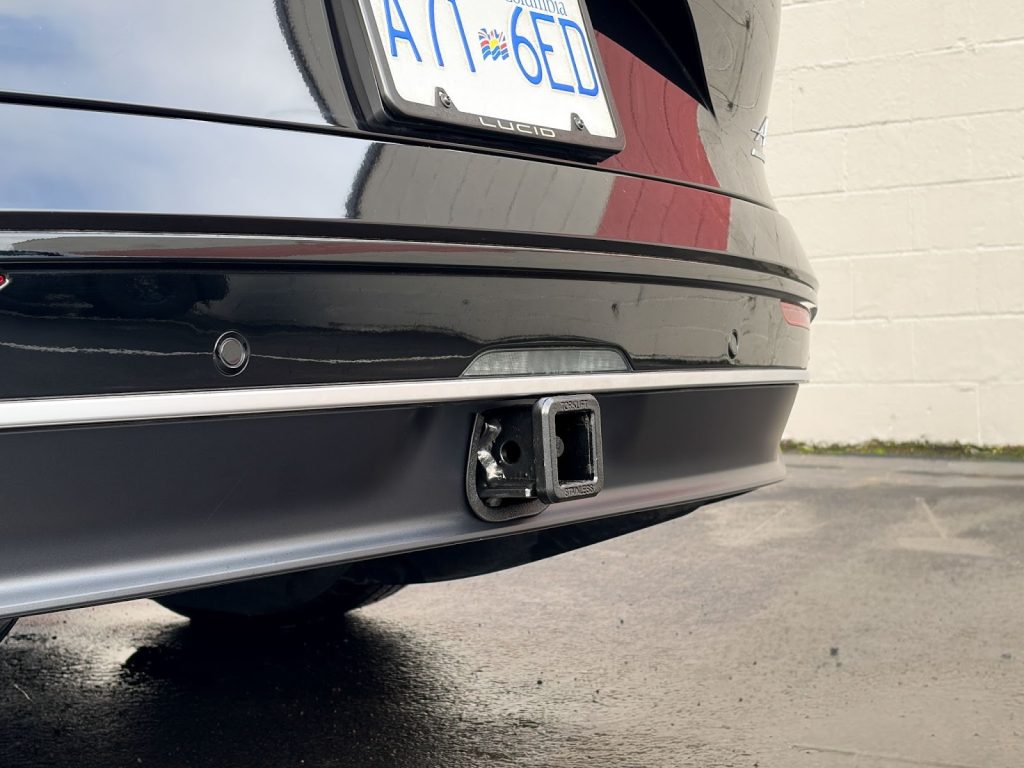
Installation Complete
That’s it, you’ve successfully installed the EcoHitch X5010S on your Lucid Air.
You now have a clean, concealed hitch solution that adds real-world utility without taking away from the vehicle’s design.
Perfect for:
- Bike racks
- Cargo carriers
- Adventure gear