

X7257/X7258: How to Install 2015 - 2021 EcoHitch® Trailer Hitch
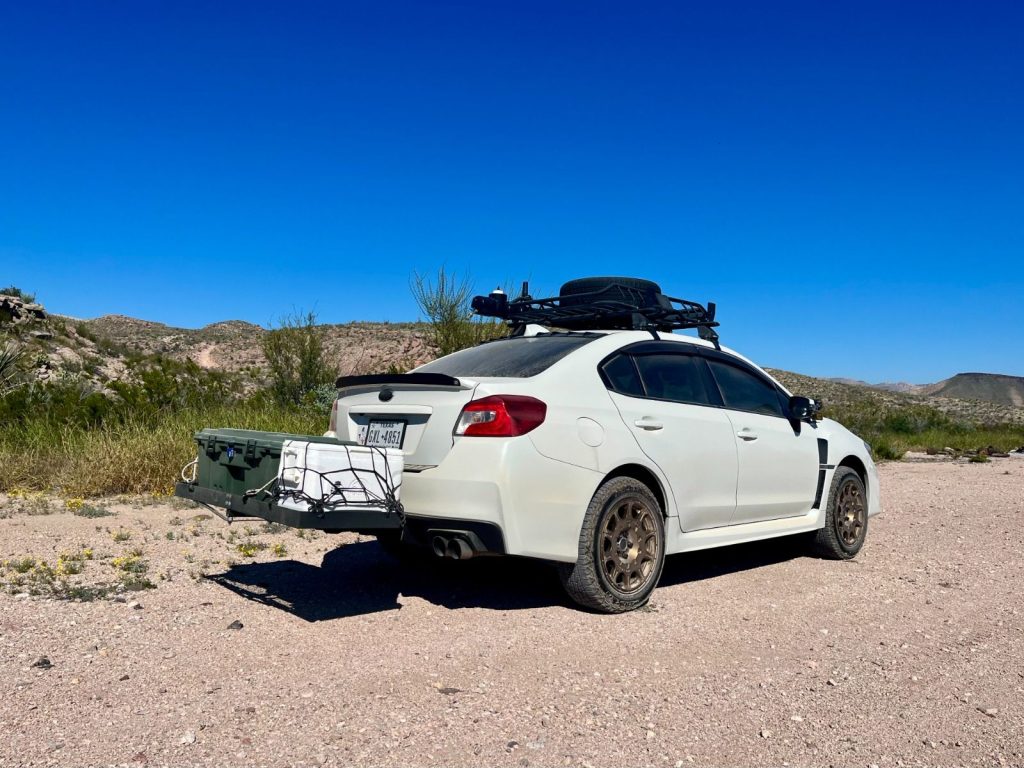
Your Subaru WRX is already a rally legend on the road, but what if it could tow like a pro, too? With the EcoHitch, you’ll turn your WRX into a versatile adventure vehicle that can haul bikes, cargo trailers, or anything your adventurous heart desires. The best part? You can install it yourself with this step-by-step guide (and a little bit of humor).
Step 1: Let’s Lift Things Up!
First things first—safety matters! Raise your WRX on suitable jack stands or a hoist. You want to make sure you have enough space to work underneath without any mishaps. Nobody wants an accidental “Subaru squat” on their hands.
Step 2 - 3: Pop the Trunk (and the Floor)
Open the trunk and remove the trunk floor mat. Easy, right? Now, remove the trunk lid trim panel by taking out the three clips on the lower portion of the trim panel. Lift up and release those claws like your WRX is ready to pounce.
Step 4 - 7: Uncover Those Taillights

Peel back the trunk side trim panels on both sides of the car to expose the taillight wiring. Unclip the wire harness clamps and taillight connectors, then remove the nuts holding the taillight in place. Slide that taillight rearward—gently, of course—and set it aside.
Step 8 - 11: Bumper Business


Time to tackle the bumper. Start at the passenger side wheel well and detach the clips and bolts as you work your way around. You’ll feel like a magician pulling off a disappearing act when you remove the entire bumper. Don’t forget to unplug any wiring harnesses connected to the bumper before setting it aside.
Step 12: Let’s Get Exhausted

Lower the exhaust by removing the rubber exhaust bungs. A little WD-40 will make this easier (because no one likes stubborn rubber). But hey, don’t let that exhaust hang freely—use a stand or prop it up to avoid damage.
Step 13: Heat Shield Removal
Remove the exhaust heat shields by taking out the bolts holding them to the frame and repeat on the opposite side of the vehicle.
Step 14 - 15: Bolt Fisher Magic
Locate and remove the two outer rubber plugs located on each side of the frame rail. Repeat on opposite side of vehicle.
It’s time to feel like a pro with the bolt fisher! Feed the coil end of the bolt fisher through the unplugged frame hole and out the other end. Attach a bolt, star lock washer, and plate washer, then pull the whole assembly into place. Repeat this process on the remaining frame rail openings.
Step 16: Heat Shield Trimming
Trim the heat shields following the highlighted portions as shown in the image below. Once the shield is trimmed, reinstall the heat shields but do not reinstall the bolts from the frame rail portion. The heat shield will be sandwiched between the hitch frame plate and vehicle frame rail.

Step 17 - 18: Lift and Align the Hitch
Raise the EcoHitch into position on the frame. Be careful not to push the bolt hardware back into the frame rails! Align the hitch with the frame bolts, then hand-tighten the nuts. You’re almost there—stay focused!
Step 19 - 20: Knockout Panel Trim

Grab the factory knockout panel you removed from the bumper earlier. Trim it along the highlighted section using a utility knife or air-saw to make room for the hitch receiver. Be careful not to cut off any important tabs, or you’ll be making another trip to the store!
Step 21: Reassemble and Torque It Up
Reinstall the bumper, lights, and trunk panels in reverse order from how you removed them. Once everything is back in place, torque the rear crossmember bolts to 50 ft-lbs and the frame nuts to 75 ft-lbs. Then, reinstall the exhaust (a little lube on the rubber bungs will help).
Ready to Hit the Road?
Congratulations! Your Subaru WRX is officially ready for some serious towing action. Whether you’re hauling bikes for a weekend trail ride or taking a lightweight trailer on a road trip, your WRX can do it all.
Need help or have questions? The Torklift Central team is here to support you every step of the way. Happy towing—and don’t forget to tag us in your #EcoHitch adventures!