

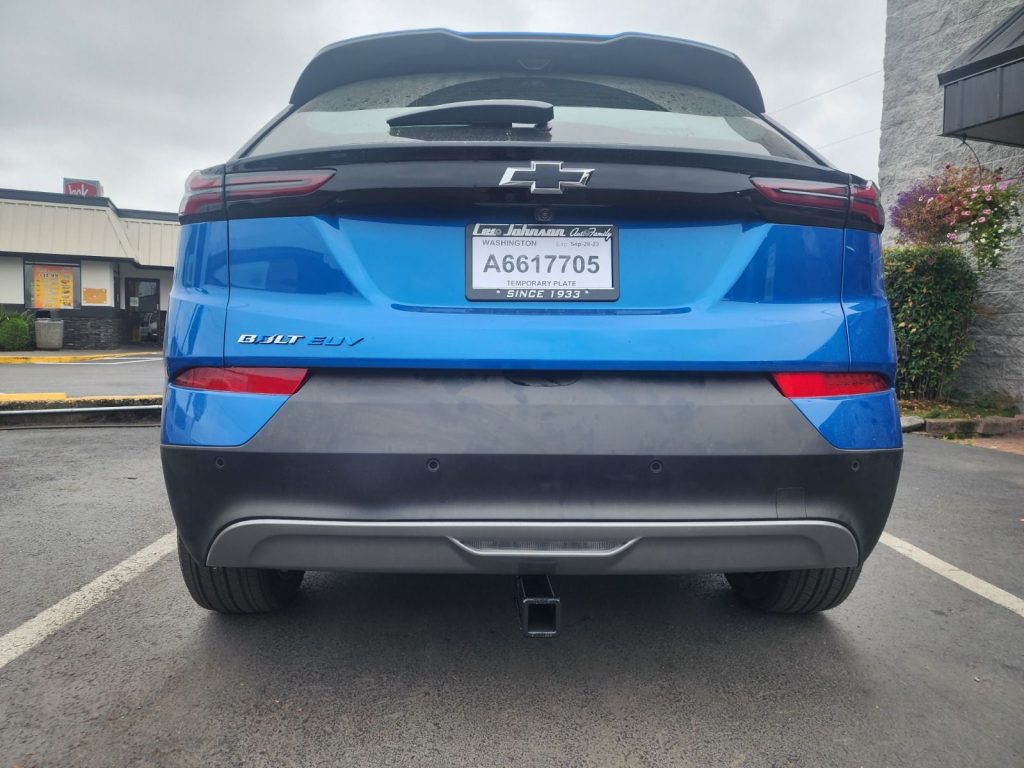
Your Chevy Bolt EUV isn’t just about efficiency—it’s also ready to haul gear for your next adventure. With the stainless steel EcoHitch, your Bolt EUV can tow bikes, cargo, or even that tiny camper you’ve been eyeing. Follow this step-by-step guide for a smooth installation, no electrical engineering degree required!
Step 1: Let’s Lift!
First things first, safety is key. Chock the front tires and raise the rear of your Bolt EUV. Place it on ramps or jack stands (or a hoist, if you’re fancy). Pro tip: Stick to Chevrolet-approved lifting points—you and your car will thank us later.
Step 2: Bumper Basics


Under the rear bumper, remove two clips and two bolts (one on each side). Think of it as giving your Bolt EUV a little nudge toward greatness.
Step 3: Fender Fun

Move to the rear fender liners and unscrew the two Torx screws on each side. Grab a Torx driver and channel your inner mechanic.
Step 4: Reflect on the Tailgate

Open the tailgate and remove two bolts just above the reflectors. These bolts are small but mighty—just like your Bolt EUV.
Step 5: Fender Arch Reveal


On each side of the car, gently unsnap the rear fender arch trim to expose a hidden screw. Remove the screw and peel back the fender liner to access one more fastener hiding behind the bumper cover. Yes, we see you, sneaky bolt!
Step 6: Bumper Removal Teamwork

This is where a helping hand will come in handy. Start at the bumper cover’s edges and gently unsnap it, working toward the middle. Don’t yank it off just yet—disconnect the wire harness first by lifting the gray latch bar. Then, store the bumper in a safe spot. Treat it like the treasure it is!
Step 7: Cross Member Cleanup

Remove the nuts holding the rear cross member, along with the black plastic harness bracket. Clean off any excess coating from the frame to ensure the hitch fits perfectly. Set the cross member aside—it won’t be joining the EcoHitch party.
Step 8: Hitch It Up!
Now, the moment we’ve all been waiting for: installing the EcoHitch. Lift the hitch into place and center it on the car. Place the rear cross member over the hitch and reinstall the black plastic harness bracket. Secure everything loosely with the factory nuts. Once aligned, torque the nuts to 50 ft-lbs. Reinstall the harness plug on the rear cross member by pressing it into place. Your EcoHitch is now snug and secure!
Step 9: Reconnect and Reassemble
Reconnect the wire harness between the bumper cover and the car. Snap the bumper cover back into place, starting at the edges and working inward. Then, reinstall all the screws, clips, and bolts you removed earlier. You’re almost there!
Step 10: The Final Touch
Slide the stainless steel insert adapter into the EcoHitch receiver. Secure it with the provided hex bolt, lock washer, and flat washer. Torque the bolt to 112 ft-lbs—your hitch is officially ready for action! Don’t forget to re-torque the bolt before each use.
Ready to Hit the Road?
Congratulations! Your Chevy Bolt EUV is now more than just an electric marvel—it’s a towing superstar. Whether you’re hauling bikes for a weekend getaway or packing for a cross-country adventure, your EcoHitch has your back.
If you have questions or need assistance, the Torklift Central team is always here to help. Share your EcoHitch moments with us using #EcoHitch—we’d love to see your Bolt EUV in action!