

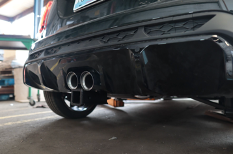
So, you’ve got yourself a 2022 Mini Cooper John Cooper Works, and now you want to make it even more versatile with an Ecohitch. Smart move. Whether you’re towing a small trailer or adding a bike rack, this upgrade is going to take your Mini’s practicality up a notch—without sacrificing its go-kart-like handling.
The good news? You don’t need to be a professional mechanic to get this installed. The bad news? You will need a little patience, some tools, and a willingness to get your hands dirty. Let’s dive in.
Tools You’ll Need
- A good set of jack stands or ramps (safety first!)
- Socket wrench set
- Torx crewdriver set
- Pry tool (for those stubborn clips)
- Reciprocating saw
- A torque wrench (to make sure things don’t fall off later)
- About 60-90 minutes of your life (but trust us, it’s worth it)
Step-by-Step Installation
Step 1: Get Your Mini Off the Ground
Raise the rear of the vehicle using ramps or jack stands. Chock the front wheels so your Mini doesn’t take off without you. If you’re fancy and have a lift, now’s the time to use it.
Step 2: Remove the Rear Bumper Bolts
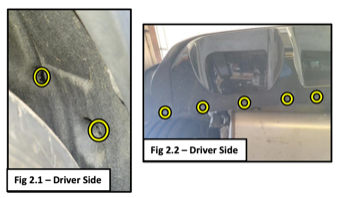
- Find the 8mm and 6mm bolts hiding under the fender well.
- Remove all 8mm bolts underneath the rear bumper.
- Repeat this process on both sides of the vehicle.
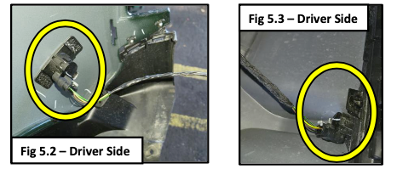
Step 3: Fender & Harness Shenanigans
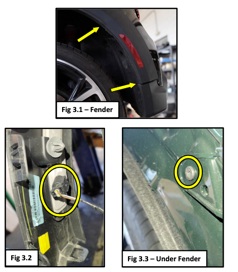
- Unclip the first section of the fender and unplug the harness.
- Remove the T15 screw securing the bumper. (Yes, Mini loves their specialty screws.)
Step 4: Taillight Removal
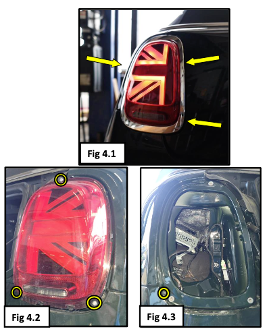
- Use a soft pry tool to pop off the headlight frame (gently, we don’t need any cracked plastic disasters).
- Remove the three screws holding the taillight in place.
- Disconnect the taillight harness and remove the lower Torx screw.
Step 5: Remove the Rear Bumper
- Carefully detach the bumper and disconnect four wiring harnesses.
- Set the bumper aside in a safe place. Maybe wrap it in a soft blanket—Mini bumpers deserve love too.
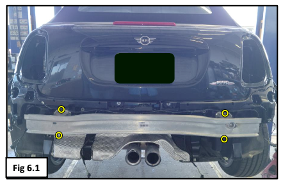
Step 6: Say Goodbye to the Rear Crossmember
- Remove the M10 hex nuts holding the crossmember in place.
- Gently pull it off. Note: It won’t be going back on, so say your goodbyes.
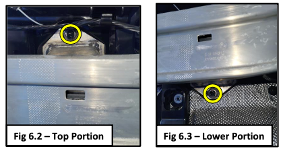
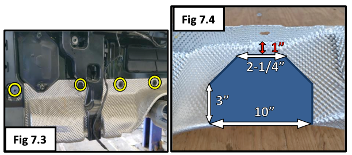
Step 7: Heat Shield Modifications
- Remove the outer ventilation panel (also not coming back).
- Take off all factory flange nuts securing the heat shield.
- Grab your reciprocating saw and complete the necessary trimming on the heat shield.
- Reinstall the heat shield with its factory hardware.
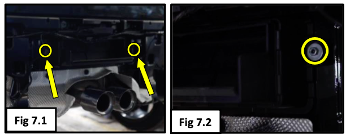
Step 8: Install the EcoHitch
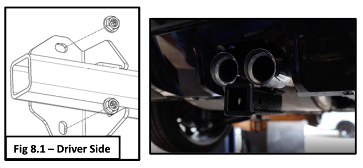
- Align the side plates to the factory studs where the rear crossmember used to live.
- Secure the hitch using the factory nuts.
- Reinstall all factory components in reverse order, minus the ventilation panel.
- Torque all 1/2" bolts to 85 ft-lbs and 5/8" bolts to 115ft-lbs.
Congratulations, You’re Done!
At this point, your Mini is officially hitch-equipped. Whether you’re hauling bikes, towing a lightweight trailer, or just feeling extra capable, your car just got a serious upgrade.
Now, step back, admire your handiwork, and maybe take a victory lap. Questions about our products? Check out our website or reach out at [email protected]. Happy towing