

X5006S: How To Install 2026 Tesla Model Y Juniper EcoHitch® Trailer Hitch
Installing your new EcoHitch on the 2026 Tesla Model Y Juniper is easier than you might think - especially with the right tools, a bit of patience, and this step-by-step guide.
Whether you're doing it yourself or working with a local installer, here's how to get the job done.
Tools You'll Need
Before you get started, make sure you have:
- A socket wrench set
- Torque wrench
- Trim panel tools
- Flathead screwdriver
Step-by-Step Installation Instructions
Step 1: Prep the Vehicle
- Raise the vehicle using Tesla-approved lifting points.
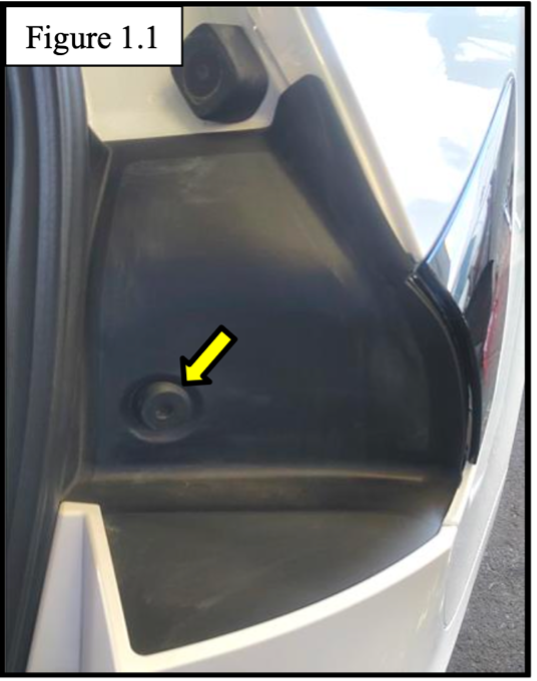
- Open the tailgate and remove the upper plastic trim panels by:
- Popping out round plugs (see Figure 1.1)
- Unclipping and removing the panels on both sides
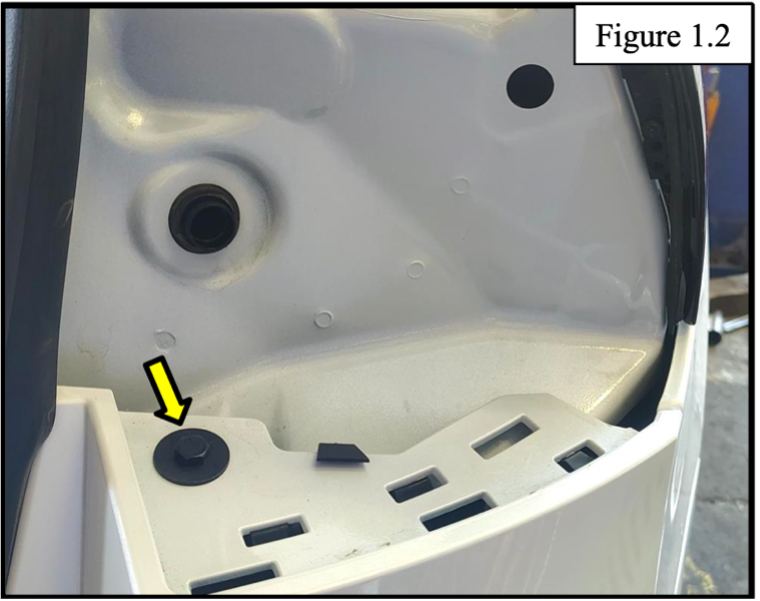
- Removing the screws beneath these panels (Figure 1.2)
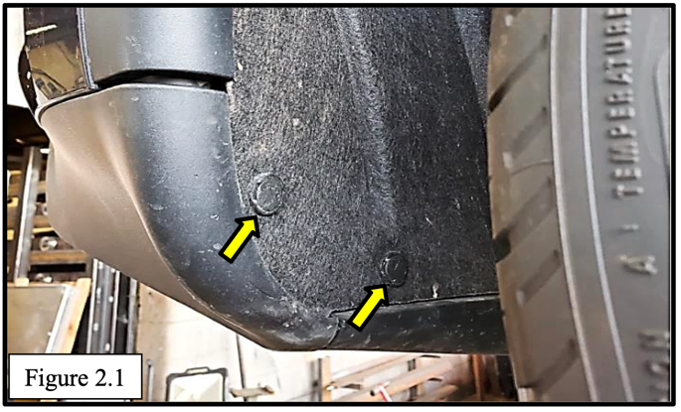
Step 2: Remove Bumper Hardware
- In the wheel wells, remove two plastic pop pins on each side (Figure 2.1).
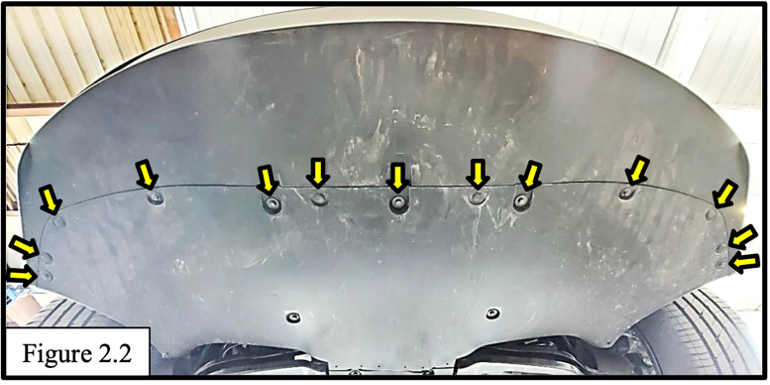
- Under the bumper fascia, remove additional pop pins and bolts (Figure 2.2).
Step 3: Unclip Fenders
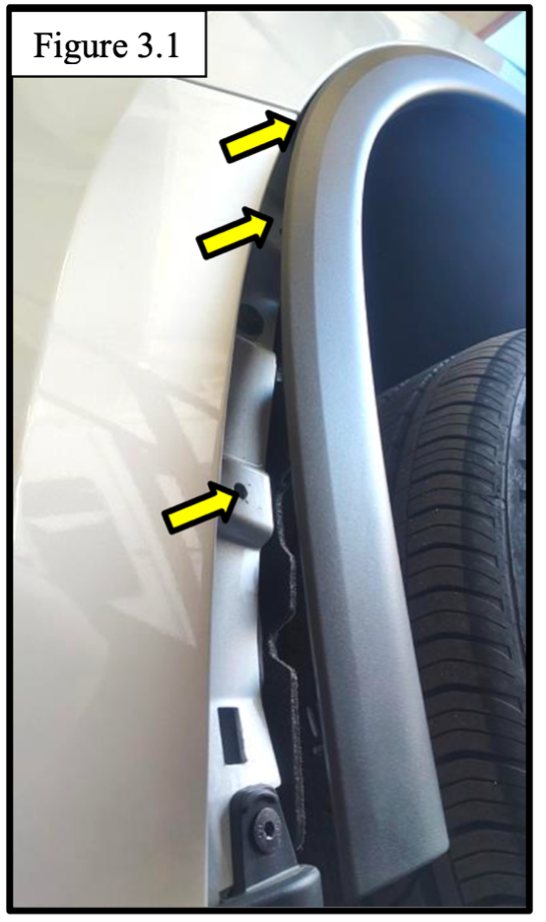
- Unsnap each fender in the wheel well up to the third clip (Figure 3.1).
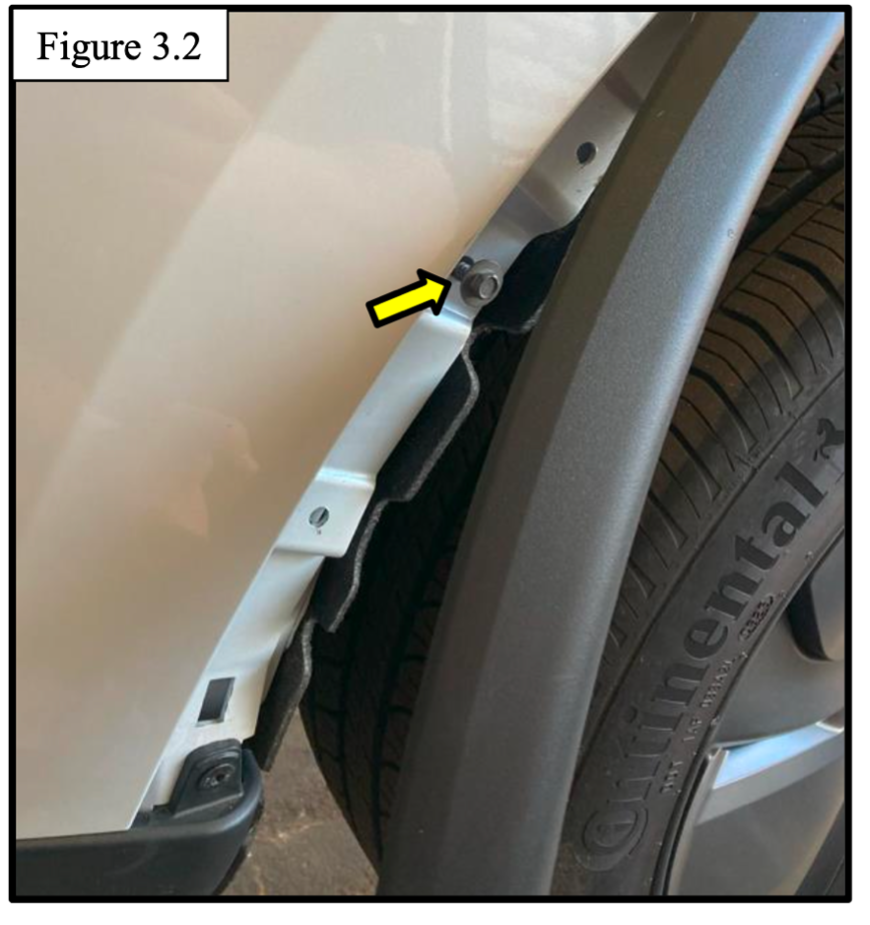
- Behind the loosened fender, remove a bolt on both sides (Figure 3.2).
Step 4: Remove the Bumper
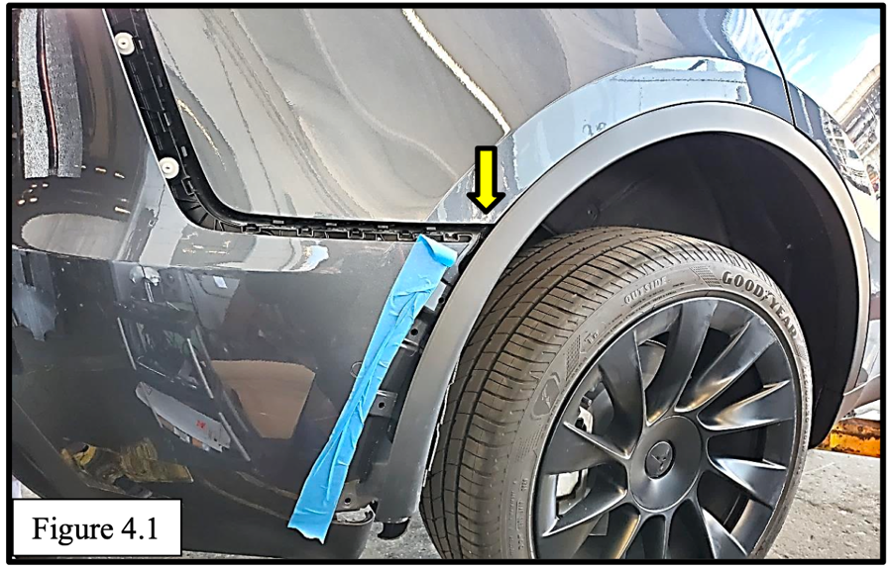
- Start unclipping the bumper fascia from the top corner on each side (Figure 4.1).
- Unclip the bottom of the bumper from the forward underbody panel.
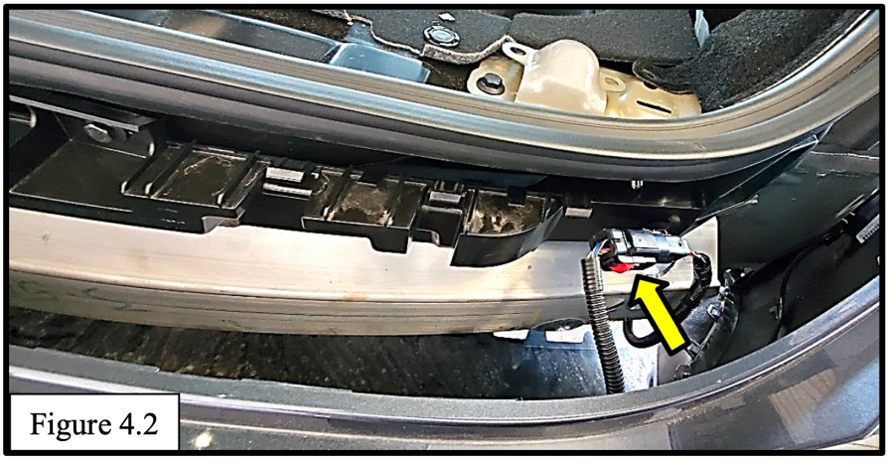
- Disconnect the wiring harness on the passenger side (Figure 4.2).
- Carefully remove and set the bumper aside.
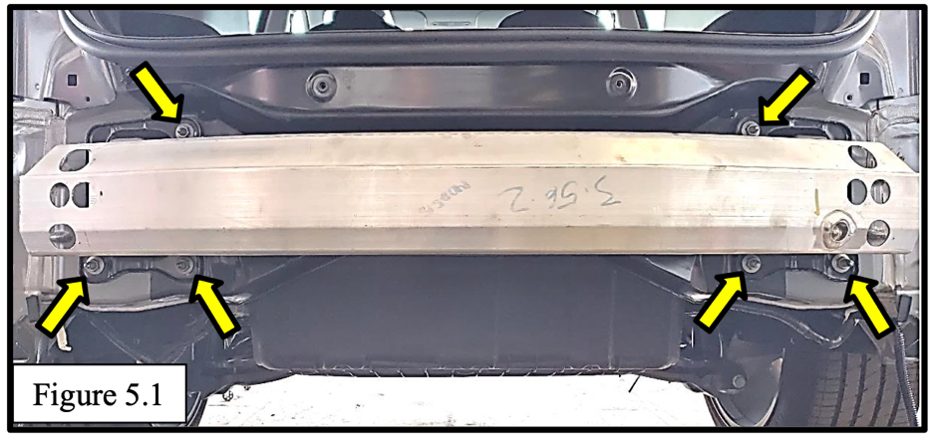
Step 5: Remove the Crossmember
- Remove the nuts that secure the crossmember mounting brackets (Figure 5.1).
- Take out the entire crossmember assembly.
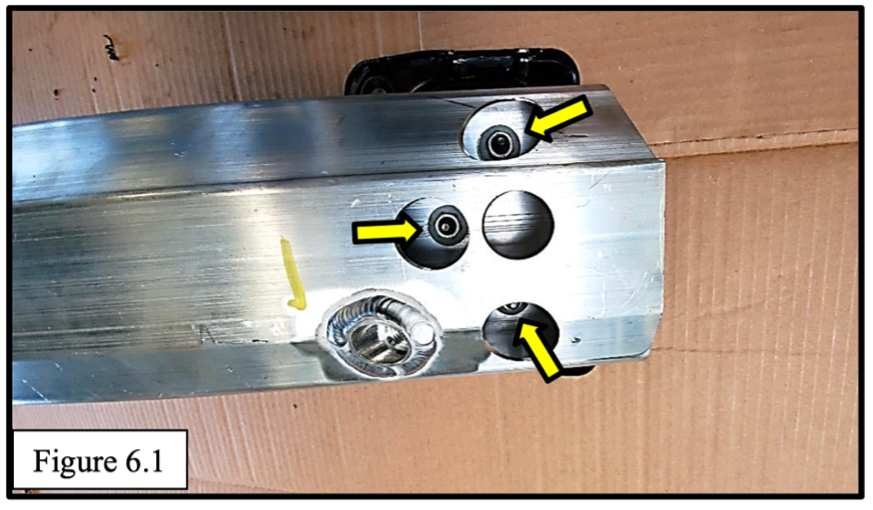
Step 6: Prep the Crossmember for Hitch Mounting
- Remove the nuts connecting the crossmember to its brackets (Figure 6.1).
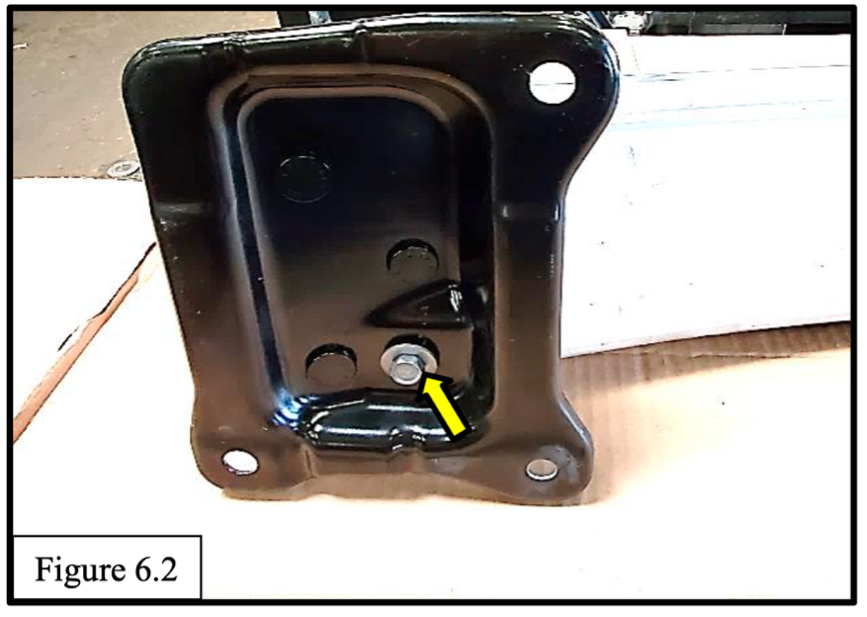
- Remove the bolt from the back of the passenger-side bracket (Figure 6.2) - this will not be reused.
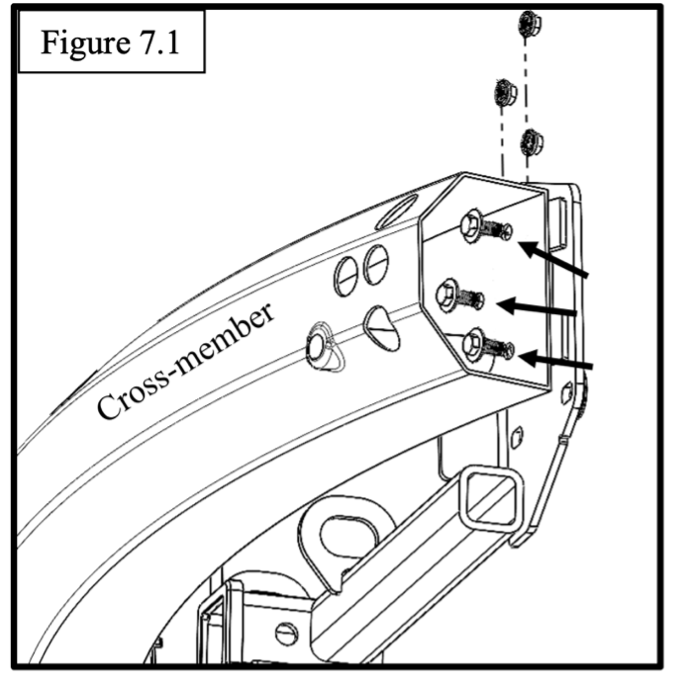
Step 7: Attach the Crossmember to the EcoHitch
- Align the crossmember with the hitch plate.
- Attach using 3/8" x 1" bolts, flat washers, and serrated flange nuts.
- Torque the bolts to 26 ft-lbs (35 Nm) (Figure 7.1).
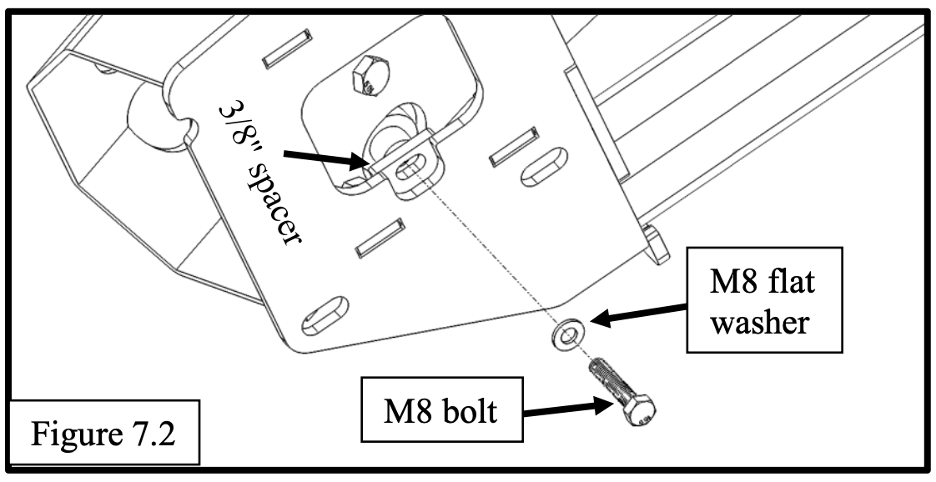
- Install the M8-1.25 x 40mm bolt with flat washer and aluminum spacer on the passenger side (Figure 7.2).
- Torque the M8 bolts to 25 ft-lbs (34 Nm).
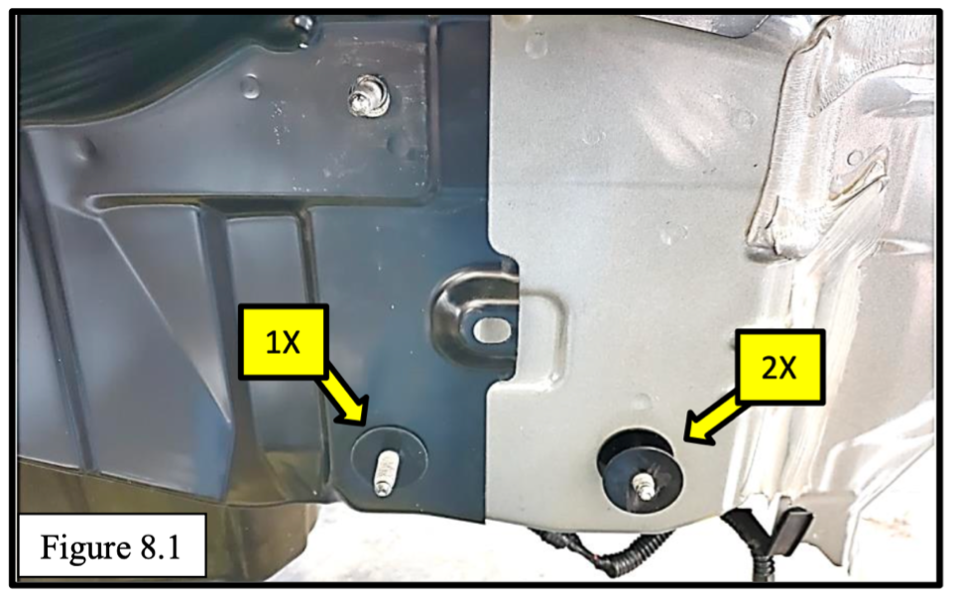
Step 8: Install the Hitch to the Vehicle
- Place 3/8" nylon fender washers on the lower studs of the frame (Figure 8.1).
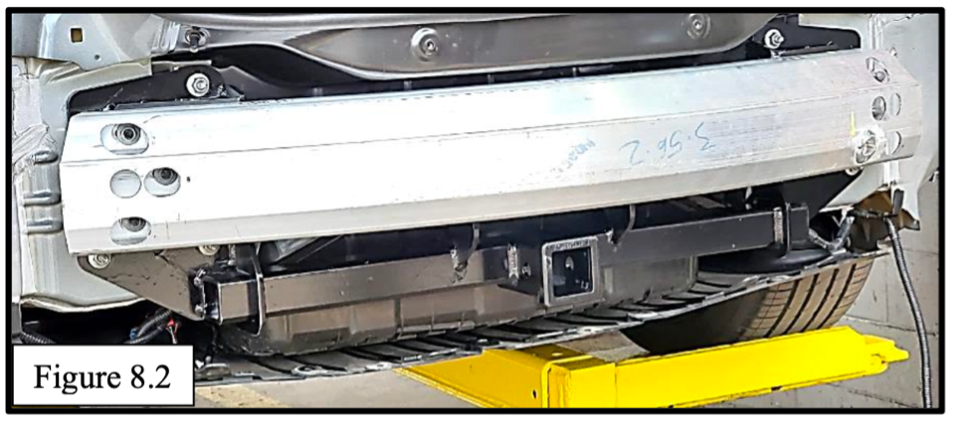
- Lift the assembled hitch + crossmember into place.
- Reinstall the factory nuts and torque them to 38 ft-lbs (51 Nm) (Figure 8.2).
Step 9: Reinstall the Bumper
- Reattach the bumper using the original hardware.
- Plug in the wiring harness.
- Test your taillights to make sure everything is functioning.
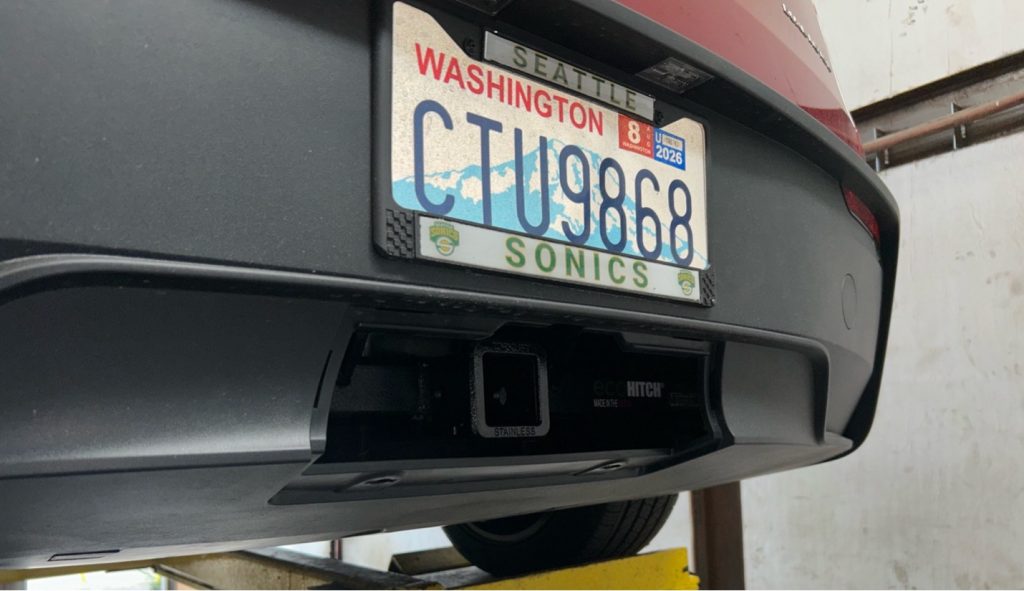
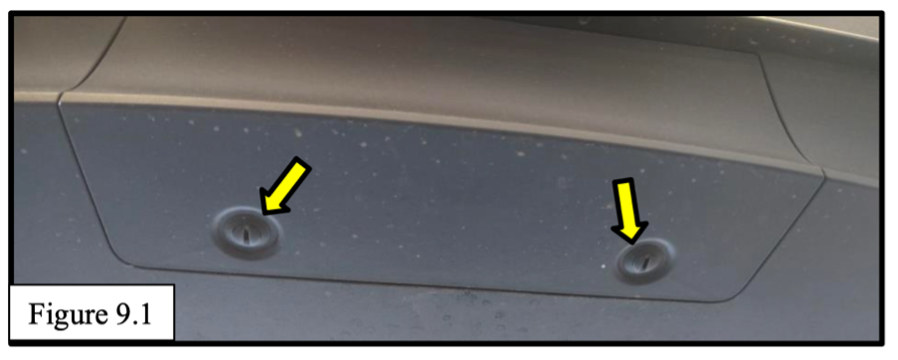
- Remove the small plastic panel from the bumper fascia to access the EcoHitch receiver (Figure 9.1).
Installation Complete!
Your 2026 Tesla Model Y Juniper is now equipped with a fully functional, hidden EcoHitch - ready for bike racks, cargo trays, and more, without compromising style or aerodynamics.
And remember, never exceed your vehicle's towing capacity. The hitch may handle 3,500 lbs of trailer weight and 425 lbs. of tongue weight, but your car's manual holds the real towing truth.
Questions? Head to torkliftcentral.com or email us at Contact Us. We're happy to talk torque, towing, or trim clips.