

DIY: How to Install EcoHitch at Home
Your Step-by-Step Guide to a Clean, Confident Install
Whether you’re gearing up for your next road trip or just added a cargo carrier to your setup, installing an EcoHitch at home is a smart and doable weekend project—no professional lift or shop needed.
At Torklift, our hitches are designed to be vehicle-specific, hidden, and strong, and with the right tools and a little patience, you can install one in your own garage or driveway. Let’s walk through what it takes to get the job done safely and correctly.
Tools You’ll Need
Before you get started, gather these basic tools:
- Torque wrench (a must for proper bolt tightening)
- Socket set (usually metric sizes, depending on your vehicle)
- Ratchet or breaker bar
- Flathead screwdriver or trim panel tool (for removing clips)
- Utility knife or Dremel tool (if trimming the bumper is required)
- Jack and jack stands or vehicle ramps (to raise the rear)
- Safety glasses and gloves
- Penetrating oil (for older vehicles with rusted bolts)
- Plastic bag or tray (for organizing removed clips and fasteners)
Pro Tip: Most installs take about 1–2 hours depending on experience and vehicle design. Set aside a good block of time, and don’t rush.
Step-by-Step: How to Install EcoHitch
While each EcoHitch is engineered specifically for your vehicle, the general process follows a similar structure. Here’s a simplified version of what to expect:
1. Raise and Secure Your Vehicle
Use ramps or jack stands to safely lift the rear of your vehicle. Always chock the front wheels and follow the safety guidelines from your vehicle’s manufacturer.
2. Remove Panels and Hardware
Remove any underbody panels, skid plates, or bumper trim that may be in the way. This usually involves plastic clips and bolts. Keep track of all hardware for reinstallation.
Tip: Use a trim panel tool to avoid breaking plastic clips.
3. Unbolt the Tow Hook (If Equipped)
Many vehicles have a factory tow hook on one side of the frame. You’ll remove this using your socket set. Keep the bolts—you’ll likely reuse them with your EcoHitch.
4. Install Frame Plates or Side Brackets
Line up the EcoHitch side plates to the factory mounting points. Start bolts by hand first before tightening. For some vehicles, bolt fishing may be required (where you use a special wire to pull bolts through enclosed frame rails).
Tip: All EcoHitches come with bolt fishers in the hardware kit if needed. Use these carefully to avoid frustration.
5. Mount the Cross Tube
With the side plates in place, lift the EcoHitch cross tube and align it with the brackets. It helps to have a second person for this step, especially to avoid scratching your bumper or underbody.
DIY Tip: If you're flying solo, use a floor jack to help hold the hitch in place while you bolt it in.
6. Torque Everything to Spec
Use your torque wrench to tighten all hardware to the specifications listed in the instructions. This is critical for safety.
7. Trim Out the Panel (If Needed)
Some installs require trimming the underbody panel or bumper fascia to allow the hitch receiver to fit properly. Follow the provided trim template and take your time. A Dremel tool or fine-tooth hand saw works well here.
8. Reinstall Trim, Panels, and Clips
Put everything back together, double-check your wiring or sensors, and make sure no cables or lines are pinched.
Tips from the Pros
- Watch our install videos: Many vehicle-specific installs are covered on the Torklift Central YouTube Channel.
- Review the instructions first: Each EcoHitch comes with detailed, illustrated instructions. Read through them before you begin.
- Test fit before trim: If your install requires trimming, do a dry fit first. Measure twice, trim once.
- Use our Fit Guide: Not sure what EcoHitch fits your car? Try our Fit Guide.
Don’t Forget the Weight Estimator Tool
Before towing, make sure your load is safe. Try our Maximum Tongue Weight Estimator Tool to check if you’re within the correct limits based on your gear, vehicle, and hitch specs.
Prefer a Pro? We’ve Got You
If DIY isn't your style or your install feels more complex, visit your local Torklift Certified Dealer or stop by Torklift Central for expert service.
Final Thoughts
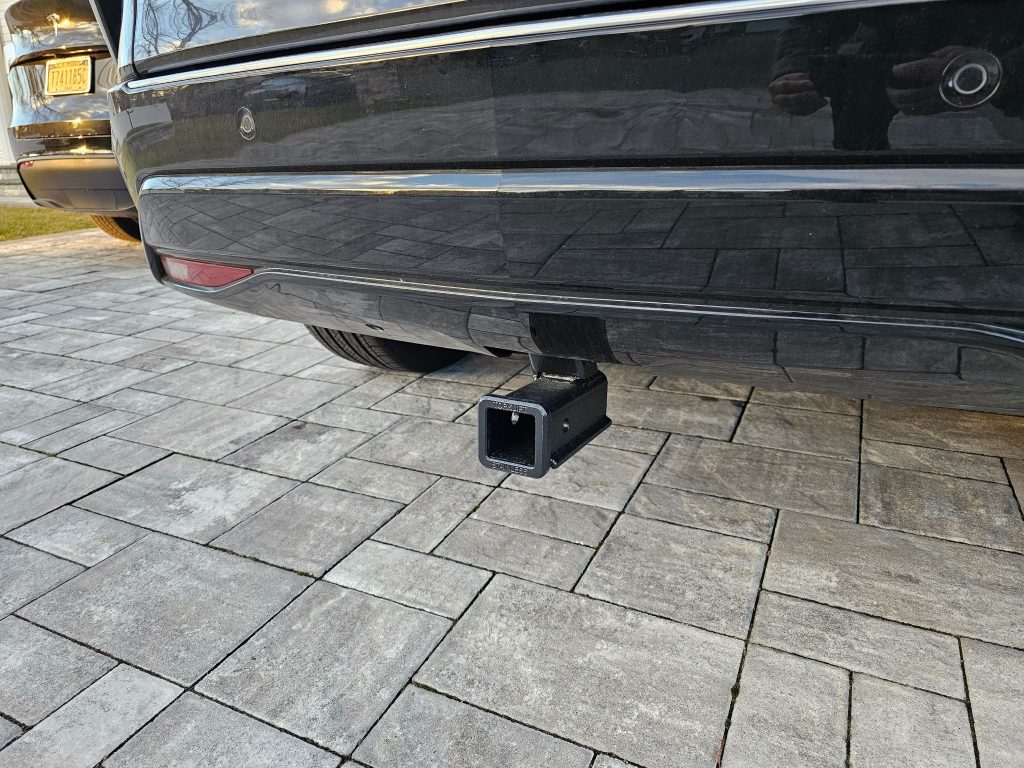
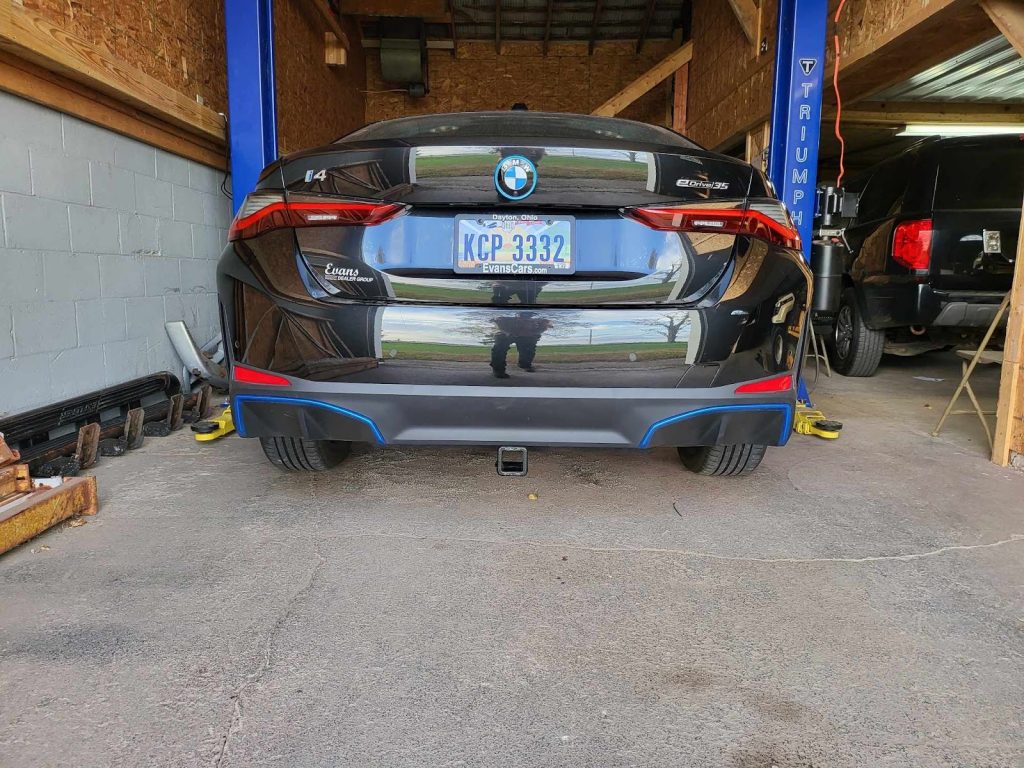
Installing an EcoHitch at home is a rewarding upgrade that adds real utility and style to your vehicle. With its stainless steel receiver*, hands-free liftgate (kick sensor) compatibility, and hidden design, you’re investing in performance and peace of mind.
Whether you're mounting a bike rack, a cargo tray, or getting ready for a trailer trip—EcoHitch is the strongest way to start.
*Stainless steel receiver is applicable on EcoHitch part numbers ending in “S”