

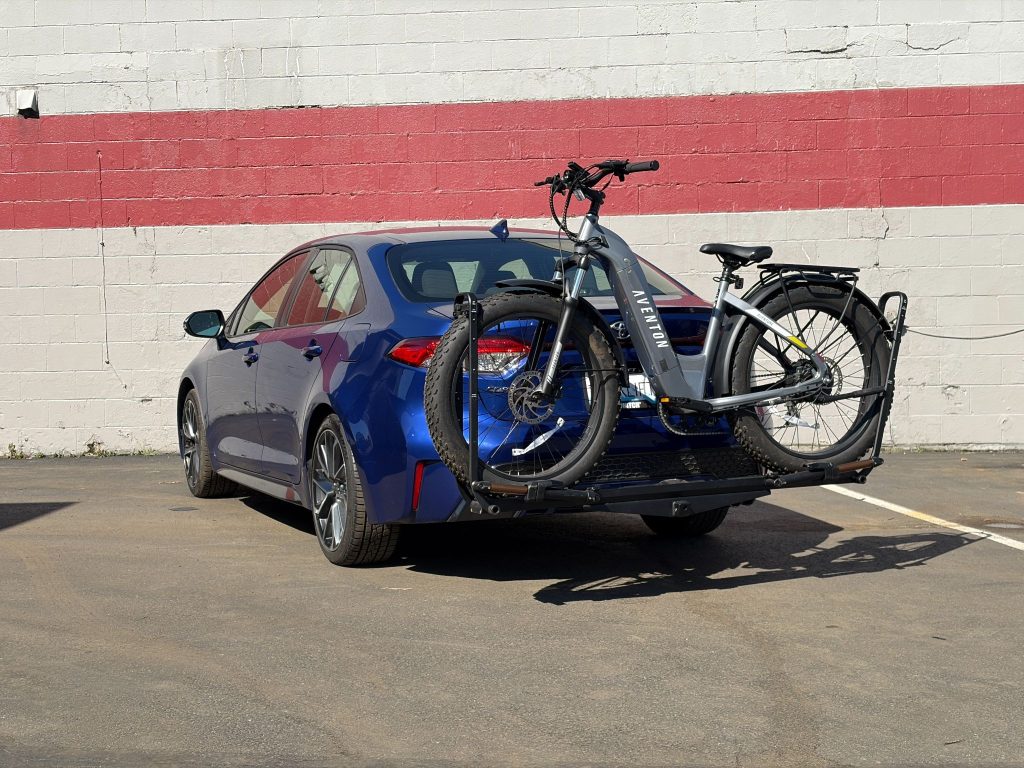
Adding an EcoHitch to your Toyota Corolla is a great way to expand what your vehicle can do, whether that’s carrying bikes, adding a cargo rack, or getting ready for light towing.
This install does involve removing the rear bumper, but don’t let that intimidate you. With a little patience and the right approach, this is a very doable project. I’ll walk you through it step-by-step just like we would in the shop.
Before You Start
Recommended Tools:
- Socket set (10mm and metric)
- Trim removal tools
- Torque wrench
- Reciprocating saw or trimming tool
- Bolt fisher (included)
- Marker and masking tape
Pro Tip: Having a second person for bumper removal will make things much easier and help prevent scratches.
Step 1: Remove Trim, Hardware, and Access Panels
We’ll start by opening up access to the rear bumper.
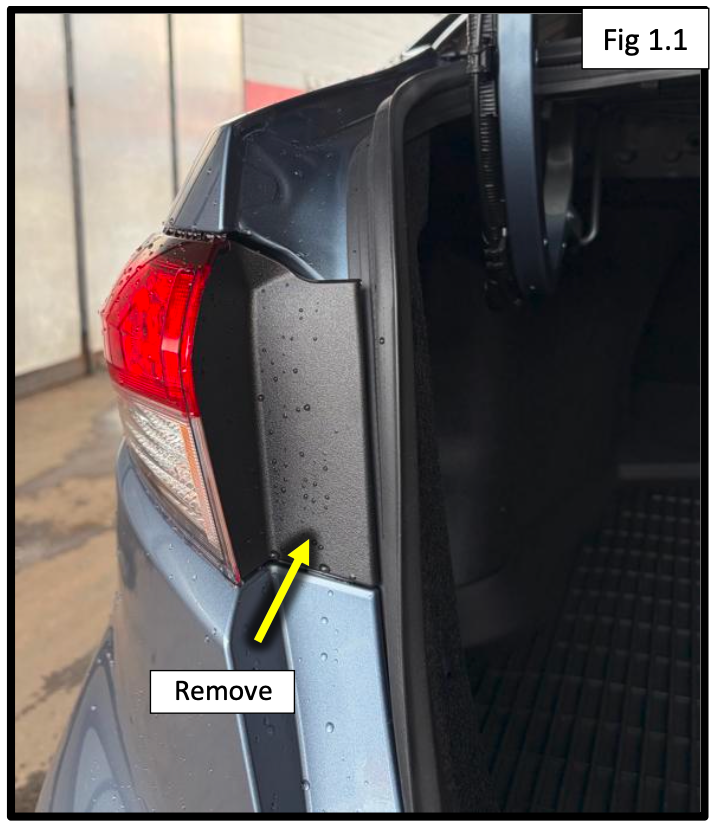
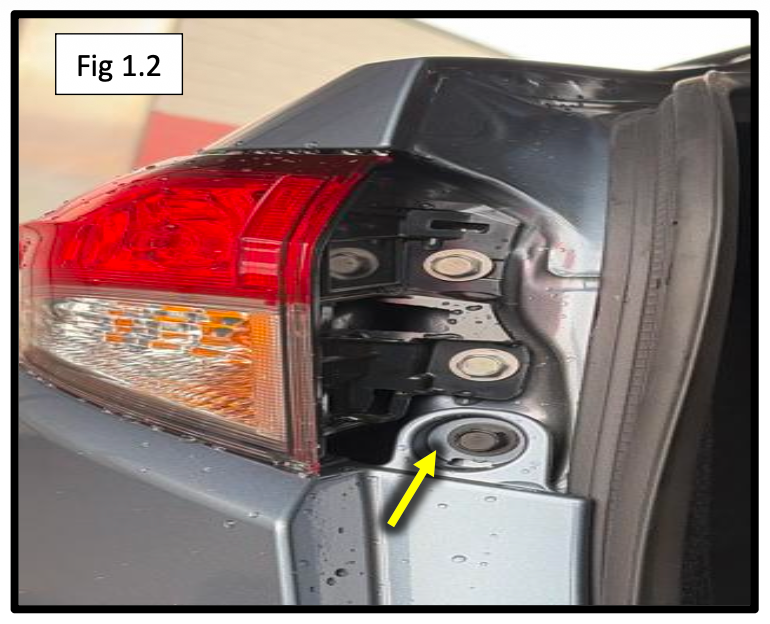
- Open the rear hatch and remove the taillight cover panels
- Remove the 10mm screw under each cover
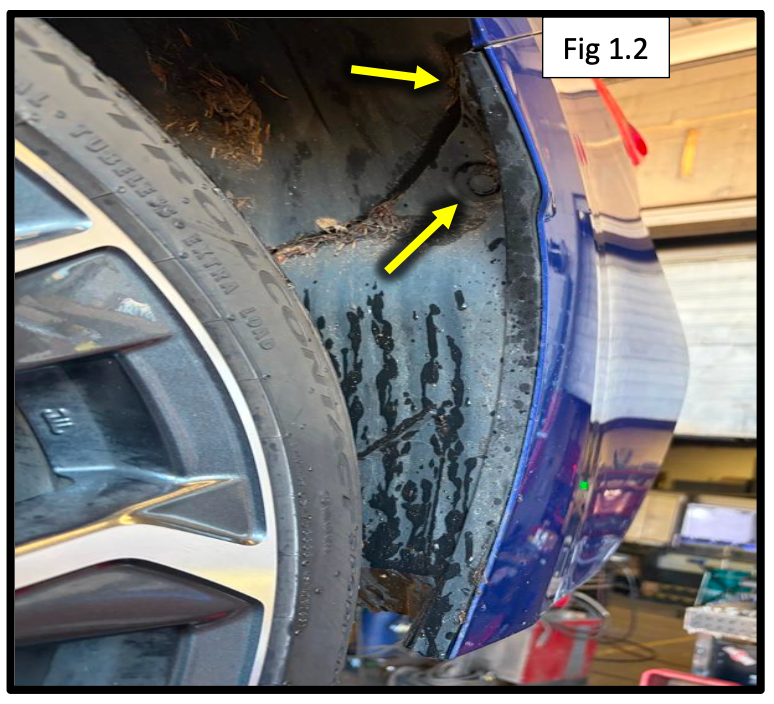
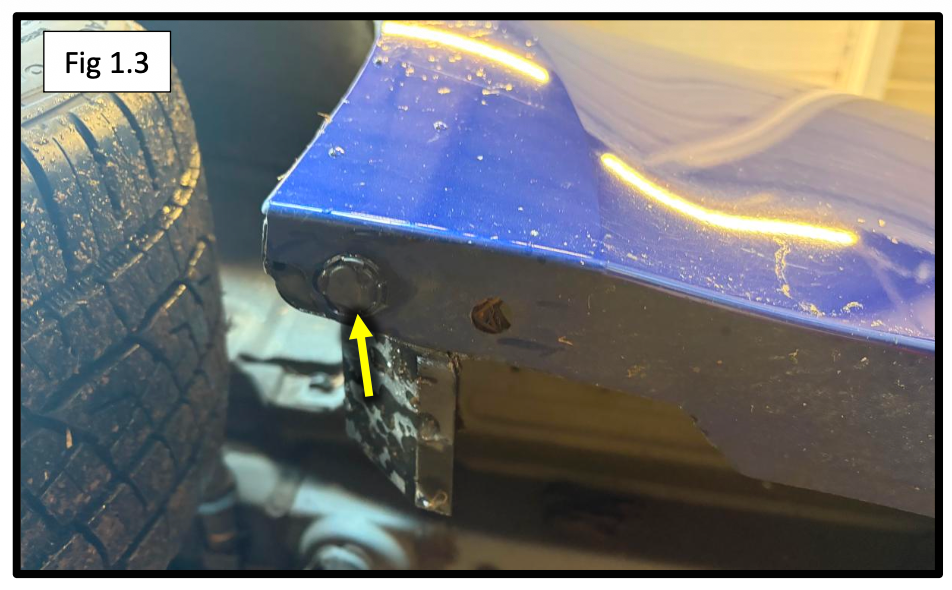
- Remove the mudflaps and screws underneath
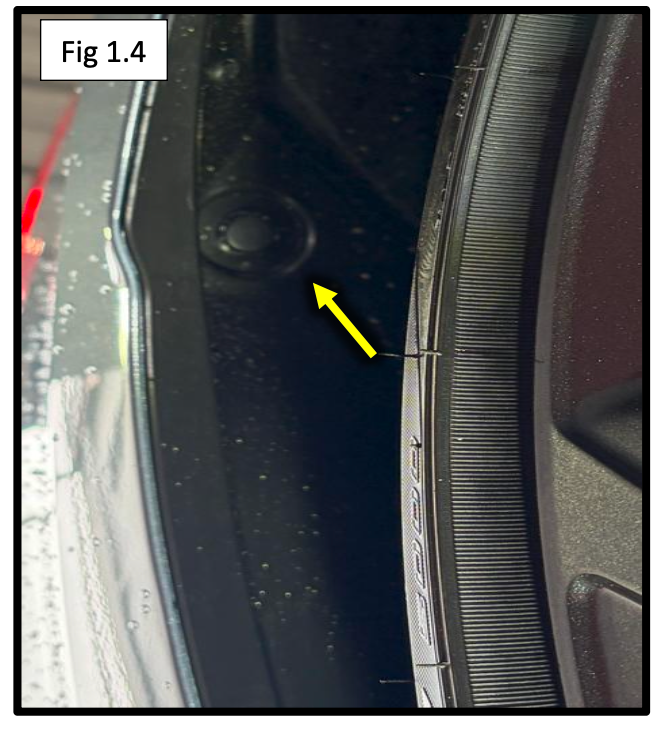
- Pop out the wheel well inner trim
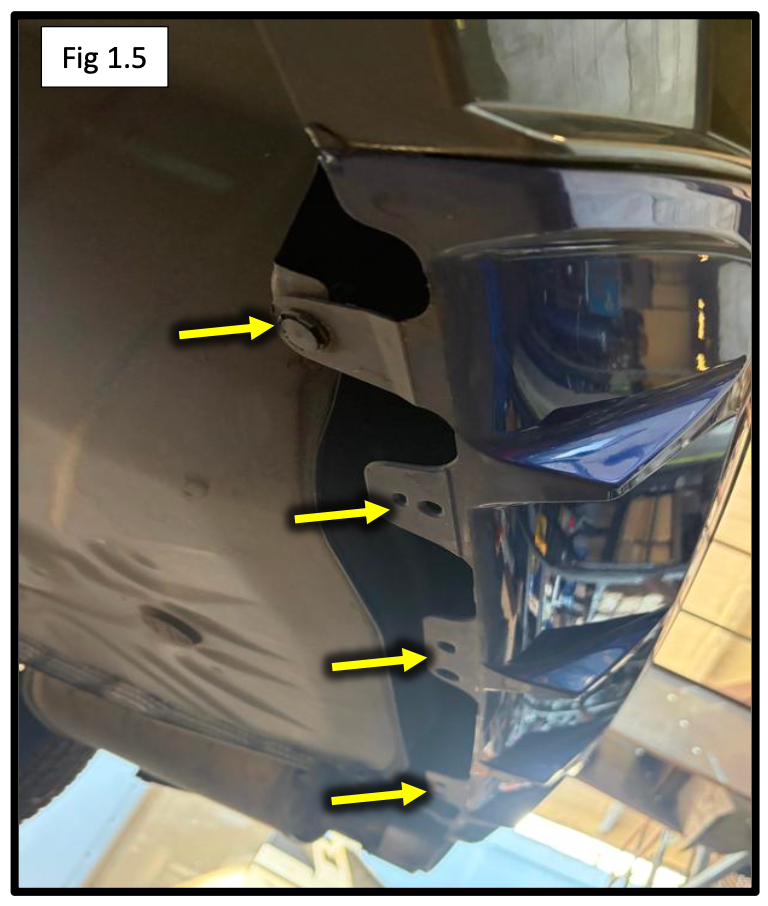
- Remove the screws along the bottom of the bumper
Repeat this process on both sides of the vehicle.
Keep all your hardware organized, you’ll be reinstalling most of it later.
Step 2: Remove the Rear Bumper
- Gently pull back the weather seal along the lower edge of the hatch
- Starting at the wheel wells, unclip the bumper
- Work your way toward the center until it’s fully released
Set the bumper aside in a safe place to avoid damage.
Take your time, these clips can be tight, and you don’t want to force them.
Step 3: Remove Crossmember & Install Hitch
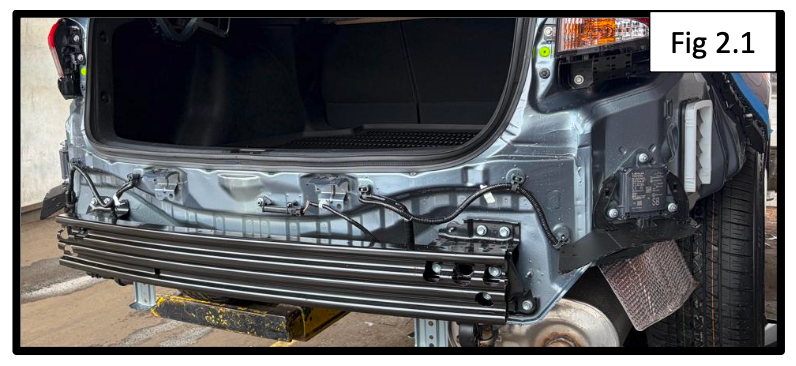
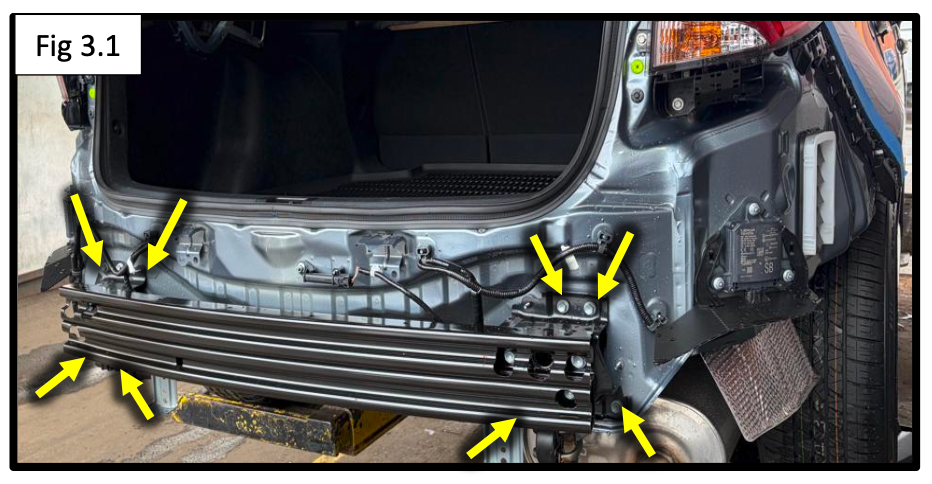
- Remove the eight factory nuts securing the rear crossmember
- Remove the crossmember completely (it will not be reused)
Install the EcoHitch:
- Raise the hitch into position where the crossmember was removed
- Secure it using:
- M8 bolts
- Lock washers
- 5/16” flat washers
Leave everything slightly loose for now until final alignment.
Step 4: Install Frame Supports & Fish Hardware
This step adds strength and ensures a secure install.
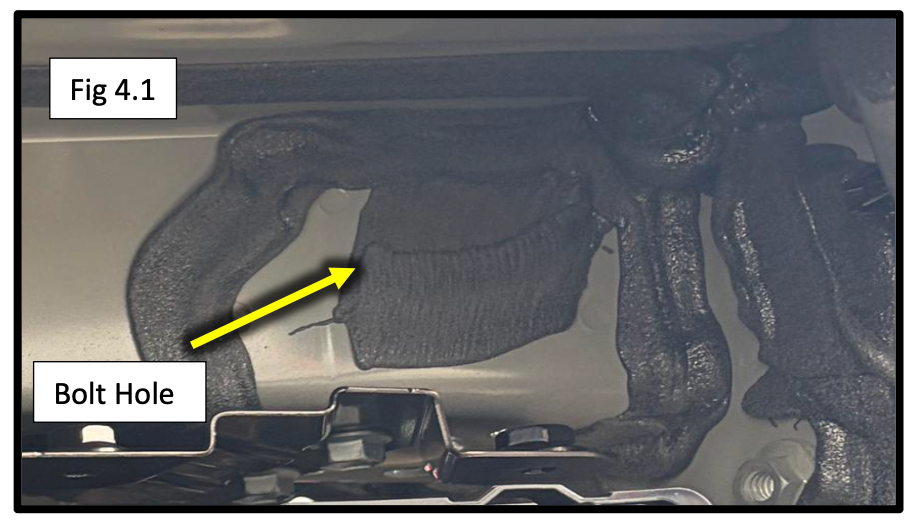
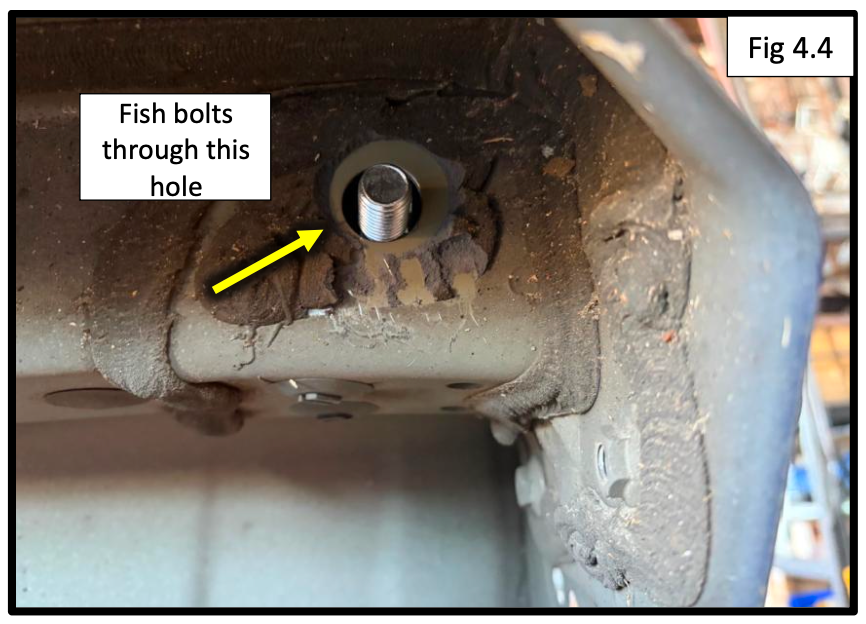
- Scrape away the seam sealant on the side of the frame to expose the mounting hole
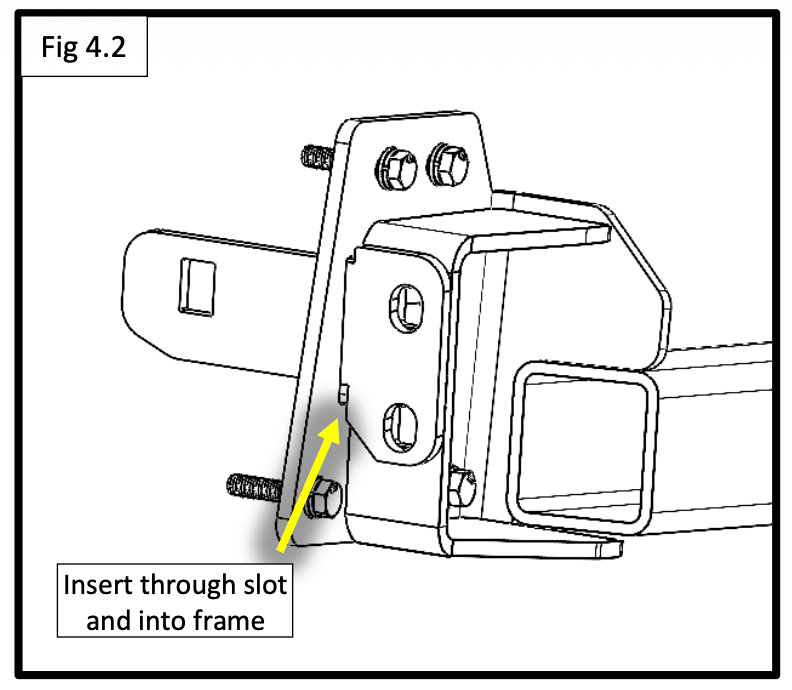
Insert the inner frame support through the side plate into the frame
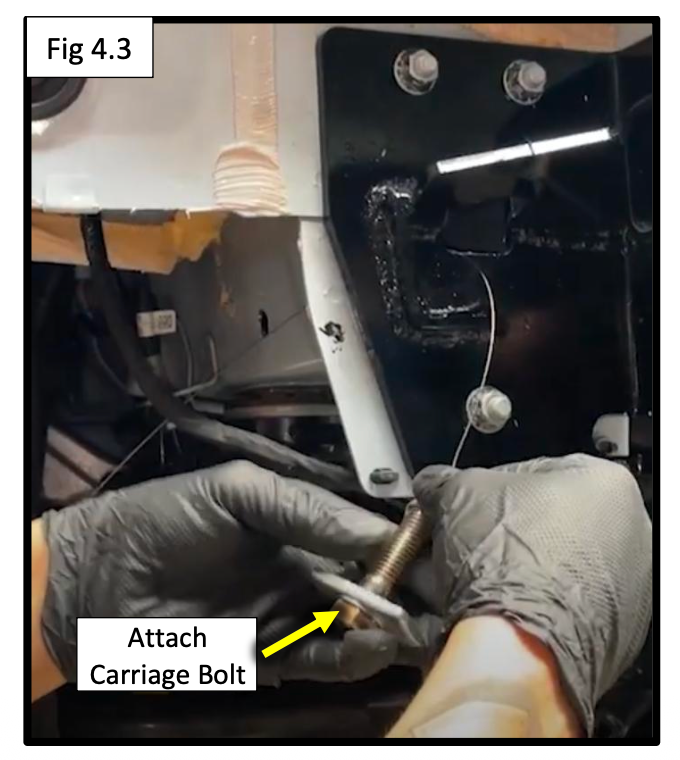
- Insert the bolt fisher through the frame and out the rear side plate
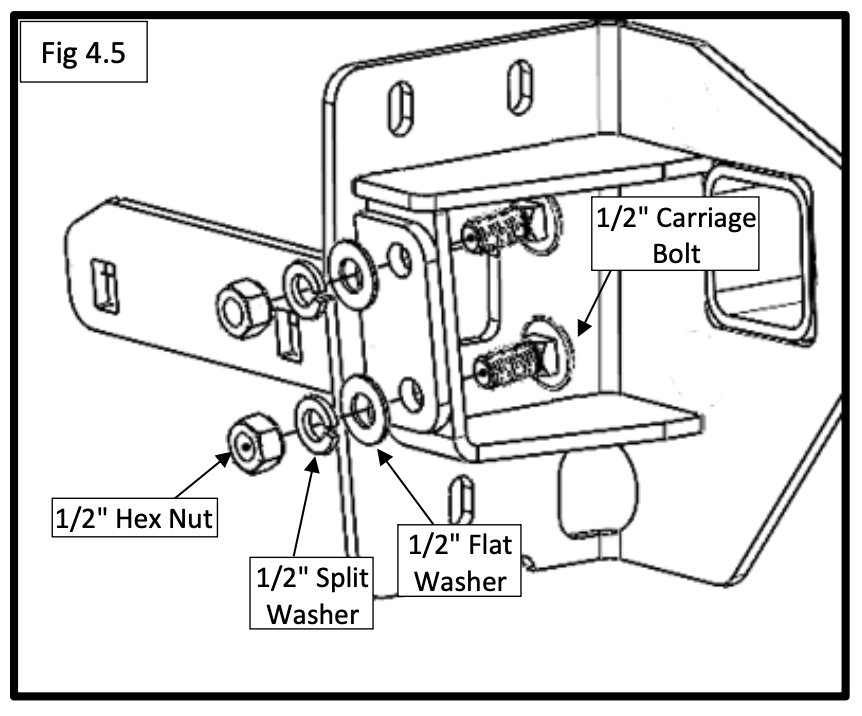
- Attach a 1/2” carriage bolt and pull it through so threads are exposed
Secure using:
- 1/2” flat washer
- 1/2” split lock washer
- 1/2” hex nut
Repeat on the opposite side.
Torque Specs:
- M8 hardware: 25 ft-lbs (34 Nm)
- 1/2" hardware: 64 ft-lbs (88 Nm)
Make sure everything is aligned before tightening fully.
Step 5: Trim Receiver Opening in Bumper
This is what gives your install that clean, factory look.
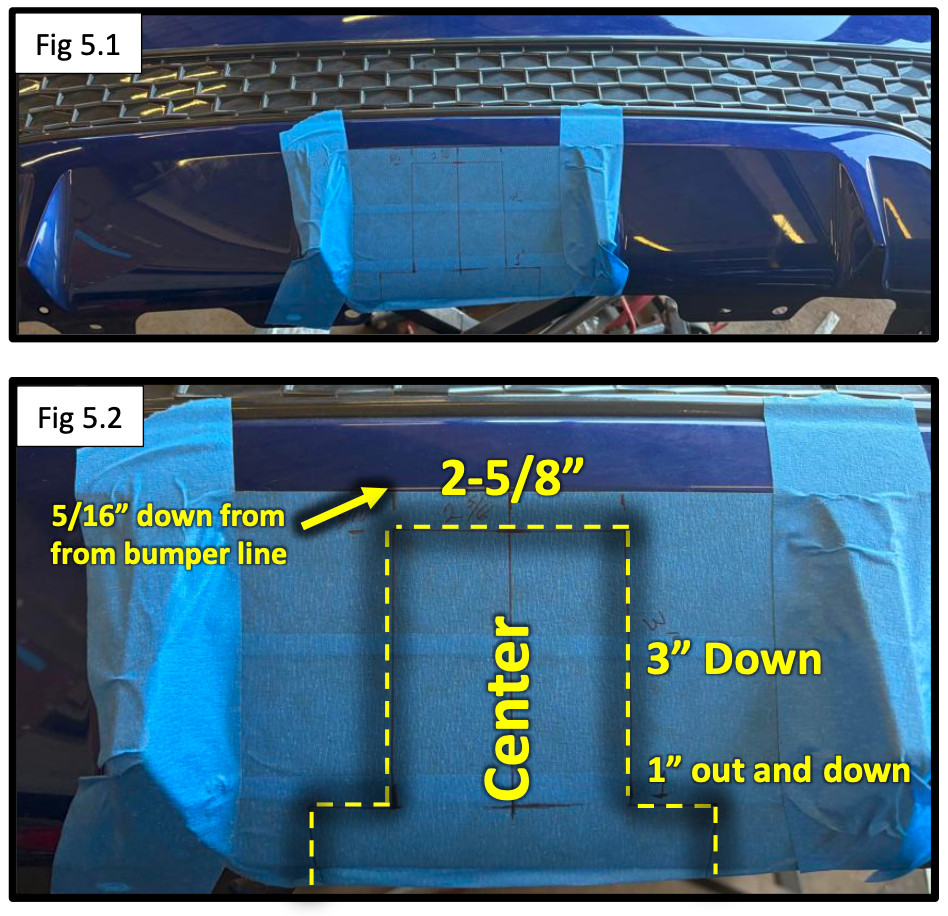
- Measure and mark the center of the lower valance
- Trim the receiver opening using a reciprocating saw or similar tool
Dimensions:
- Positioned slightly below the bumper line as shown in the guide
Start small and test fit, you can always enlarge the opening if needed.
Step 6: Reinstall the Bumper
- Reinstall the bumper in reverse order:
- Snap clips back into place
- Reinstall screws and trim
- Reattach mudflaps and panels
- Reinstall taillight covers
Make sure everything is aligned and secured properly.
Installation Complete
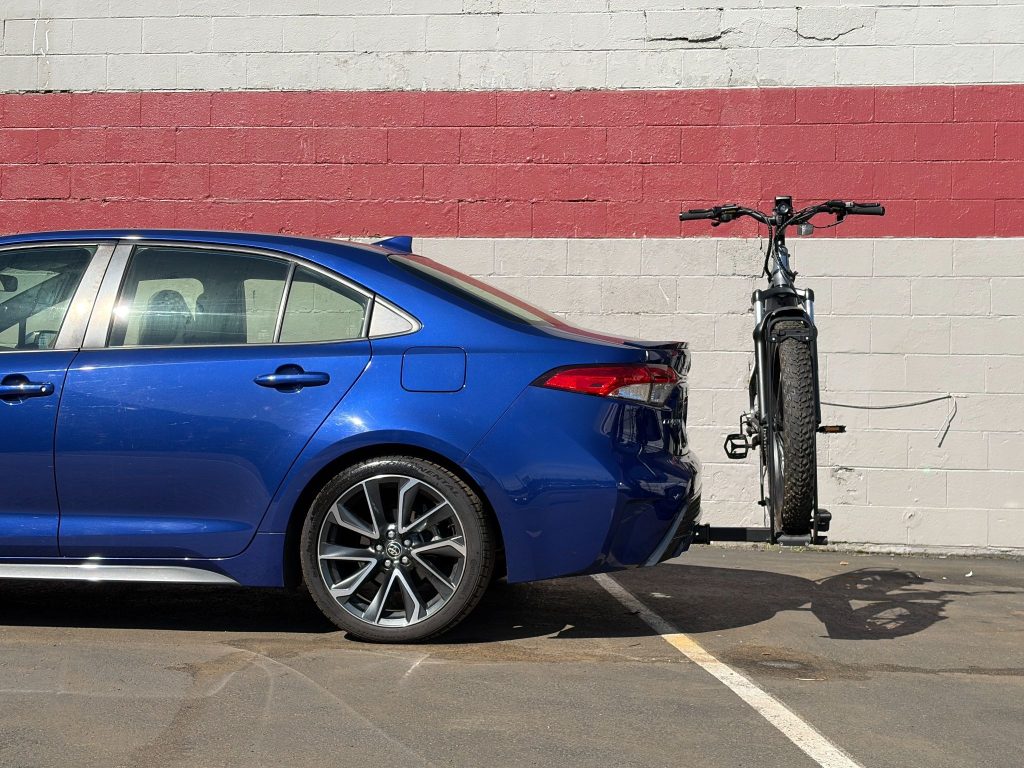
You’ve successfully installed the EcoHitch X7514S on your Toyota Corolla.
You now have a clean, concealed hitch that’s ready for:
- Bike racks
- Cargo carriers
- Light towing