
If you’re looking to add more functionality to your Mini Cooper S without sacrificing its sporty look, the EcoHitch X7383 is a fantastic upgrade. Whether you’re carrying bikes, extra cargo, or just want added versatility, this hitch is designed to fit cleanly while maintaining excellent ground clearance.
This install does involve removing the rear bumper and tail lights, but don’t let that scare you off. With patience and the right tools, this is a very manageable DIY project. I’ll walk you through it step-by-step just like we would in the shop.
Before You Start
Recommended Tools:
- Socket set
- Trim removal tools
- Torx bits
- Utility knife or air saw
- Torque wrench
- Jack stands or ramps
Installer Tip: Keep your hardware organized as you remove it. A small parts tray or labeled bags make reassembly much easier.
Step 1: Raise the Vehicle
Start by safely raising the rear of the vehicle.
- Place the Mini Cooper S on:
- Ramps
- Or suitable jack stands
Always make sure the vehicle is stable and secure before working underneath it.
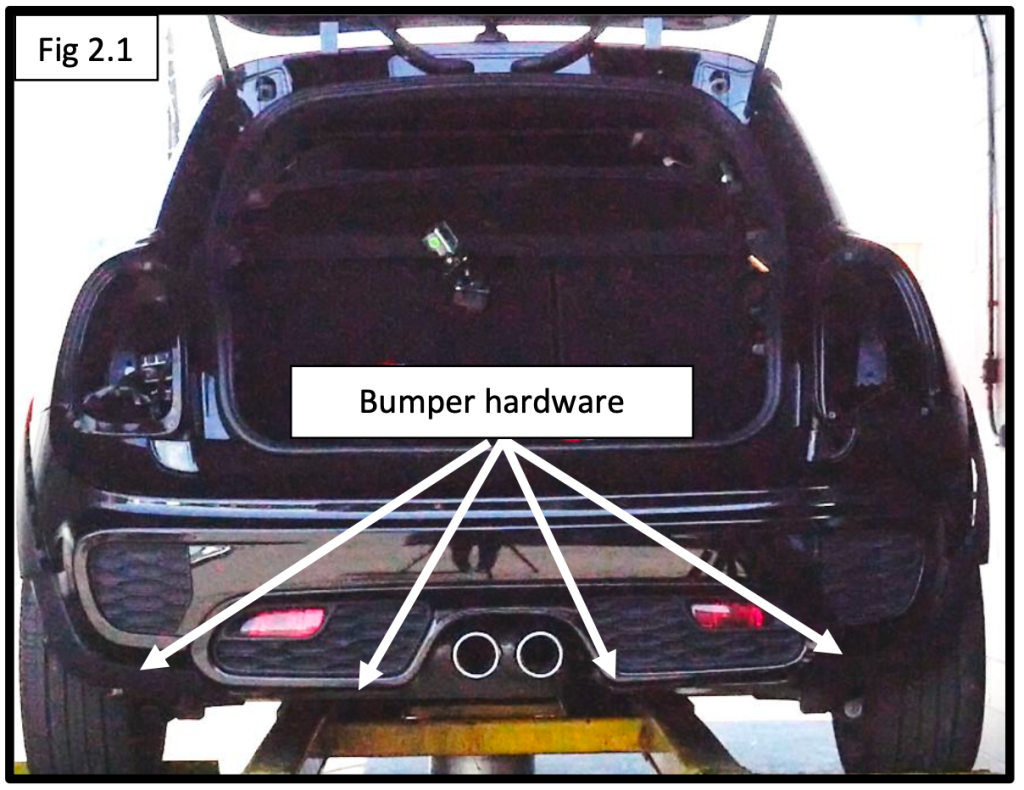
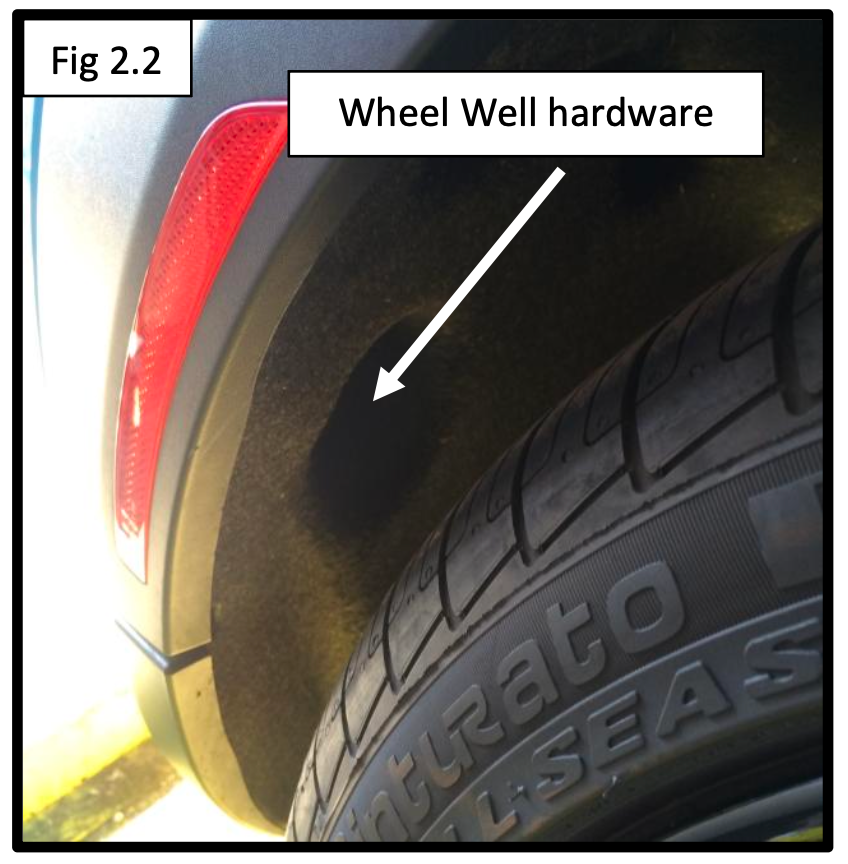
Step 2: Remove Lower Bumper Hardware
Next, we’ll free up the bumper fascia.
- Remove the fasteners along the underside of the bumper
- Remove the fasteners inside the rear wheel wells on both sides
These fasteners secure the bumper and fender trim panels.
Trim removal tools help prevent scratching the paint or damaging clips.

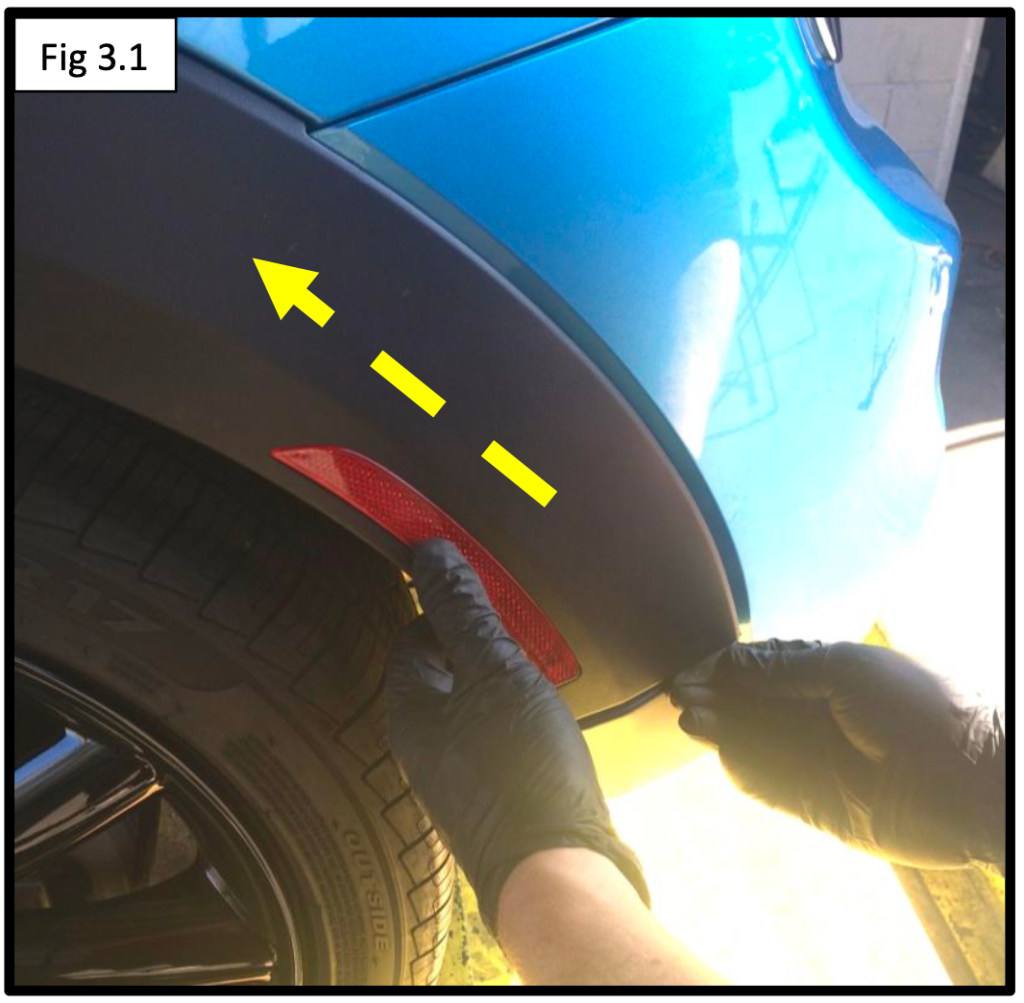
Step 3: Remove Fender Trim Panels
- Starting at the rear, gently pull outward on the fender trim panels to release the clips
- Work your way forward as the trim unsnaps
If equipped:
- Disconnect any attached wire harnesses carefully
If any retaining clips stay behind on the vehicle:
- Remove them gently and reinstall them into the trim panel before reassembly
Go slow here, steady pressure works much better than forcing the clips.
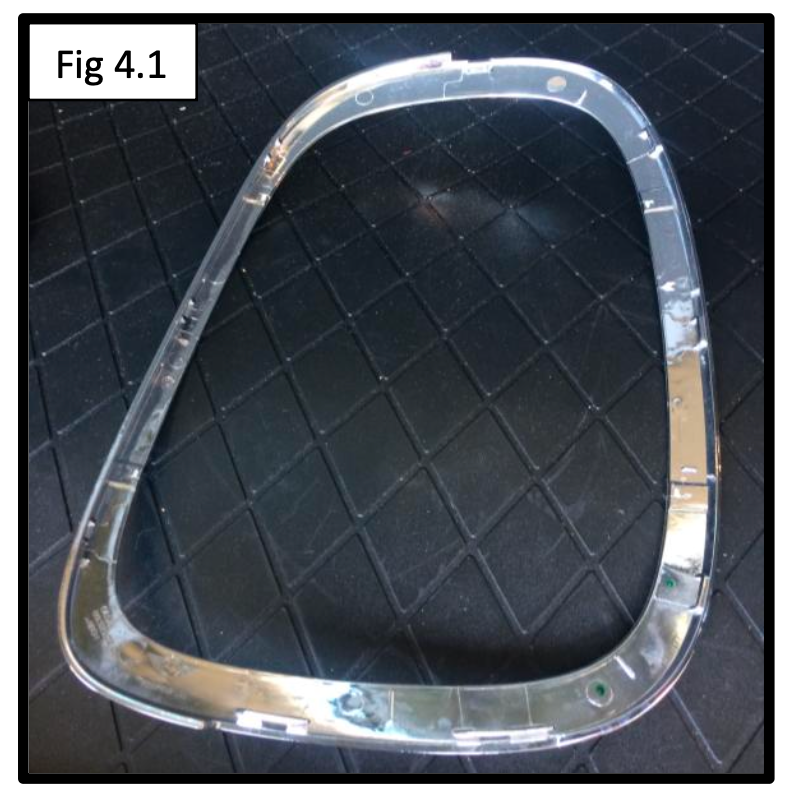
Step 4: Remove Tail Light Trim & Hardware
Open the trunk and remove the tail light trim pieces.
- Gently unsnap the trim around each tail light
- Remove the three fasteners securing each tail light assembly
Set the hardware aside for reinstallation later.
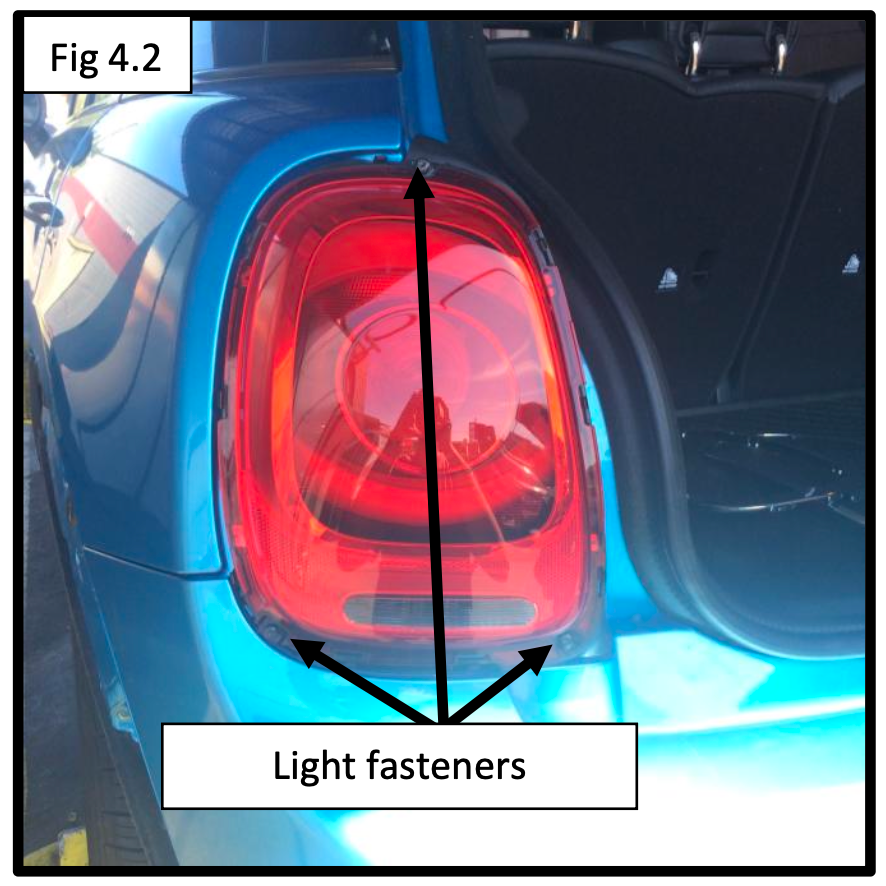
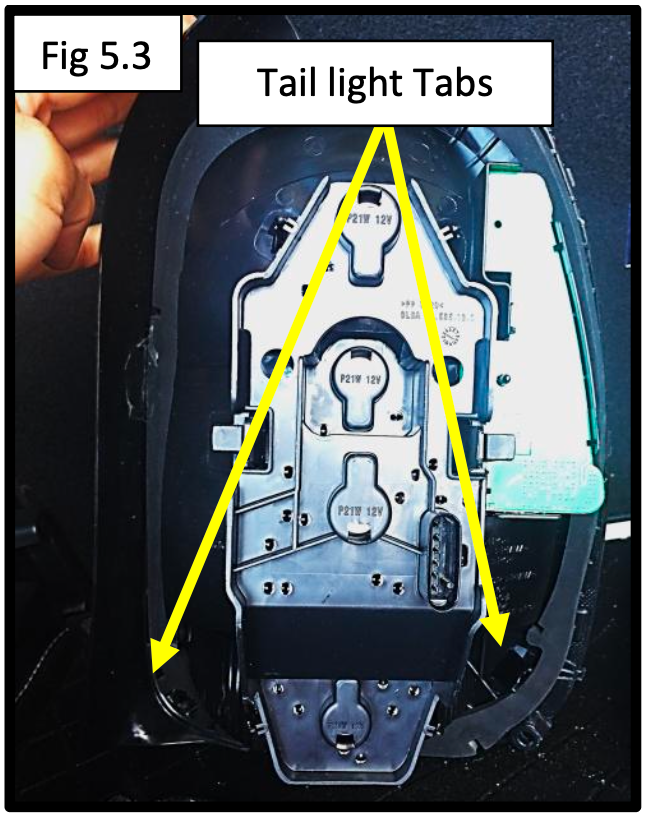
Step 5: Remove Tail Lights
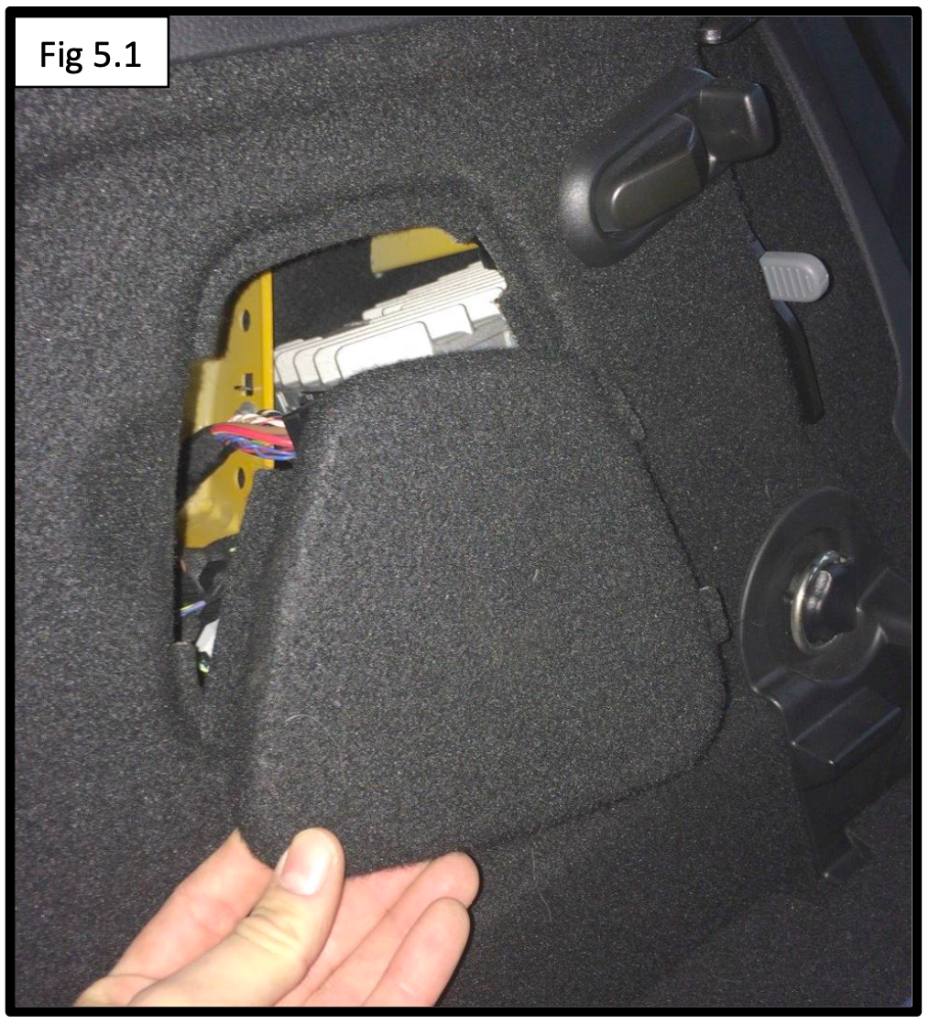
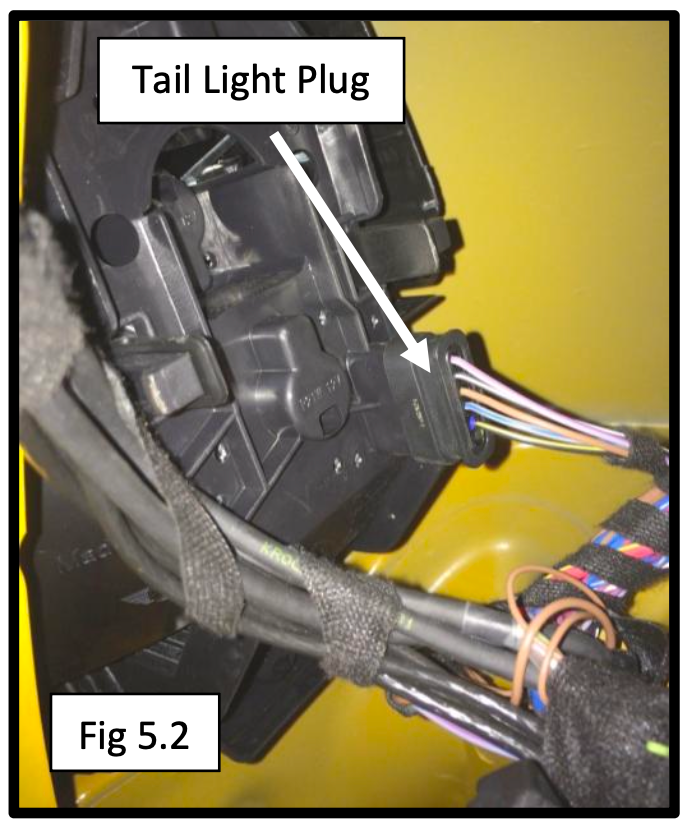
Inside the trunk:
- Remove the tail light access panels
- Disconnect the tail light wiring harnesses on both sides
- Release the retaining tabs and carefully remove the tail lights from the vehicle
Place the tail lights somewhere safe to avoid scratches or damage.
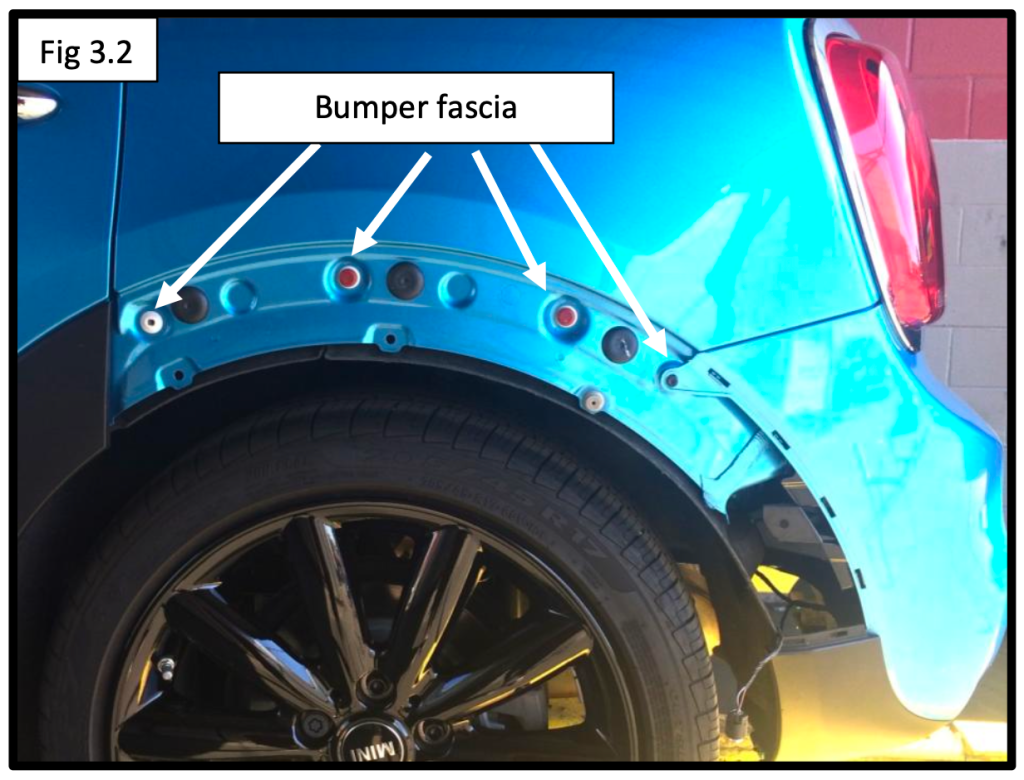
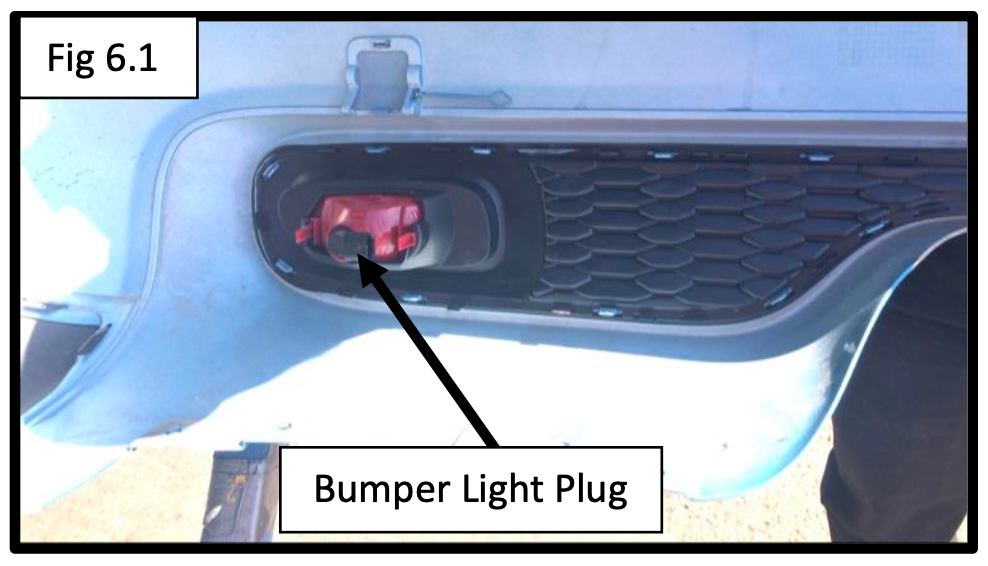
Step 6: Remove the Rear Bumper
Now the bumper is ready to come off.
- Starting on the driver side, gently unsnap the bumper fascia from the vehicle
- Work your way across toward the passenger side
- Disconnect the rear bumper lighting harnesses before fully removing the bumper
Set the bumper aside on a soft surface.
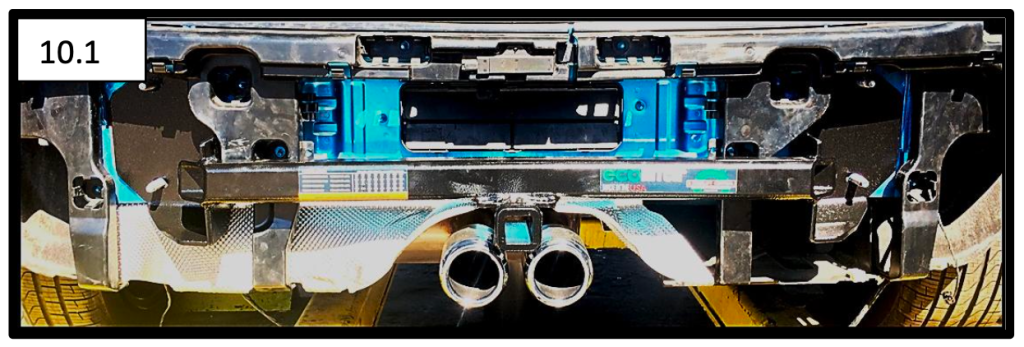
Step 7: Remove the Factory Impact Bar
- Remove the four factory nuts holding the rear impact bar in place
- Remove the impact bar from the vehicle
The EcoHitch will mount using these same factory mounting points.

Step 8: Move the Wire Harness Panels
- Unhook the wire harnesses
- Remove the fasteners securing the two plastic wire harness panels
These panels will be reinstalled later around the hitch.

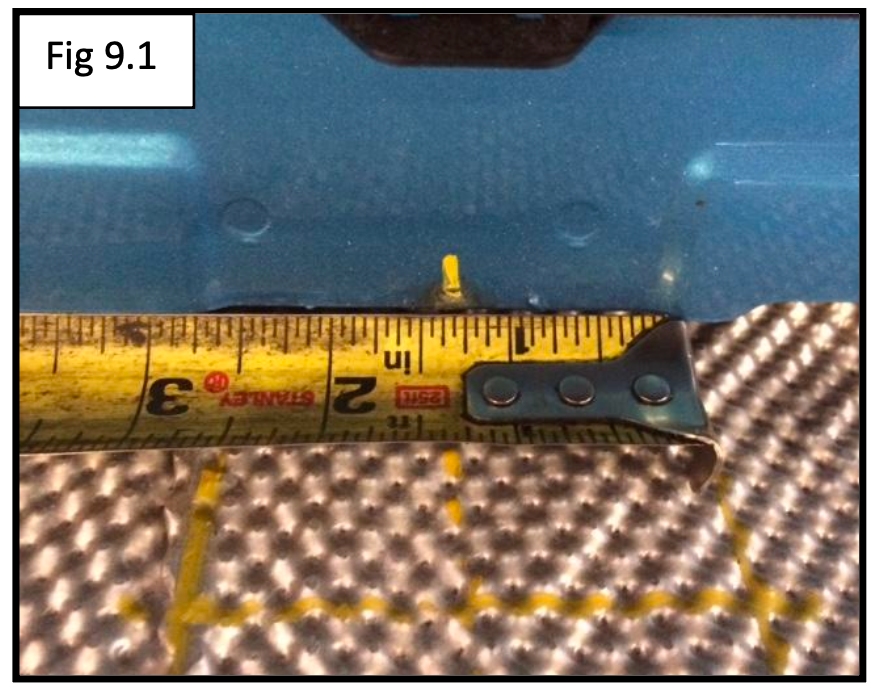
Step 9: Trim the Heat Shield
To allow clearance for the receiver:
- Mark a 2-1/2” x 2-1/2” section on the metal heat shield above the exhaust tips
- Carefully trim the marked section using:
- Tin snips
- Air saw
- Or similar trimming tool
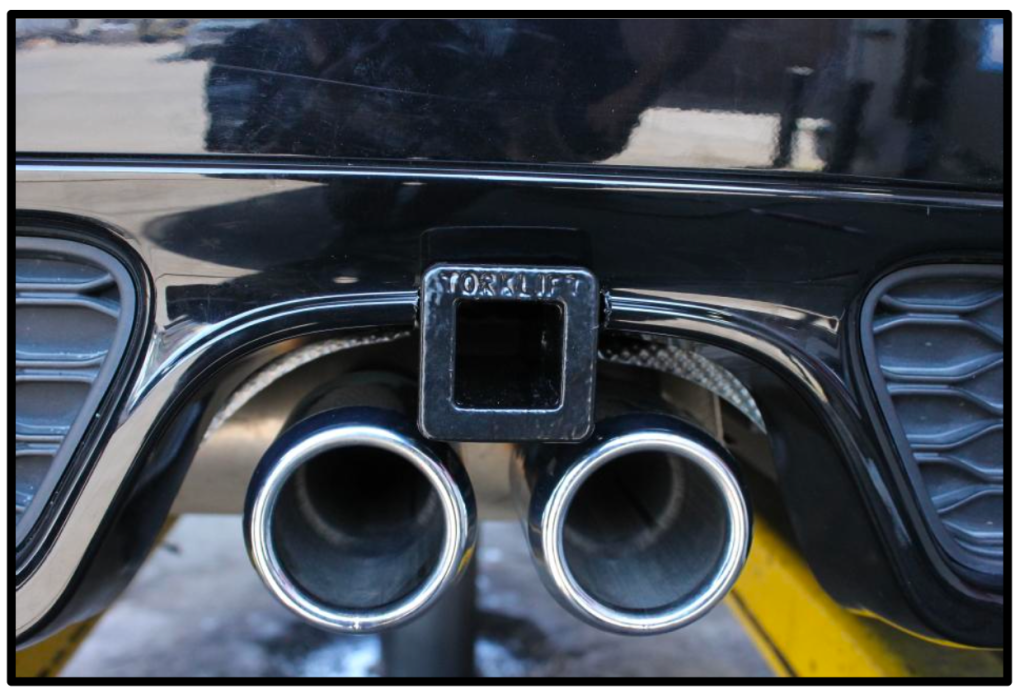
Step 10: Install the EcoHitch
- Lift the EcoHitch onto the four impact bar studs
- Reinstall the plastic wire harness panels around the hitch
- Minor trimming may be needed for proper fitment
Reinstall the factory hardware and torque to:
50 ft-lbs
Check that wiring is routed safely away from the hitch and exhaust.
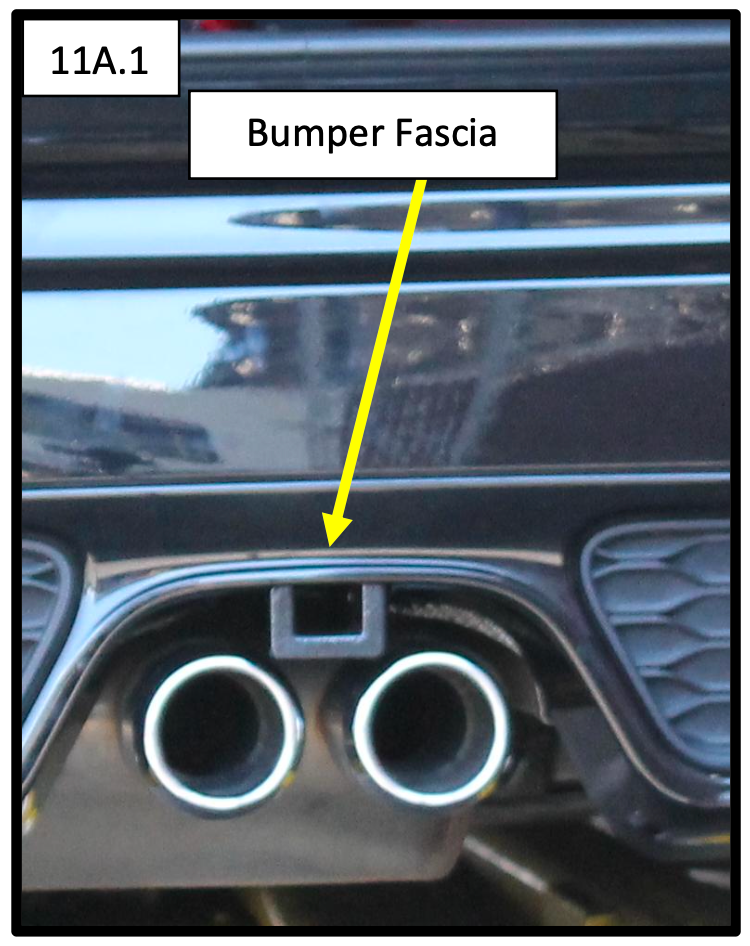
Step 11: Trim the Rear Bumper Fascia
The bumper trim process differs slightly depending on model year.
2016–2020 Mini Cooper S
- Mark a 2” wide centered section at the bottom of the bumper fascia
- Cut upward to the recessed dip in the fascia
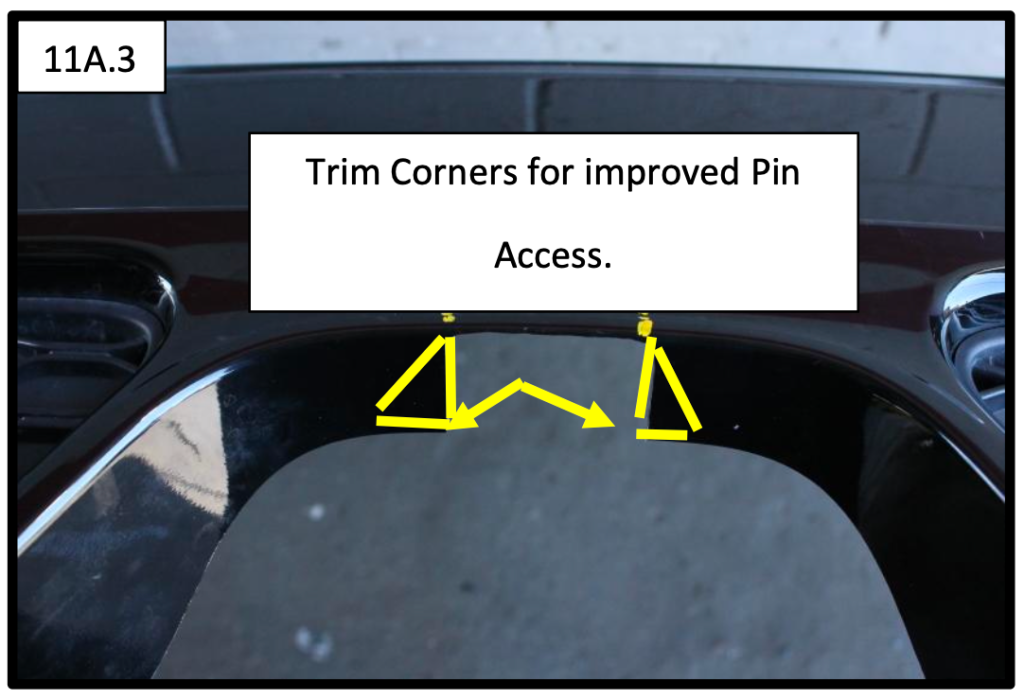
For easier hitch pin access:
- Trim the corners approximately 3/4”–1”
Alternate Trim Style (Later Models)
For applicable models:
- Mark the center of the bumper cover
- Cut the opening according to the provided dimensions:
- Approximately 2” wide
- 1-1/4” tall
Always start small and test fit before enlarging the opening.


Step 12: Reinstall the Bumper & Tail Lights
Now it’s time to put everything back together.
- Reinstall the bumper fascia
- Reconnect all bumper lighting harnesses
- Reinstall tail lights and trim pieces
- Reinstall wheel well trim and lower hardware
Additional trimming may be needed for easier hitch pin access once everything is fully assembled.
Step 13: Final Exhaust Clearance Check
Because exhaust alignment can vary slightly from vehicle to vehicle:
- Check for clearance between the hitch and exhaust system
- Adjust the exhaust hangers if necessary to prevent rattling or contact
A small adjustment now can prevent future noise issues.
Installation Complete
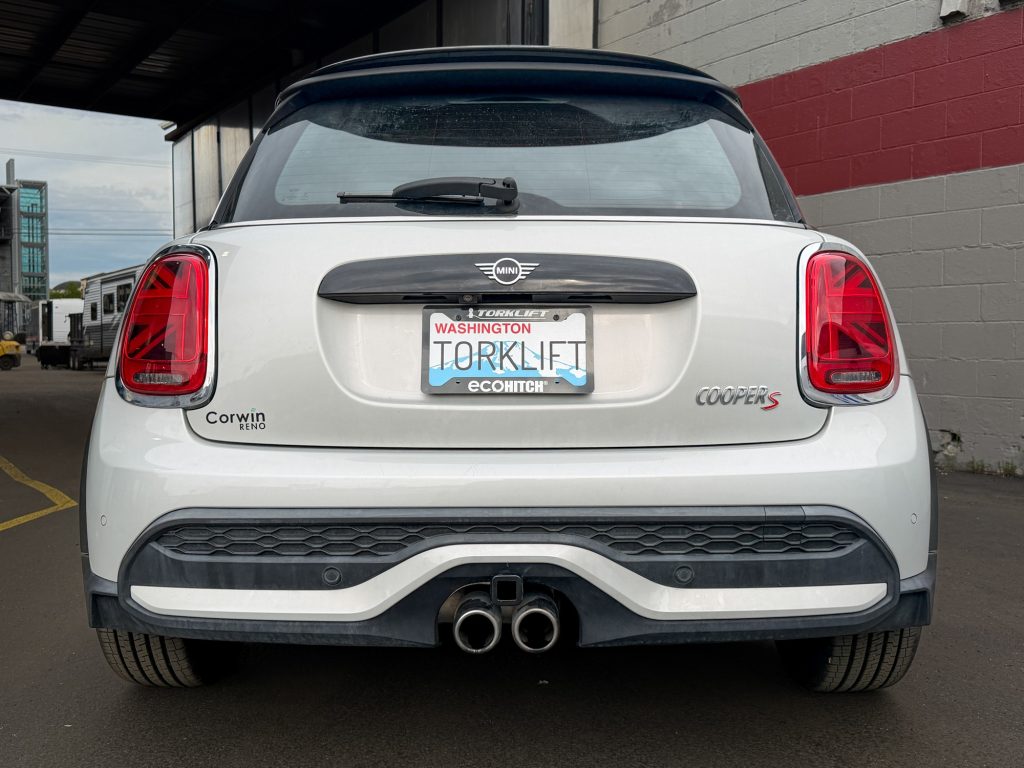
Congratulations, you’ve successfully installed the EcoHitch X7383 on your Mini Cooper S.
You now have a clean, hidden hitch solution ready for:
- Bike racks
- Cargo carriers
- Everyday utility