

A friendly, step-by-step guide for first-time installers
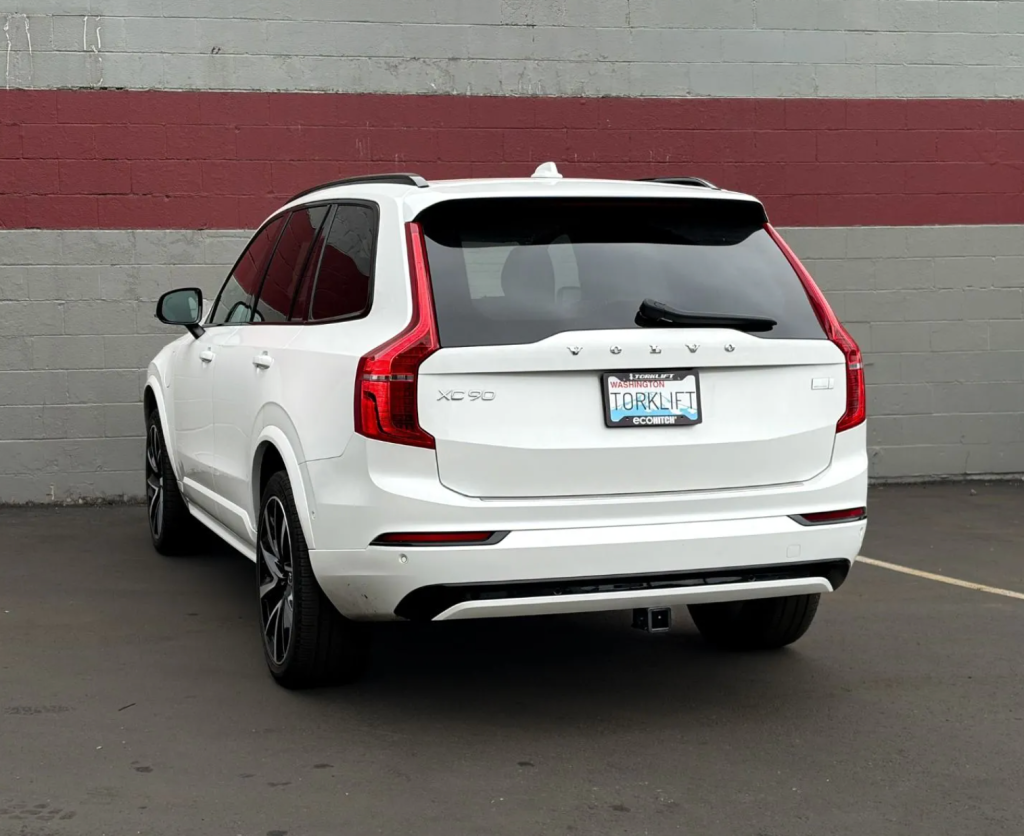
The X6099S EcoHitch for the 2026 Volvo XC90 is completely doable in an afternoon, even if you've never tackled a project like this before. You'll remove the rear bumper cover to get to the mounting points and once you see how it comes apart, you'll realize it's really just a handful of screws and clips.
| Good to know: This hitch is rated for a 650 lb tongue weight and 6,000 lb trailer weight. Always stay within these numbers and your XC90’s factory tow rating, whichever is lower. |
Before You Start: Tools & Time
This install uses a few specific tools, so gather everything before you get under the vehicle:
•A way to safely lift the vehicle (a lift, or a floor jack with jack stands rated for the weight)
•T25 Torx driver (for the bumper cover screws)
•15 mm, 17 mm, and 15/16" sockets, a ratchet, and a 6" extension
•A 90-degree bit driver (handy for tight spots)
•A plastic panel pry tool (protects the finish when releasing clips)
•A torque wrench — required for tightening every bolt to spec
•For the optional trim step: a reciprocating saw, razor blade, or similar cutting tool
Time needed: plan on about 2 to 4 hours for your first install. A second set of hands makes removing and reinstalling the bumper cover much easier and safer.
| Heads-up: Only raise the vehicle on Volvo’s approved jacking points, and always rest it on jack stands. Never work under a vehicle supported by a jack alone. |
What’s in the Box
Lay everything out and check it against this list before you begin. It only takes a minute and beats stopping mid-install to hunt for a washer.
| Part | Reorder SKU / Item # | Qty |
| Receiver hitch | X6099S-A1 | 1 |
| Receiver adapter | XA3004-W1 | 1 |
| 5/8"-11 x 3-1/2" hex bolt (Grade 5) | 11185 | 1 |
| 5/8" split lock washer | 6023 | 1 |
| 5/8" flat washer | 9943 | 1 |
| M10-1.5 x 40mm cap screws (10.9) | 12926 | 2 |
| M10 split lock washers | 12009 | 2 |
| 3/8" USS flat washers | 6001 | 2 |
Step 1: Lift the Vehicle Safely
First things first, get the XC90 up in the air. Raise it on the factory-approved jacking points and lower it onto jack stands so it's completely stable before you climb underneath.
•Lift the vehicle on the factory-approved jacking points and set it securely on jack stands.
Step 2: Remove the Lower Bumper Screws
Now we start freeing up the rear bumper cover. Begin along the bottom edge.
•Using your T25 Torx driver, remove the four screws along the bottom of the bumper cover (Figure 2.1).
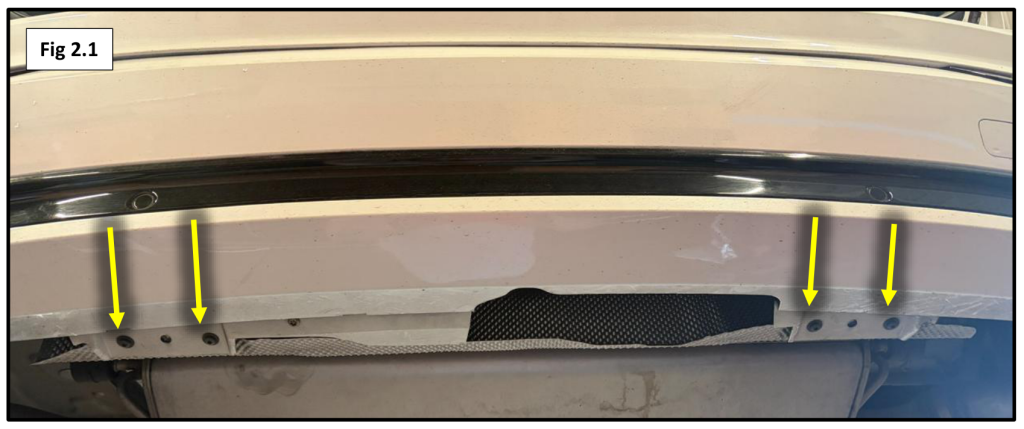
Figure 2.1 — The four lower bumper cover screws (arrows).
| Pro tip: Grab a small parts tray or a labeled bag and drop every screw and clip in as you go. On a job with this many fasteners, staying organized is what keeps reassembly quick and stress-free. |
Step 3: Free the Wheel-Well Screws, Plugs, and Fender Clips
Next you'll work around the wheel wells and release the edges of the bumper cover. Take your time here so nothing gets scratched.
•Remove the four screws from the lower wheel openings — check both sides — using your T25 Torx (Figure 3.1).
•Remove the two plugs in the rear bumper cover (Figure 3.2).
•Gently release the clips holding the fender flare on both sides. A plastic pry tool works best here.
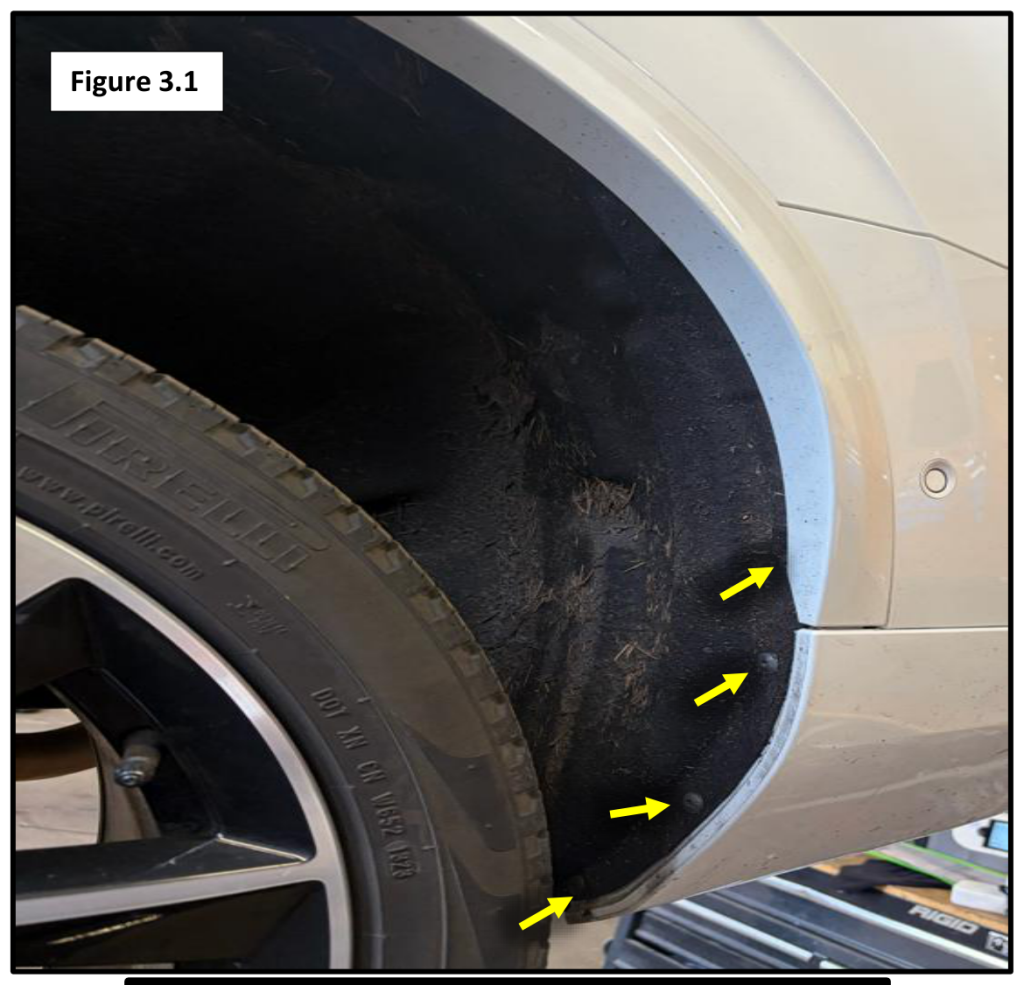
Figure 3.1 — Wheel-well screws to remove (arrows); repeat on both sides.
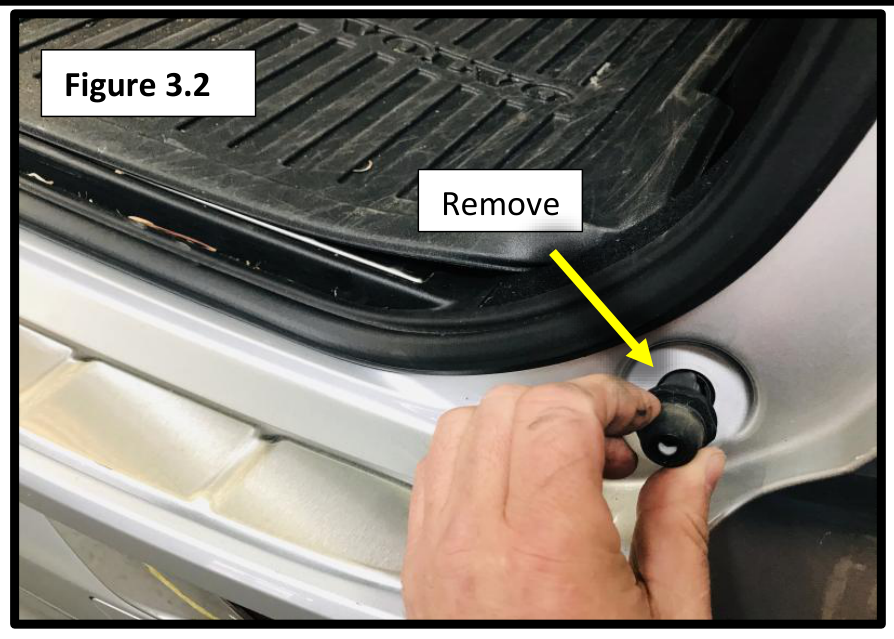
Figure 3.2 — Remove the plug indicated by the arrow.
| Pro tip: Slide the flat side of the pry tool behind the panel and lever gently against the clip, not the paint. If a clip fights you, reposition rather than forcing it — that’s how you avoid cracked tabs. |
Step 4: Remove the Bumper Cover
This is the step where that helper really earns their keep. The bumper cover is large, so having someone support it protects both the cover and your vehicle's paint.
•Gently pull outward on the sides near the wheel wells, working from the outsides toward the center of the vehicle.
•Have a second person support the cover as it comes free.
•Disconnect the large wiring harness connector on the passenger side.
•Set the bumper cover on a padded surface (a moving blanket or towels) to protect the finish.
| Don’t worry: The cover only feels stuck because of the clips. Once the edges are released and you pull evenly, it comes off without a fight. Even pressure is the secret — avoid yanking one corner. |
Step 5: Remove the Crossmember Nuts
With the cover off, you'll see the crossmember bolted to studs on the frame. You're going to borrow those same studs for the hitch.
•Remove the six crossmember nuts using a 15 mm socket and extension (Figure 5.1).
•Set that hardware aside somewhere safe — you’ll reinstall those exact nuts in the next step.
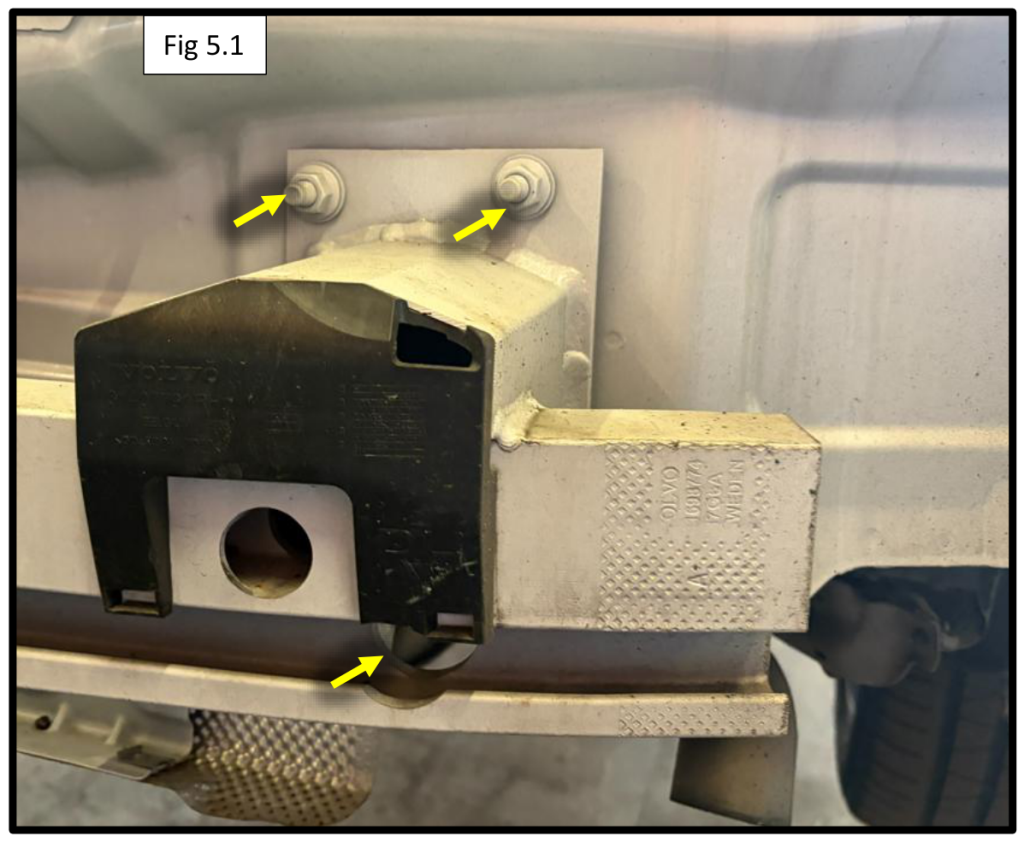
Figure 5.1 — The crossmember nuts to remove (arrows).
Step 6: Install the Hitch and Torque It Down
Here's the satisfying part, the hitch goes right onto the studs the crossmember was using. A helper makes lifting it into position much easier.
•Install the EcoHitch onto the studs where the crossmember was attached (Figure 6.1).
•Reinstall the six factory nuts onto the studs.
•Install two M10 bolts, each with a lock washer and a flat washer, into the remaining holes in the frame plates, one per side.
•Torque all of this hardware to 45 ft-lbs (61 Nm).
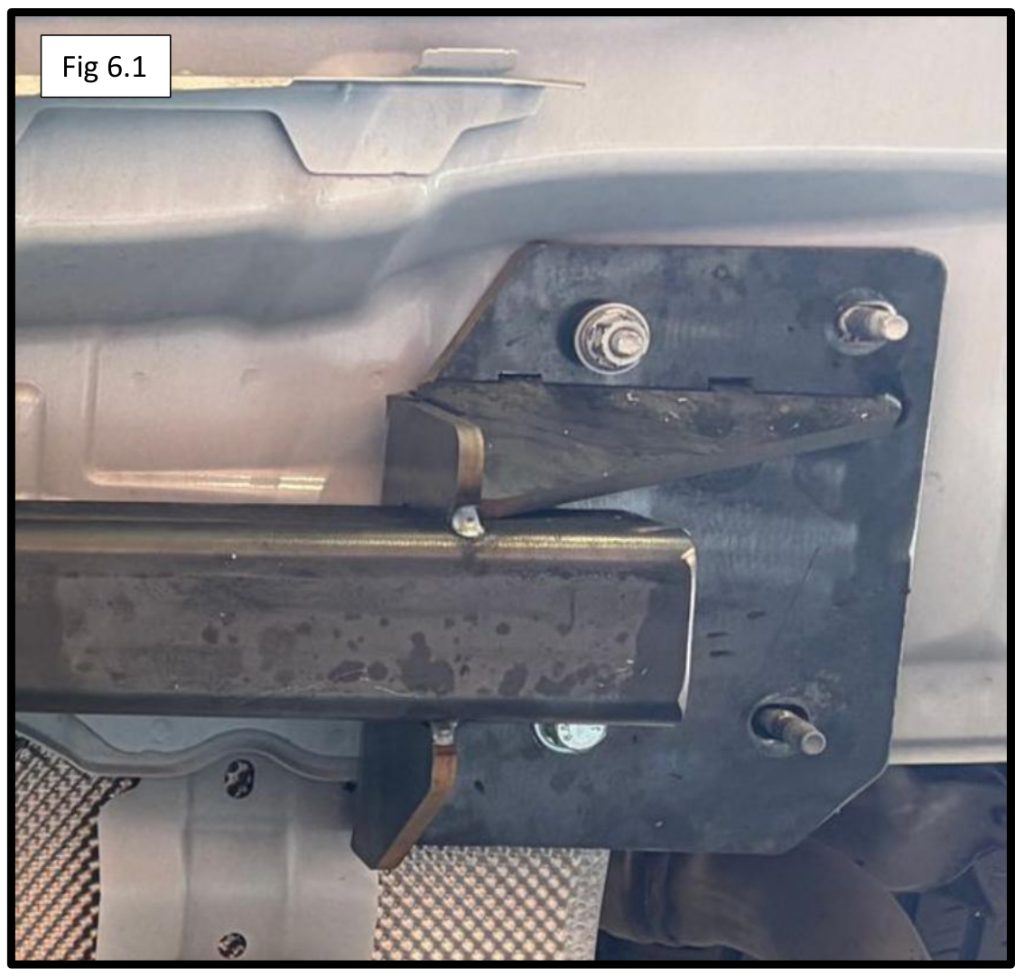
Figure 6.1 — The EcoHitch mounted on the frame studs.
| Important: Use a torque wrench for every fastener here — don’t eyeball it. Proper torque is what keeps your hitch safe and solid on the road. Snug isn’t the same as torqued. |
Step 7: Reinstall the Bumper Cover
The hitch is on, now you'll put the vehicle back together. Reassembly is just Steps 2 through 4 in reverse.
•Reconnect the wiring harness connector you unplugged, then center the cover on the body.
•Press the retainer clips back in, starting in the center and working outward toward the wheel wells.
•Reinstall the clips, plugs, and screws in the reverse order you removed them.
•Work carefully to avoid damaging the finish of the cover or the paint on the car.
| Pro tip: Line up the top edge first and make sure the cover seats evenly along the body before pressing any clips home. If a panel gap looks off, unclip and reseat rather than pushing harder. |
Step 8 (Optional): Trim for Extra Clearance
This step is optional. If you want a little more room around the receiver opening, you can trim the bottom of the bumper cover. Skip it if your clearance already looks good.
•Mark your cut first — the reference shown is about 3" (Figure 8.1).
•Trim the bottom of the bumper using a reciprocating saw, razor blade, or similar cutting tool, staying on your line.
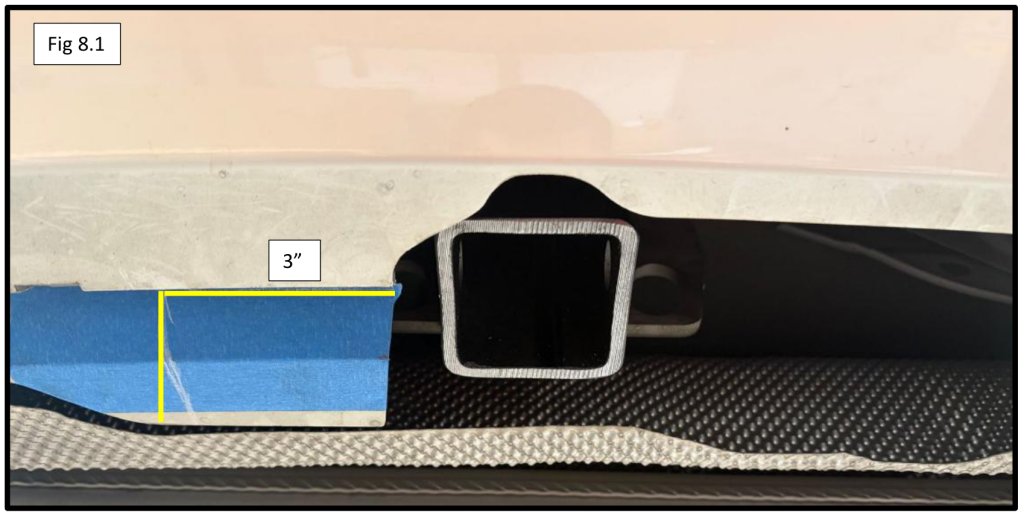
Figure 8.1 — The optional trim area, marked about 3" wide.
| Pro tip: Mask the area with painter’s tape and mark your line on the tape (just like the photo). Cut a little at a time — you can always trim more, but you can’t add plastic back. |
Step 9: Install the Receiver Adapter
Last step. The XC90 hitch uses a receiver adapter that slides into the hitch and gives you the standard receiver opening for your accessories.
•Slide the receiver adapter into the receiver hitch (Figure 9.1).
•Secure it with one 5/8" split lock washer, one 5/8" flat washer, and the 5/8"-11 x 3-1/2" Grade 5 hex bolt.
•Torque the bolt to 112 ft-lbs (152 Nm).
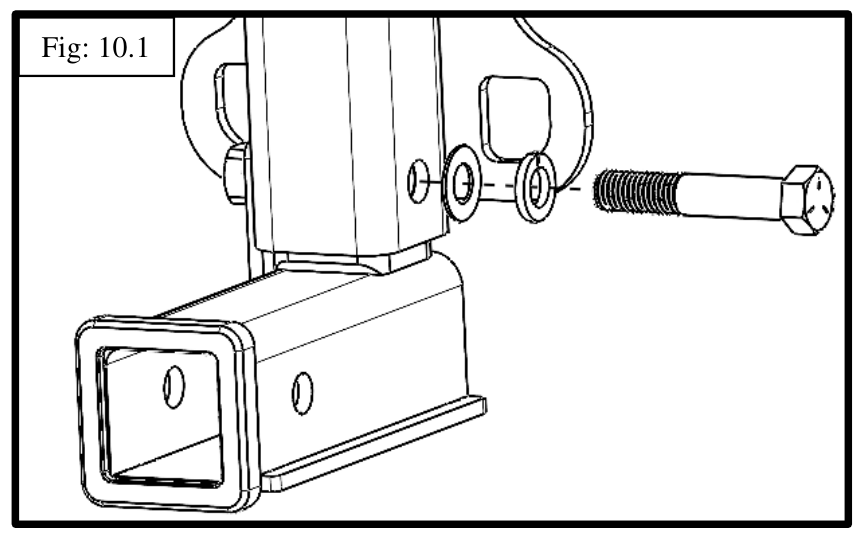
Figure 9.1 — The receiver adapter, washers, and bolt assembly.
| Important: Retorque this adapter bolt to 112 ft-lbs before every single use. It’s the one fastener you’ll check regularly — a quick habit that keeps every tow safe. |
You’re Done — Installation Complete!
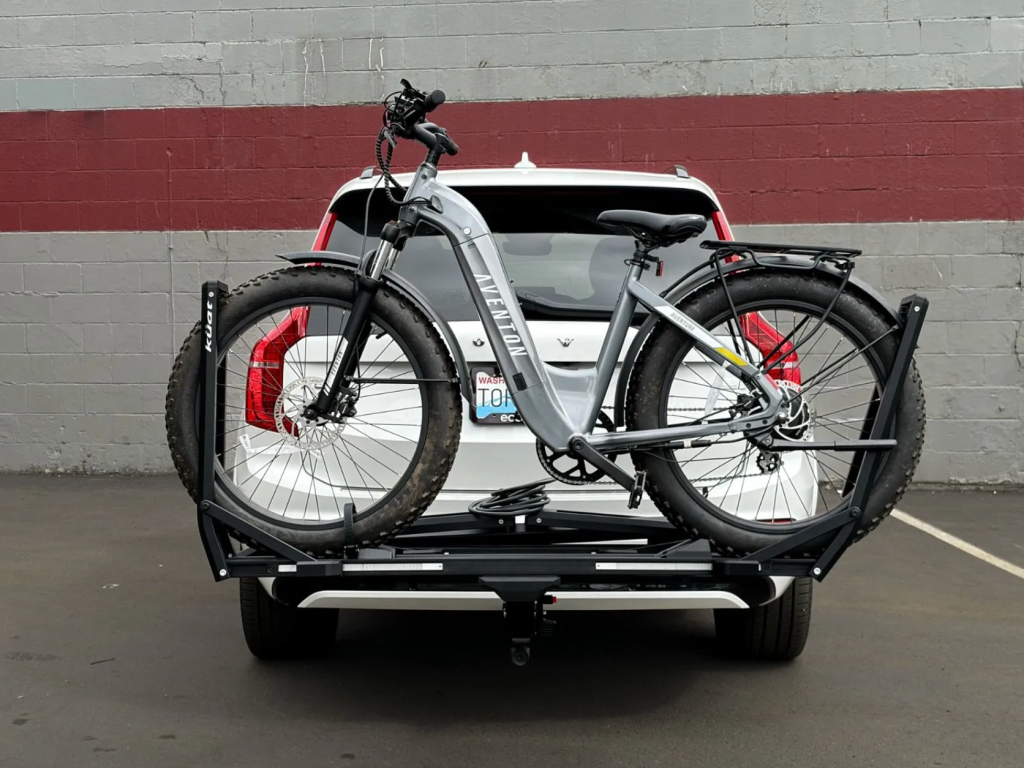
That's it — you just installed a hitch that required a full bumper removal, and that's something to be proud of. Take a look underneath: all six factory nuts and both M10 bolts torqued to 45 ft-lbs, the adapter bolt at 112 ft-lbs, the bumper cover reseated evenly, and the wiring reconnected.
Before your first tow, remember to stay within the 650 lb tongue / 6,000 lb trailer ratings — or your XC90's factory tow rating if it's lower. Great work.
| Final checklist: Six factory nuts + two M10 bolts torqued to 45 ft-lbs • Adapter bolt torqued to 112 ft-lbs • Wiring harness reconnected • Bumper cover reinstalled with all clips, plugs, and screws |
***IMPORTANT NOTICE:
While EcoHitch® trailer hitches are built with high-strength materials and tested for exceptional weight ratings, your vehicle’s factory towing capacities are the ultimate limit. Always refer to your vehicle’s owner’s manual to determine its maximum towing and tongue weight ratings. No aftermarket hitch or accessory can increase your vehicle’s factory-rated towing capacities.
Using hauling accessories like extensions, cargo trays, bike racks, or other accessories that extend the load out from the trailer hitch, will significantly reduce the tongue weight capacity of your hitch system.
To estimate how your setup will affect tongue weight, we recommend using our Maximum Hitch Weight (Tongue Weight) Estimator before hauling your payload (cargo trays, bike racks, etc).
Disclaimer: It is the user’s responsibility to ensure safe towing practices and to confirm that all loads fall within the limits of the lowest-rated component in the towing system. Torklift is not liable for any damage or injury resulting from the misuse or overloading of towing/hauling equipment.