This content is accurate as of April 30, 2026. Fitment details may change, so for the latest information, please visit the EcoHitch product page.
Adding an EcoHitch to your Nissan Leaf is a great way to unlock more versatility, whether you're carrying bikes, a cargo rack, or extra gear for your next trip. While this install involves removing the rear bumper, it’s very doable with the right tools and a little patience.
I’ll walk you through it step-by-step, just like we would in the shop, so you can tackle this install with confidence.
Before You Start
Recommended Tools:
- Socket set (including 10mm)
- Phillips screwdriver
- Trim removal tools
- Torque wrench
- Bolt fisher (included)
- Reciprocating saw or trimming tool
- Marker and masking tape
Pro Tip: Having a second person for bumper removal makes this process smoother and helps prevent scratches.
Step 1: Remove Taillights, Trim, and Wheel Well Components
We’ll start by opening up access around the rear bumper.
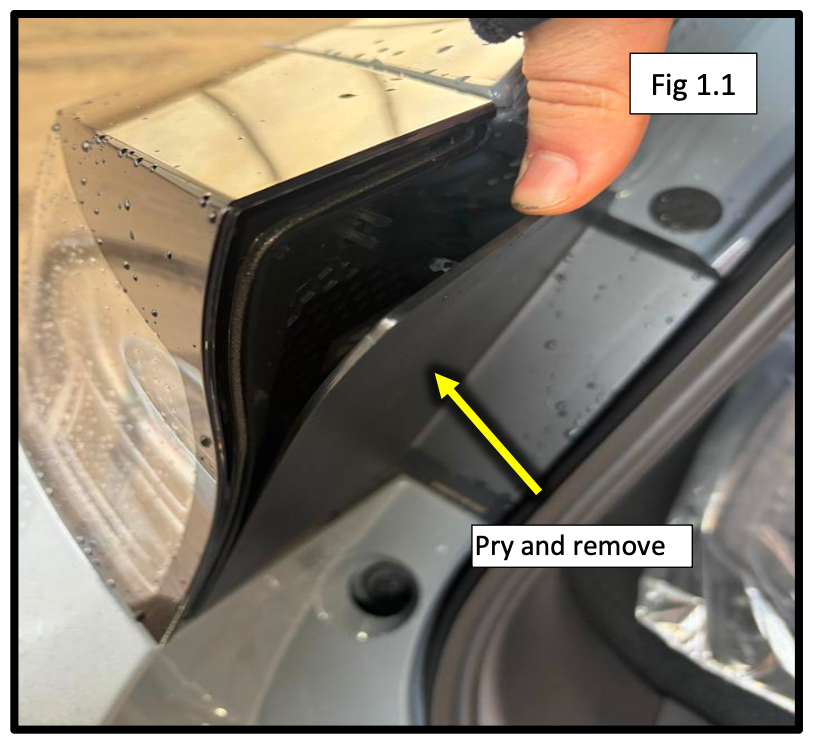
- Open the rear hatch and remove the plastic covers over the taillights (gently pry them off)
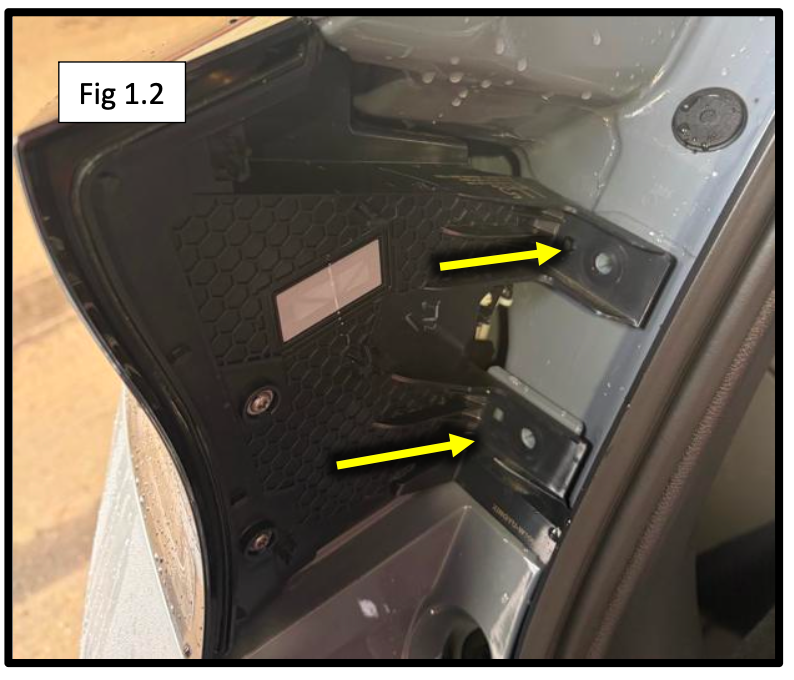
- Remove the two 10mm bolts securing each taillight
- Carefully remove the taillights, disconnect the wiring harness, and set them aside
- Remove the plastic clip under each taillight
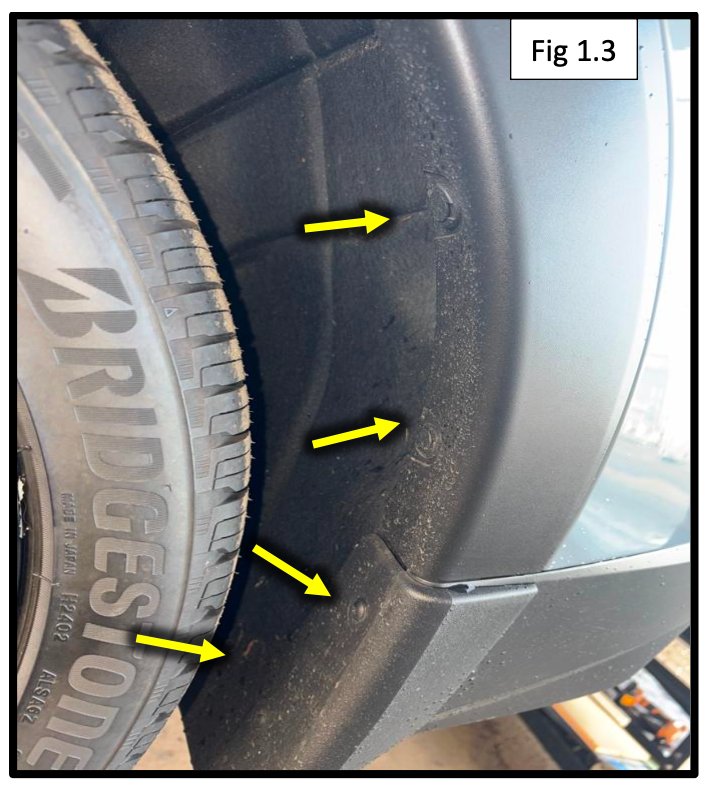
- Inside the wheel wells:
- Remove Phillips screws and plastic clips
- Pop out the wheel well inner trim
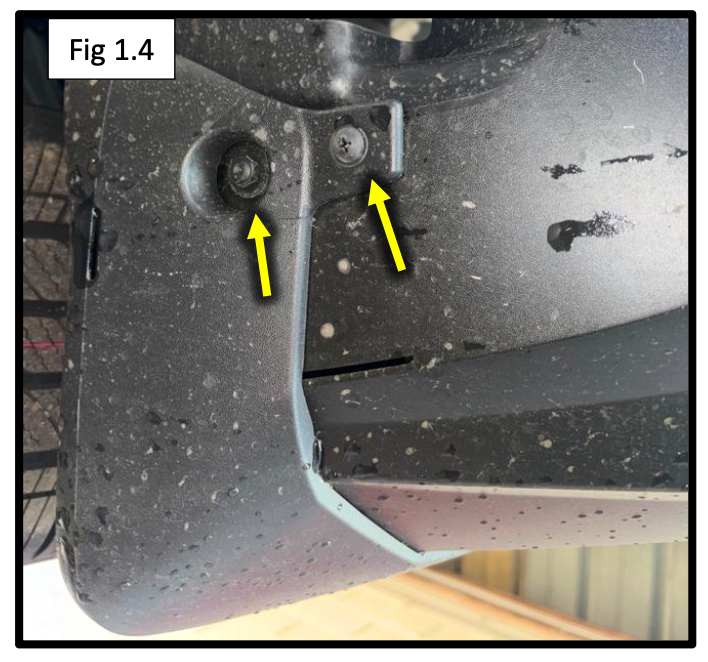
- Remove mudflaps and the screws underneath
Repeat this process on both sides of the vehicle.
Step 2: Remove the Rear Bumper
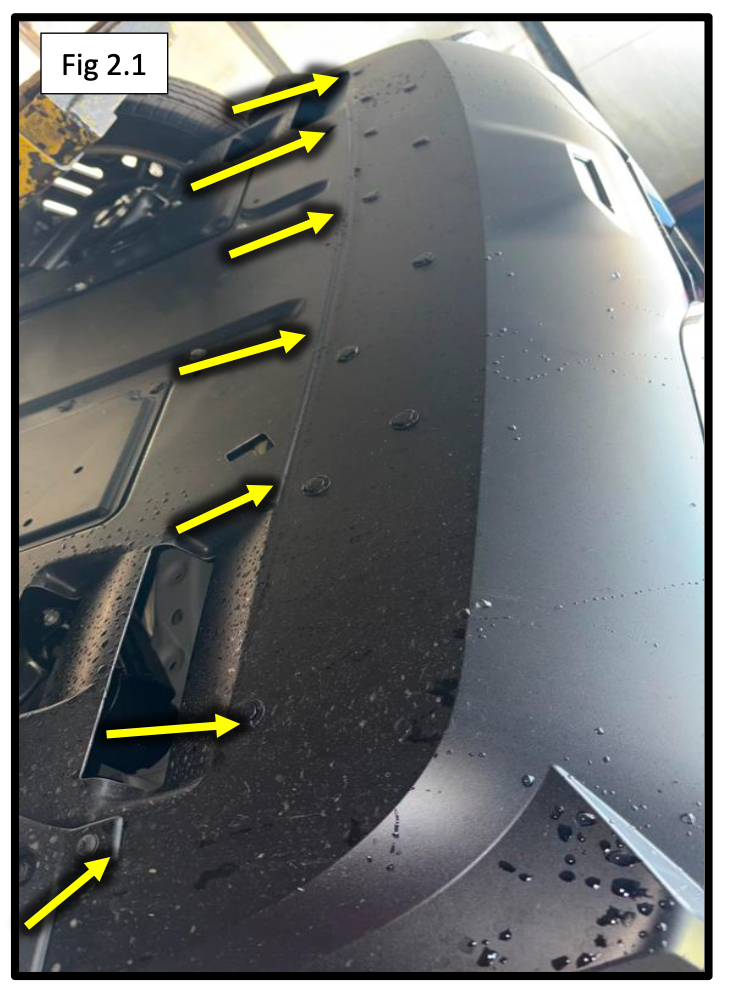
- Remove the plastic clips along the bottom of the bumper
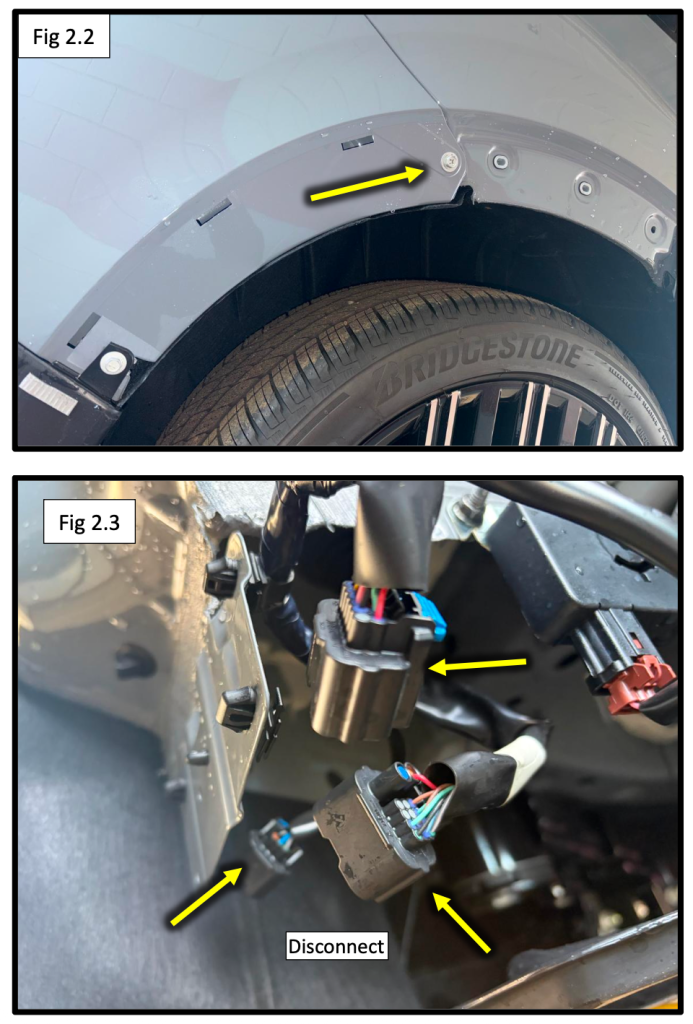
- Remove the wheel well cover and the 10mm bolt behind it
- Starting at the wheel wells, gently unclip the bumper, working toward the center
- Disconnect the three wiring harnesses on the driver side
- Carefully remove the bumper and set it aside in a safe place
Take your time with the clips, steady pressure works better than forcing them.
Step 3: Remove Factory Crossmember & Install Hitch
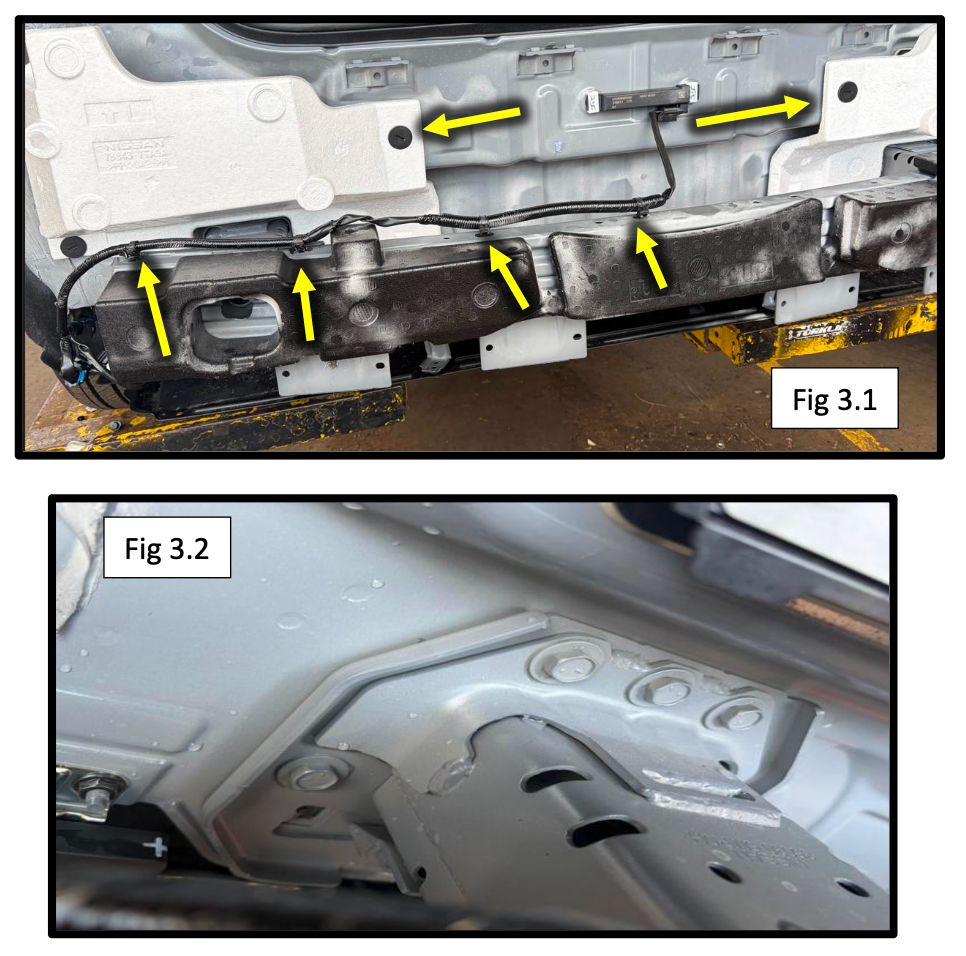
- Unclip the wire harness from the top of the crossmember
- Remove the white foam block above the crossmember
- Remove the six bolts per side securing the crossmember
- Remove the crossmember (it will not be reused)
Install the EcoHitch:
- Position the hitch in place of the crossmember
- Secure using M8-1.25 bolts, each with:
- 5/16” lock washer
- 5/16” flat washer
Install all six bolts per side and leave slightly loose until aligned.
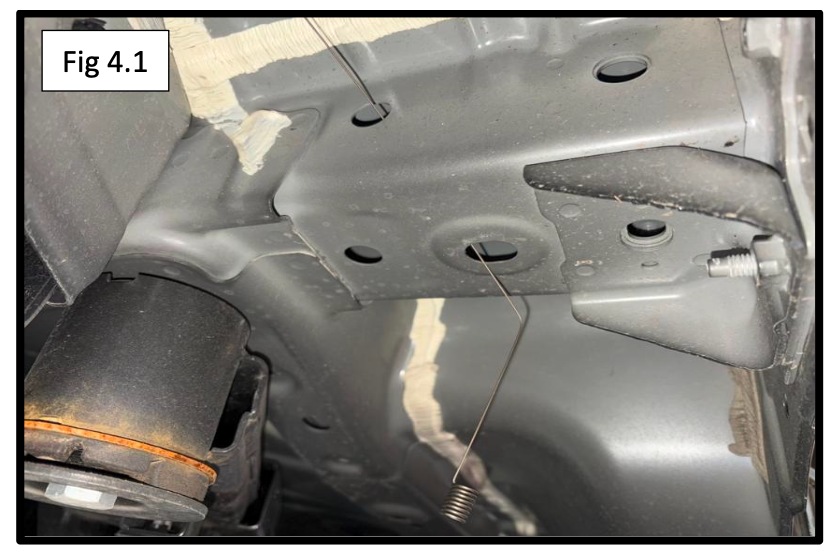
Step 4: Install Support Straps & Fish Hardware
This step adds strength and stability to the hitch.
- Insert the bolt fisher through the side frame hole and out the lower frame hole
- Attach:
- 3/8” bolt
- Internal tooth lock washer
- Plate washer
- Pull the hardware through so the bolt threads are exposed
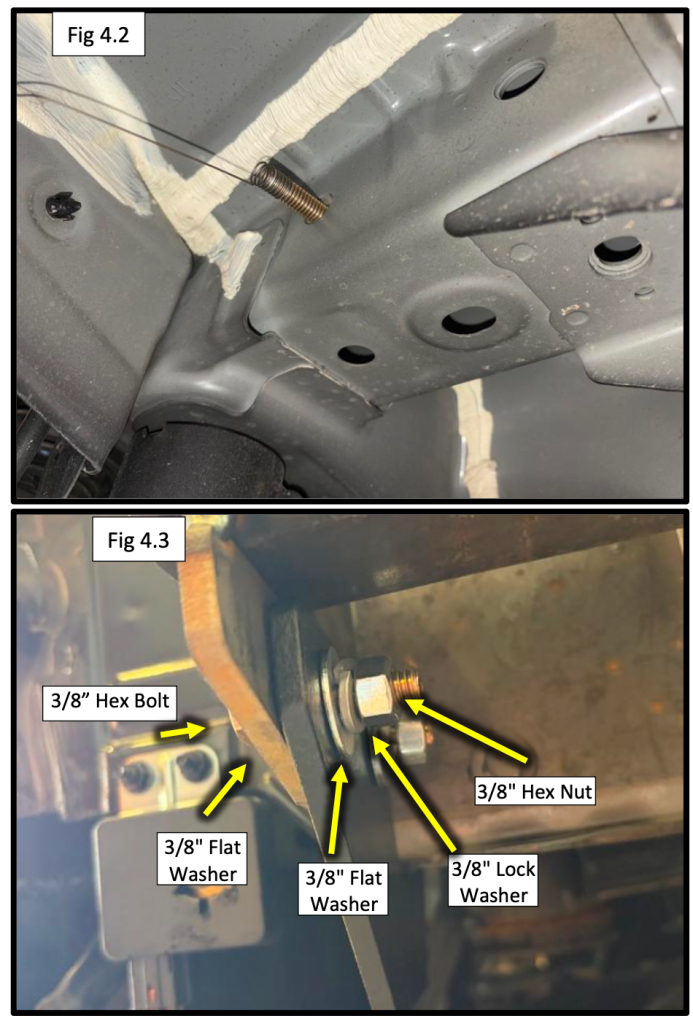
- Install the support strap over the bolt and secure using:
- 3/8” flat washer
- Split lock washer
- Hex nut
- Repeat this process for the rear hole and on the passenger side
Final Torque Specs:
- M8 hardware: 24 ft-lbs (34 Nm)
- 3/8" hardware: 30 ft-lbs (40.7 Nm)
Make sure everything is aligned before fully tightening.
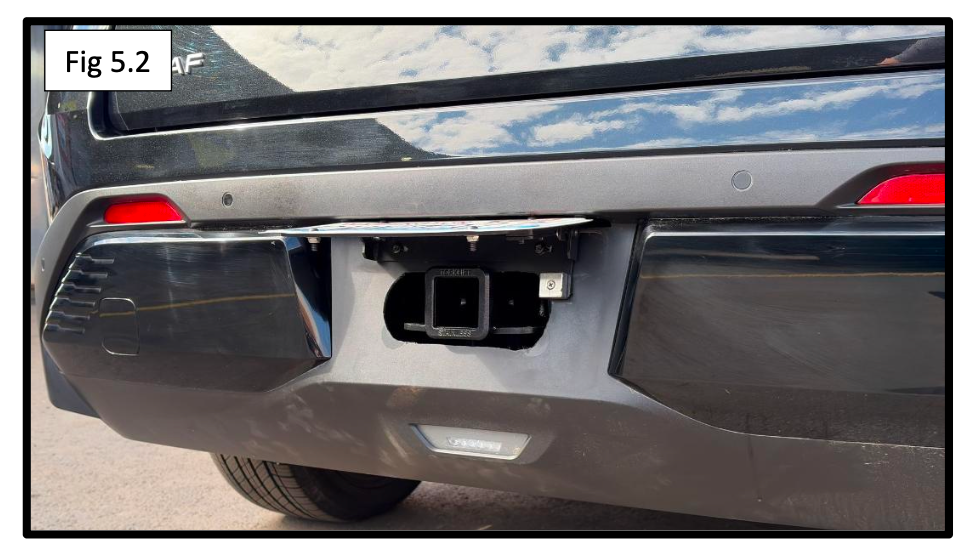
Step 5: Trim Bumper Opening & Install Flip Kit
Now for the finishing touch.
- Mark the center of the bumper under the license plate area
- Trim a receiver opening using a reciprocating saw
Dimensions:
- Approx. 6” wide x 3” tall (centered under plate area)
- Install the XA4000 License Plate Flip Kit over the opening so the plate flips upward
- This keeps the hitch hidden when not in use
Clean edges with a file or sandpaper for a factory look.

Step 6: Reinstall the Bumper
- Reinstall the bumper in reverse order:
- Reconnect all wiring harnesses
- Snap bumper back into place
- Reinstall screws, clips, and trim
- Reinstall taillights and reconnect wiring
- Test all lights (brake, signal, reverse)
Installation Complete
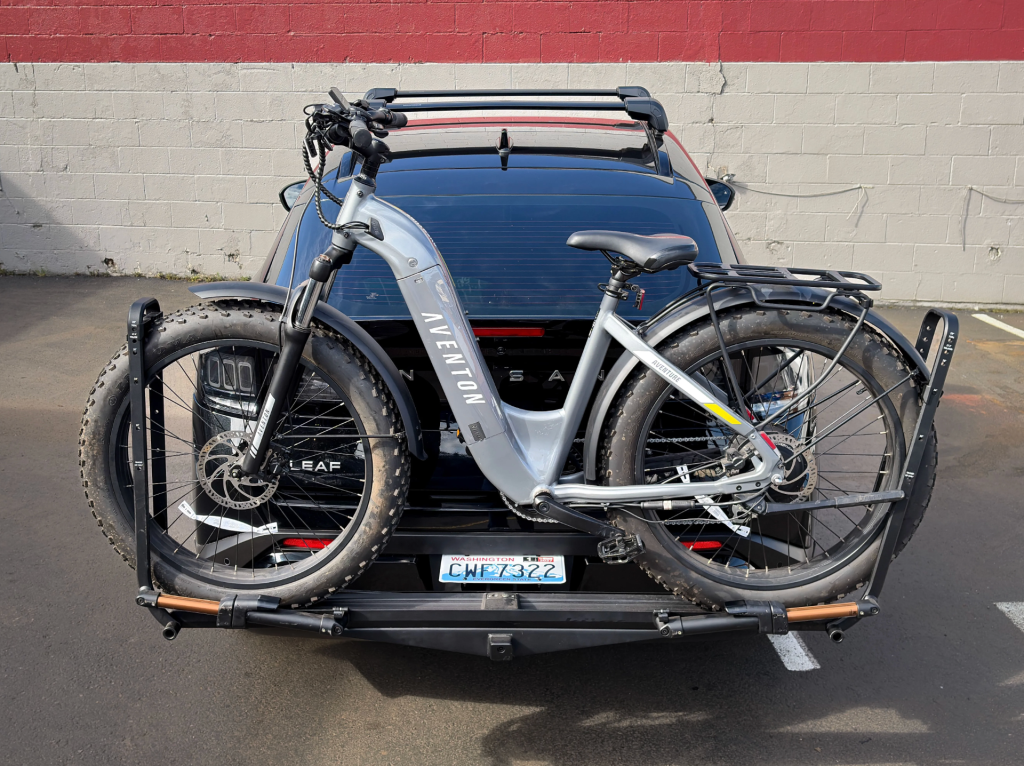
You’ve successfully installed the EcoHitch X5011S on your 2026 Nissan Leaf.
You now have a clean, concealed hitch solution that’s perfect for:
- Bike racks
- Cargo carriers
- Everyday utility