

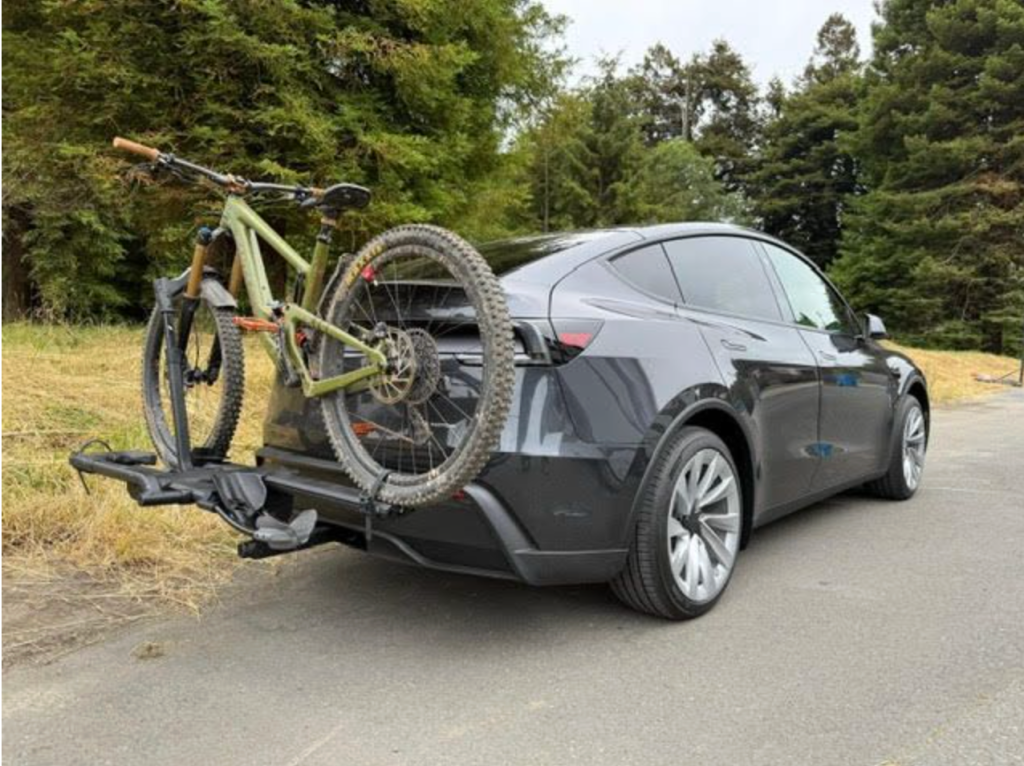
Step-by-step instructions from a pro installer
If you're ready to add towing or cargo capability to your 2026 Tesla Model Y, the EcoHitch X5006S is the best way to do it, designed to integrate seamlessly and sit completely hidden for a clean, factory-style finish. In this guide, we’ll walk you through the install process step by step, with a few pro tips to help make things easier.
Tools needed: Basic hand tools, torque wrench, flathead screwdriver or trim removal tool, and a lift or jack stands
Estimated time: =1–3 hours based on experience
Check out the detailed installation steps below or just watch the video:
Step 1: Raise the Vehicle & Remove Interior Trim Panels
To start, raise the rear of your Model Y using Tesla-approved lift points or ramps.
- Open the tailgate.
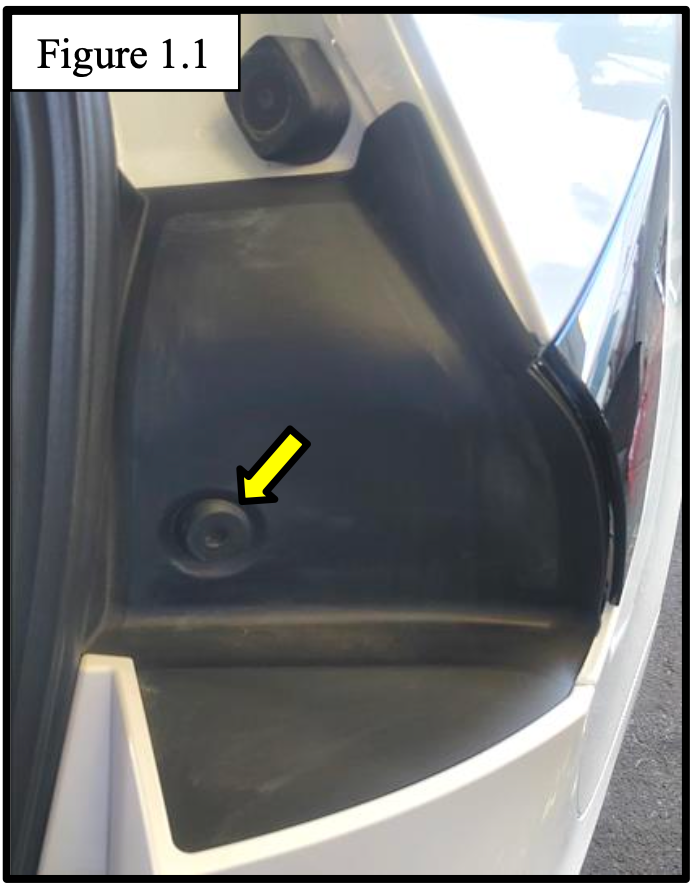
- Remove the round plastic plugs from the trim piece inside the trunk (Figure 1.1).
- Pop off the plastic trim panels from both sides.
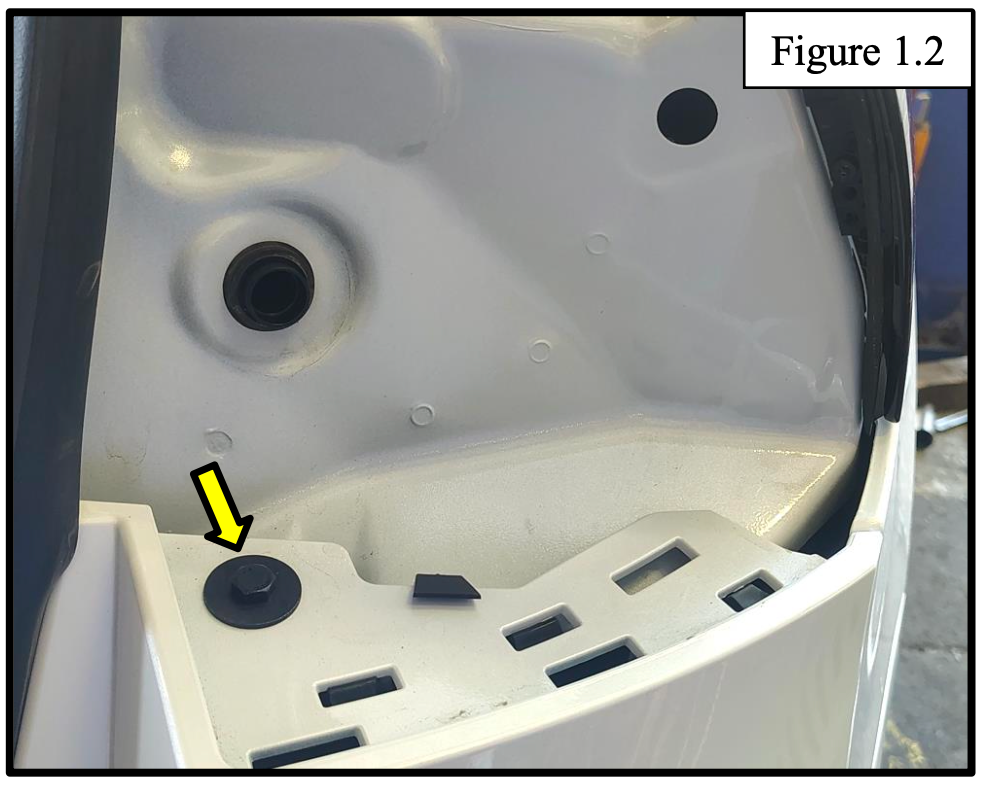
- Underneath those panels, remove the screws holding them in place (Figure 1.2).
Pro Tip: Keep all your hardware organized in labeled containers. Tesla loves pop pins, and you’ll need to reuse many of them later.
Step 2: Remove Bumper Hardware
Time to dive into the bumper details.
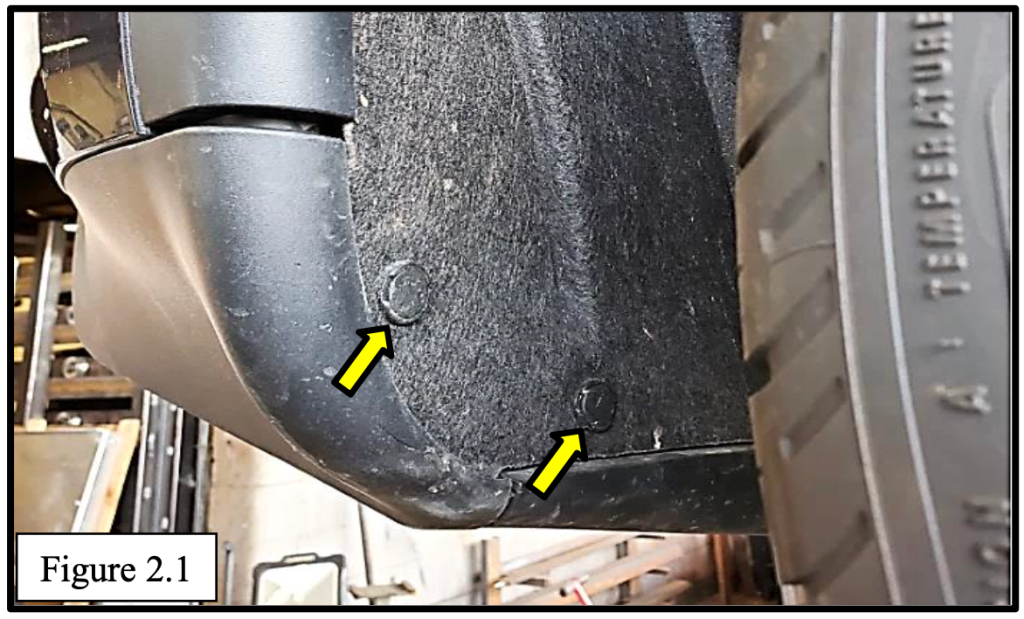
- On both wheel wells, remove two plastic pop pins (Figure 2.1).
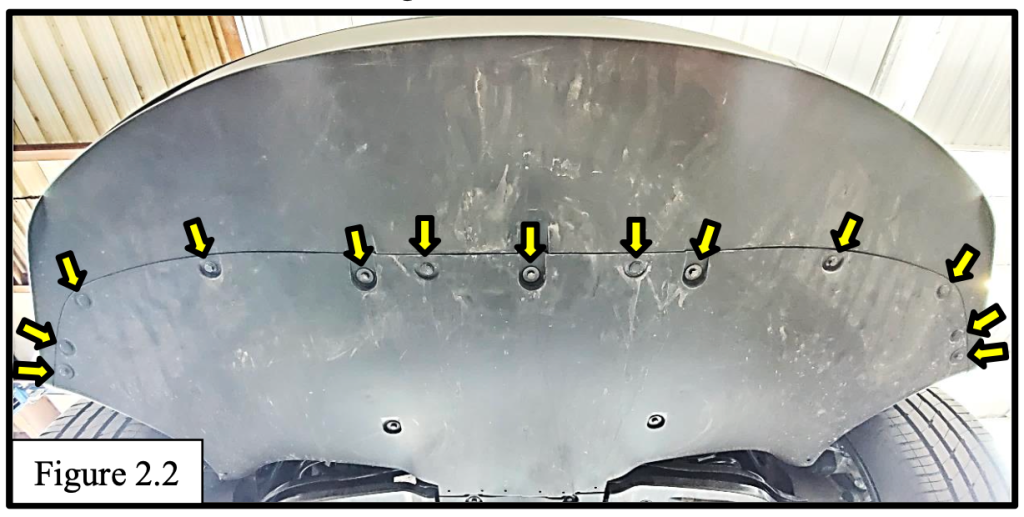
- Head under the bumper and remove all the plastic pins and bolts holding it to the underbody panel (Figure 2.2).
Step 3: Unclip the Fenders
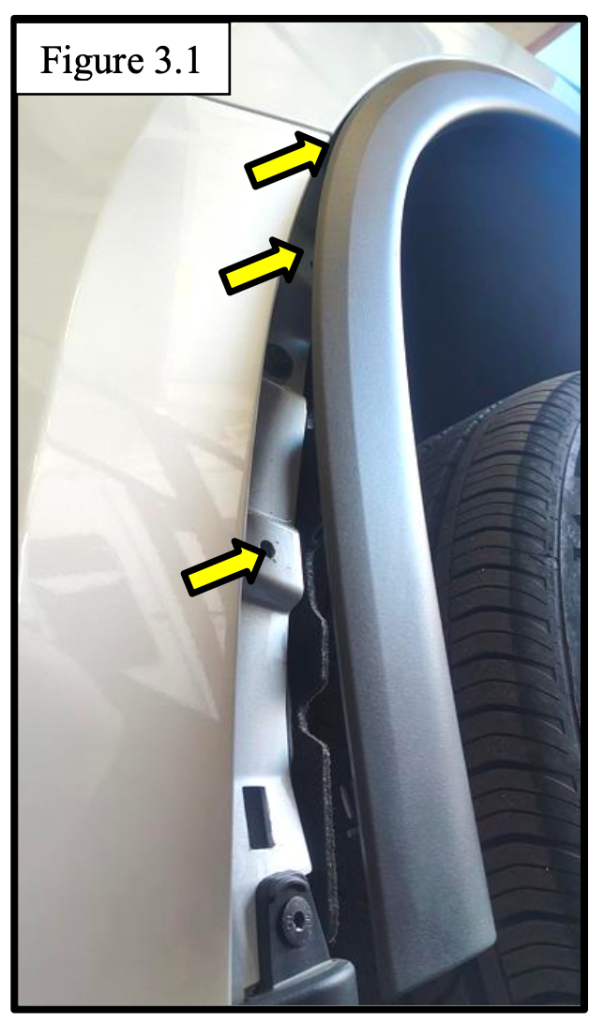
- Gently unsnap the wheel well fender trim to the third clip (Figure 3.1).
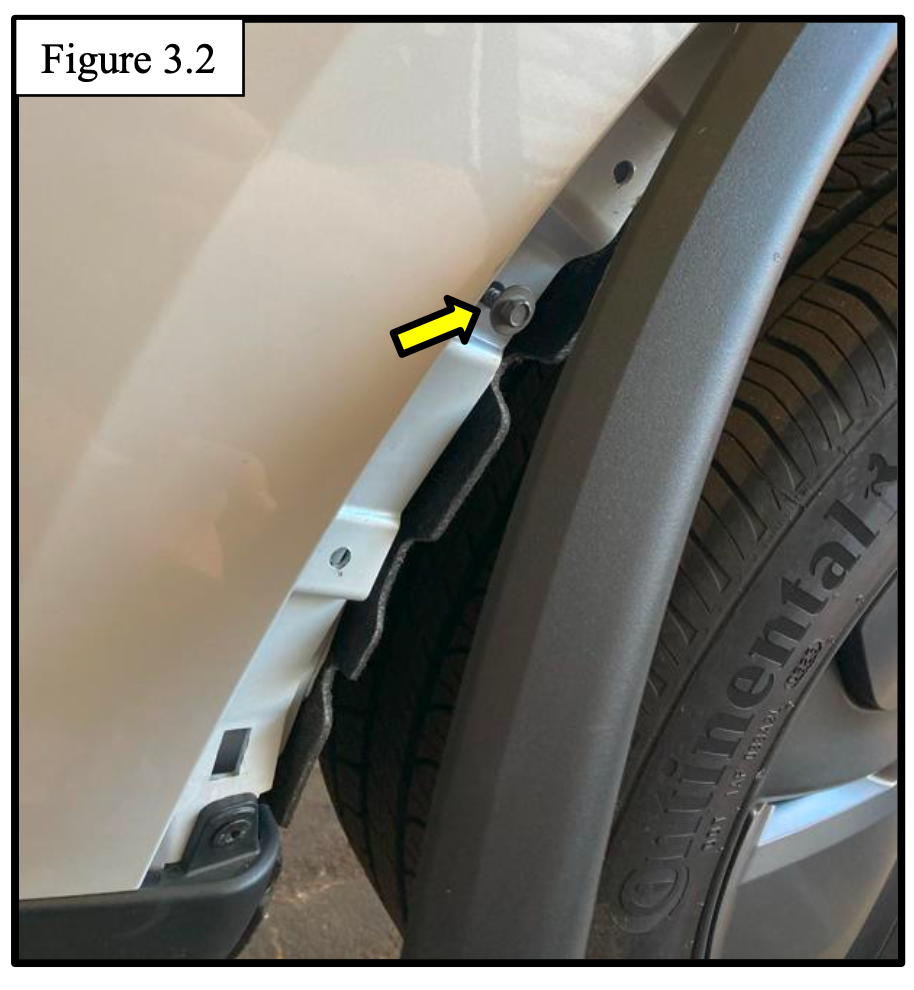
- Once loose, remove the bolt hidden behind the trim (Figure 3.2).
Take care here—Tesla trim can be snug and might need a bit of coaxing. Pry slowly and evenly to avoid damage.
Step 4: Remove the Rear Bumper
With everything unbolted:
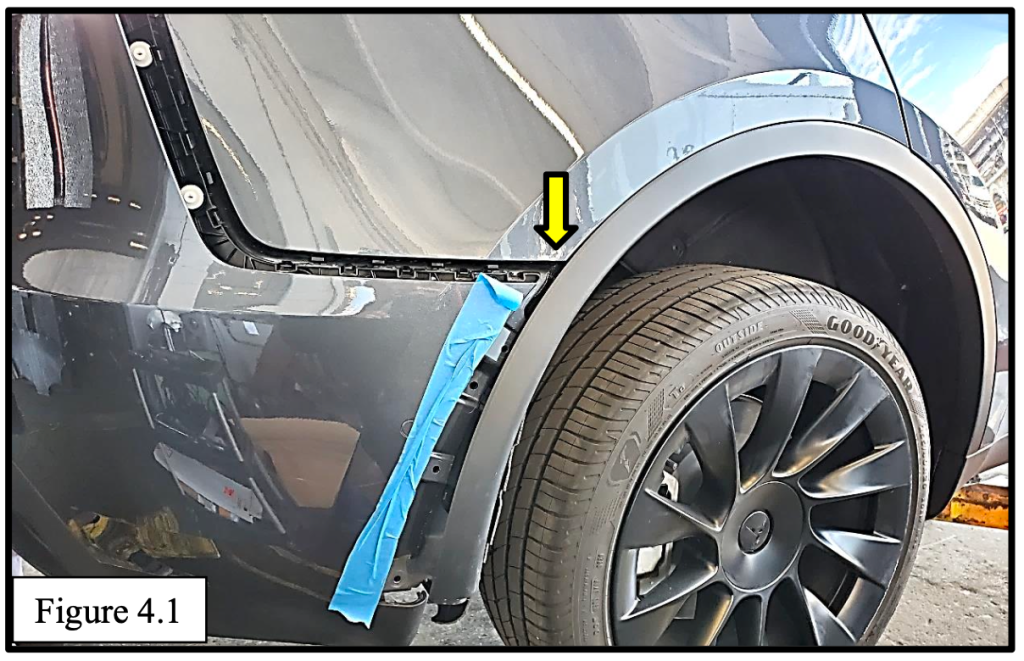
- Start from the top rear corners and carefully unclip the bumper fascia (Figure 4.1).
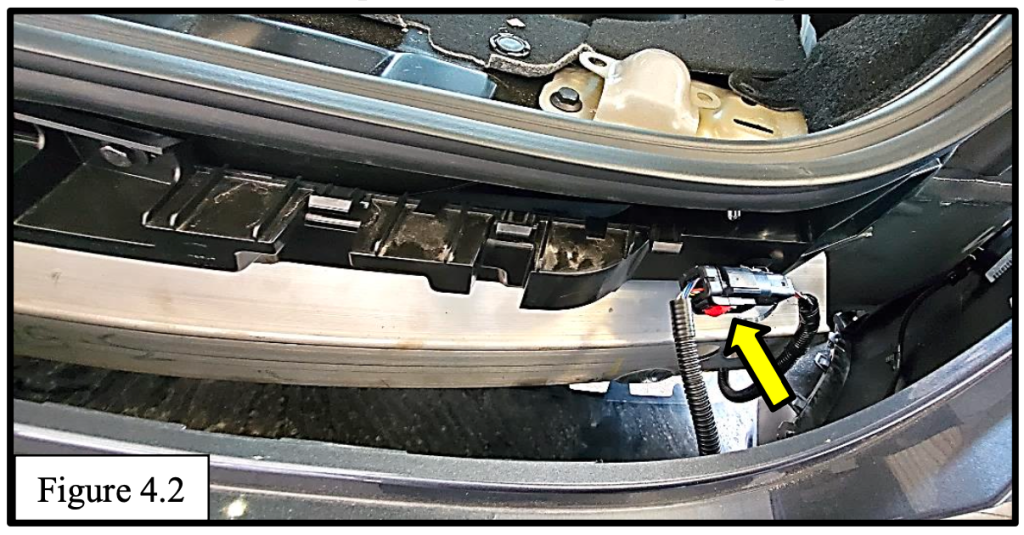
- Disconnect the passenger-side wiring harness to free the bumper (Figure 4.2).
- Store the bumper safely out of the way.
This is where that second set of hands is a lifesaver.
Step 5: Remove Tesla’s Crossmember
The factory crossmember needs to come out.
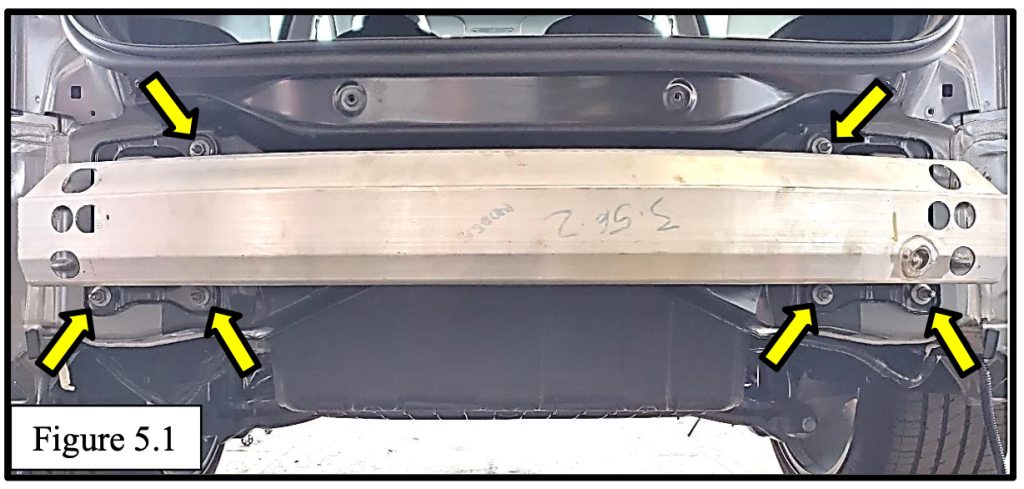
- Remove the nuts securing the crossmember brackets to the frame (Figure 5.1).
- Carefully remove the entire crossmember assembly.
Step 6: Separate the Crossmember Mounts
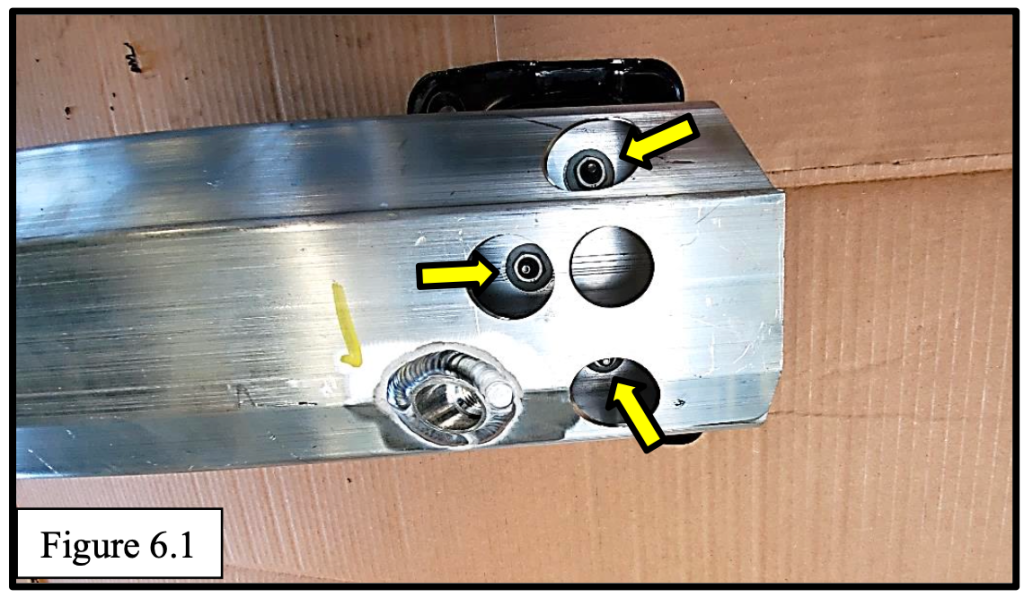
- Detach the crossmember from the mounting brackets (Figure 6.1).
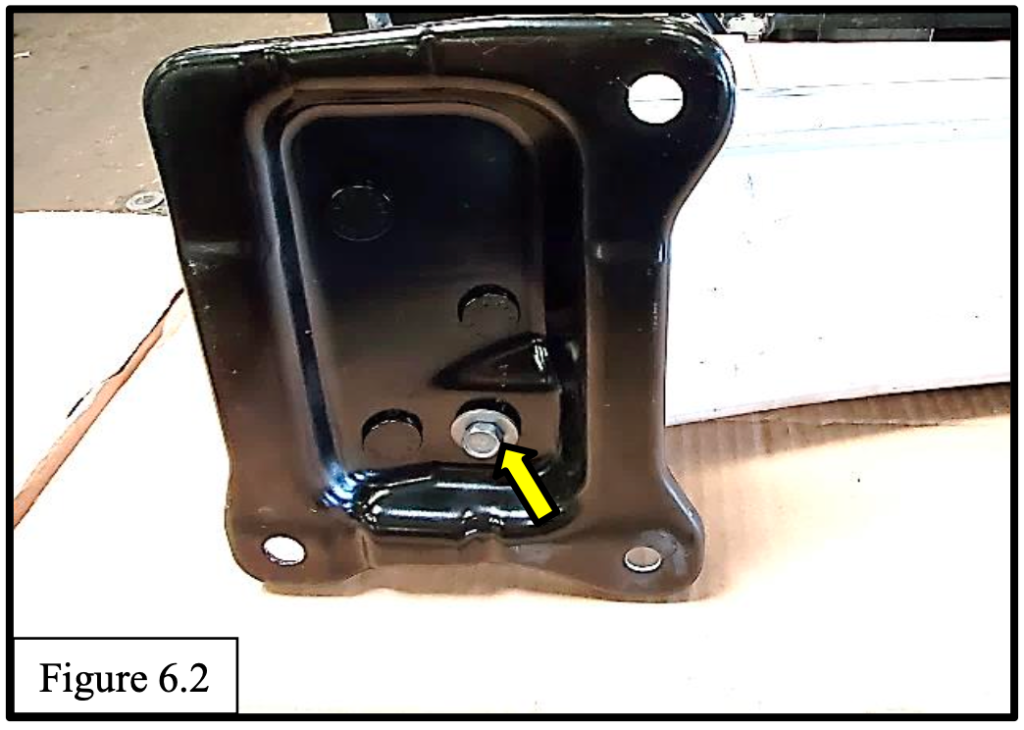
Also remove the bolt behind the passenger-side mount (Figure 6.2).
These won’t be reused in the EcoHitch install.
Step 7: Attach the Crossmember to the EcoHitch
Now we begin building the new assembly.
- Set the OEM crossmember over the hitch plate holes.
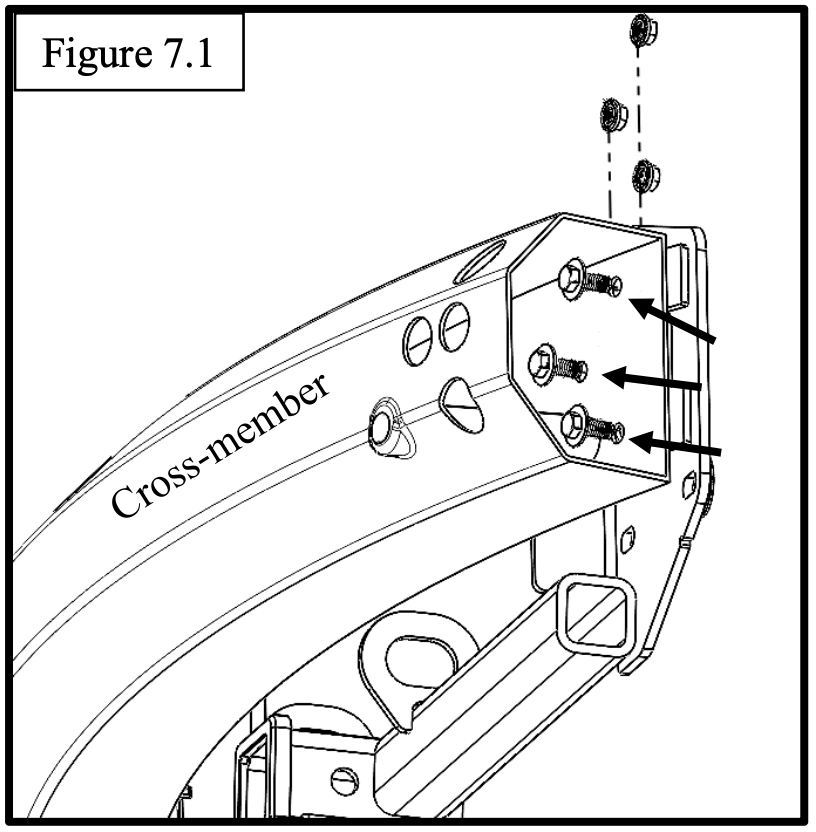
- Use the 3/8” x 1” bolts with flat washers and serrated flange nuts to fasten them together (Figure 7.1).
- Torque to 26 ft-lbs.
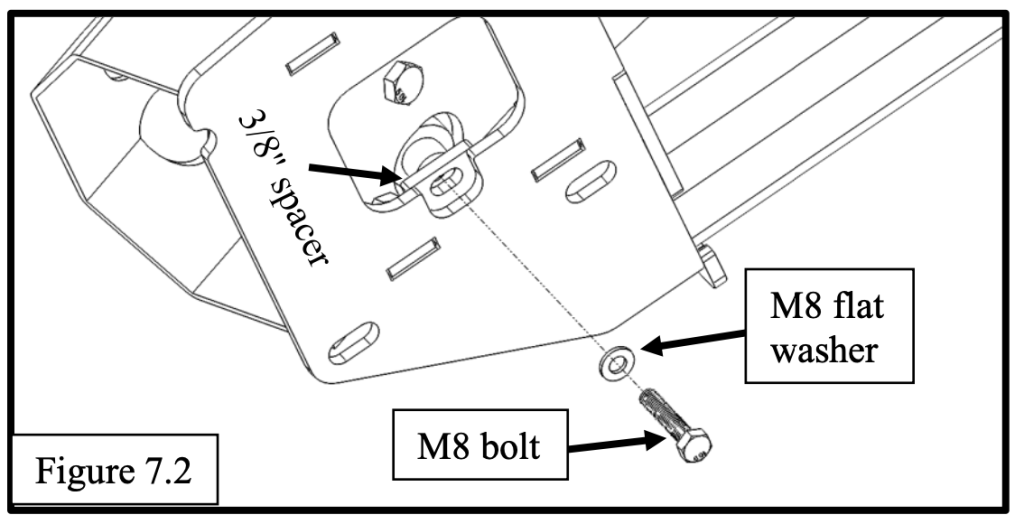
Next, thread an M8 x 40mm bolt with a washer through the passenger-side plate, a 3/8" spacer, and into the crossmember (Figure 7.2).
- Torque to 25 ft-lbs.
Step 8: Install the EcoHitch Assembly
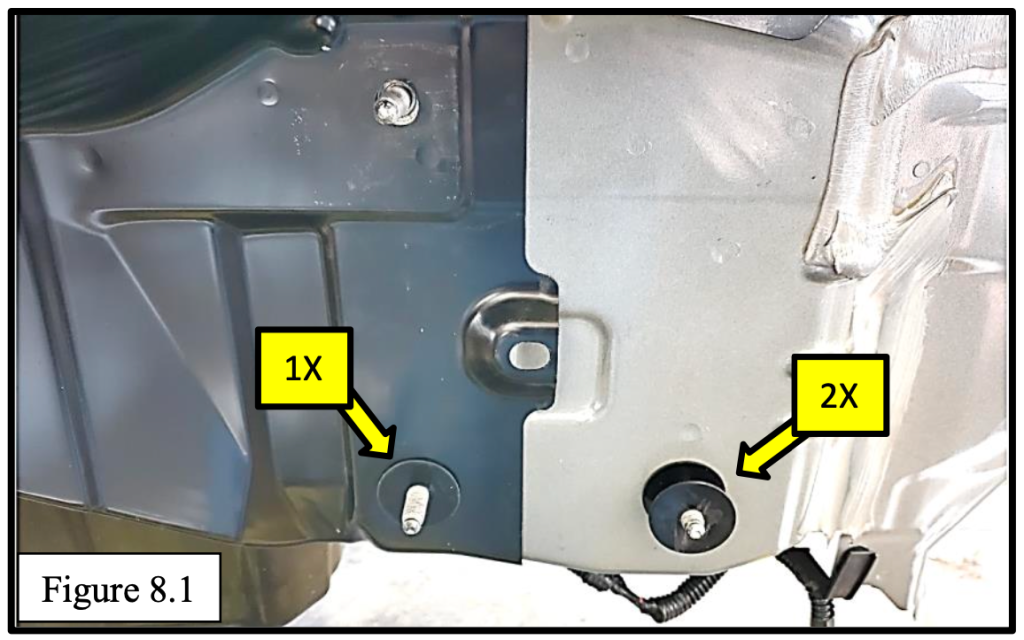
- Place two 3/8" nylon fender washers on the outer frame stud and one on the inner stud (Figure 8.1).
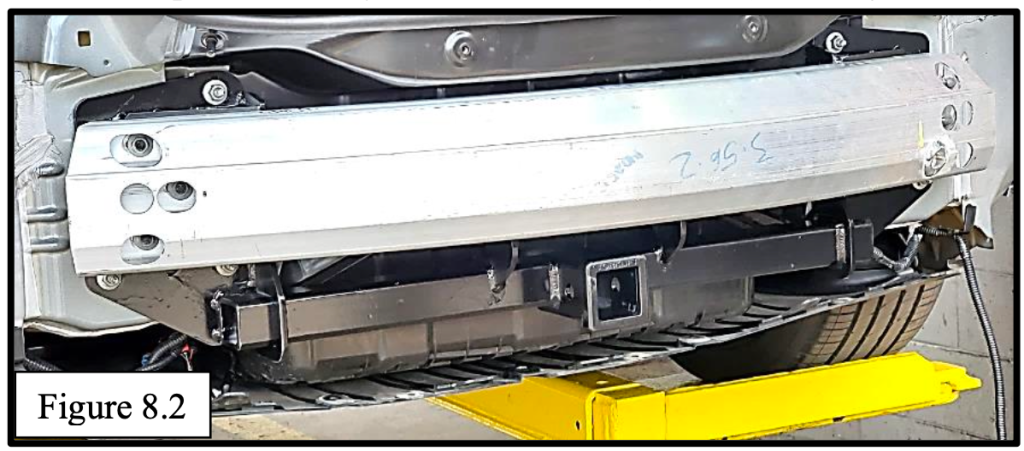
- Lift the EcoHitch assembly into place and center it.
- Reinstall the factory nuts removed in Step 5 and torque to 38 ft-lbs. (Figure 8.2)
Step 9: Reinstall the Bumper and Wrap Up
- Reconnect the wiring harness.
- Snap the bumper fascia back into place using the same reverse order.
- Double-check taillight functions—better safe than sorry.
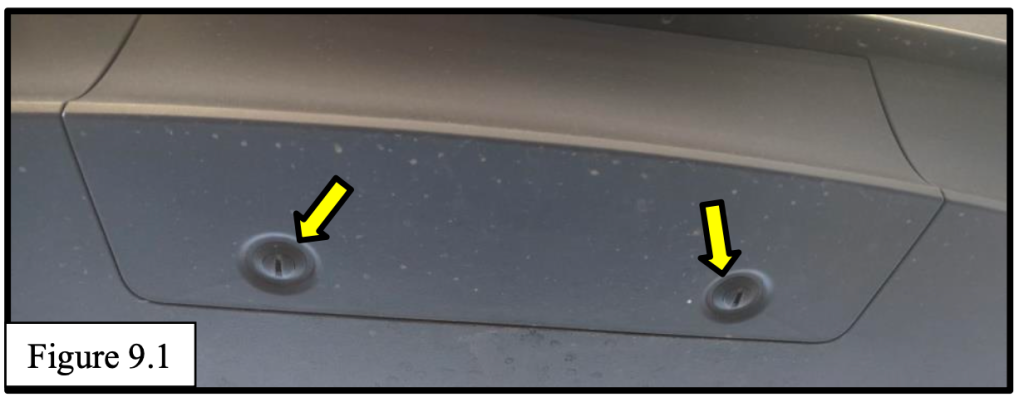
Remove the plastic insert panel covering the receiver (Figure 9.1). Just twist and pull.
Final Thoughts from the Shop Floor
You did it! The EcoHitch is now installed, and your Tesla Model Y is ready for bike racks, cargo trays, and more. This isn’t your average hitch install, it’s a sleek, stainless steel solution designed to keep your vehicle clean and your accessories level.
If you're a DIY enthusiast, this job is absolutely doable with patience and the right tools. But if you prefer a professional install, remember you can also locate a Certified Torklift Installer near you.
Watch the Installation Video
Want to see the process step by step? Watch our professional install video here:
We walk you through every step visually, so you can follow along with full confidence.