

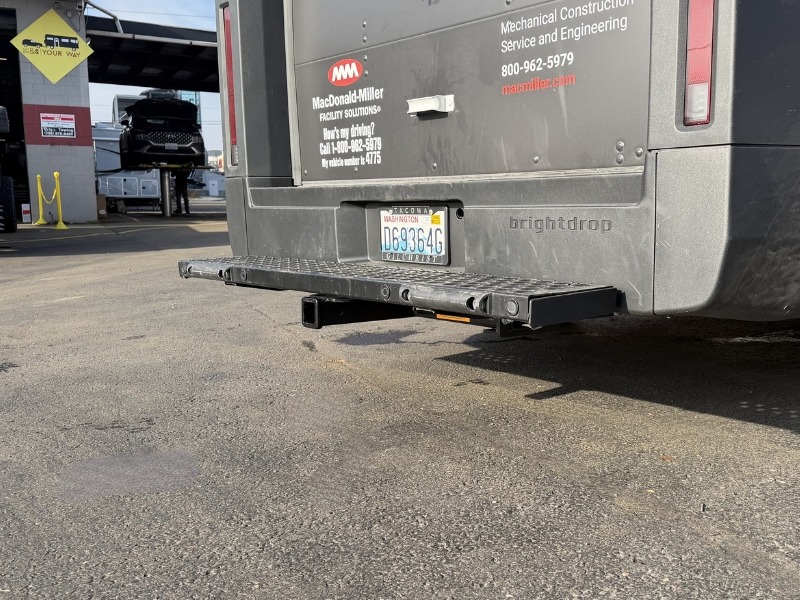
The EcoHitch X7524S was designed specifically for the Chevy BrightDrop EV, giving fleet operators and owners a reliable hitch solution for cargo carriers, racks, and light towing. While the BrightDrop platform is unique, the installation process is very manageable when broken into clear steps.
Below is a step-by-step walkthrough based on our shop installation process. Take your time, keep your hardware organized, and you’ll have your hitch installed and ready to work in no time.
Before You Begin
Before starting the installation, make sure you have the proper tools ready.
Recommended Tools
- Socket set (including 15mm socket)
- Torque wrench
- Drill with 17/32" drill bit (BrightDrop 400 only)
- Marker
- Bolt fisher (included with the hitch kit)
- Jack or vehicle lift (if additional working room is needed)
Always work safely and make sure the vehicle is securely parked with the parking brake engaged.
Step 1: Prepare the Frame Area
The preparation step is slightly different depending on whether you're installing on a BrightDrop 600 or BrightDrop 400.
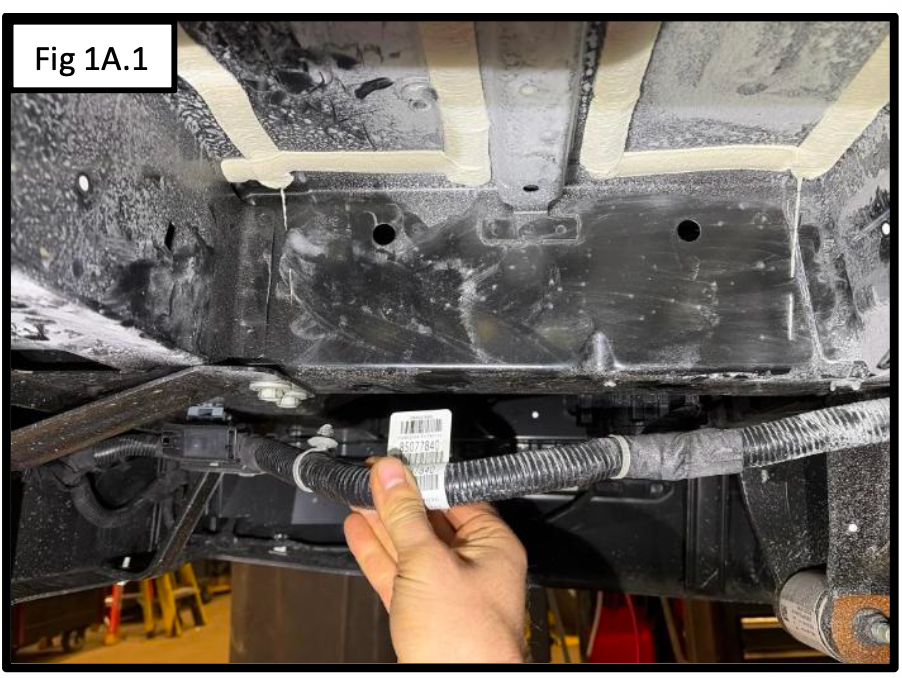
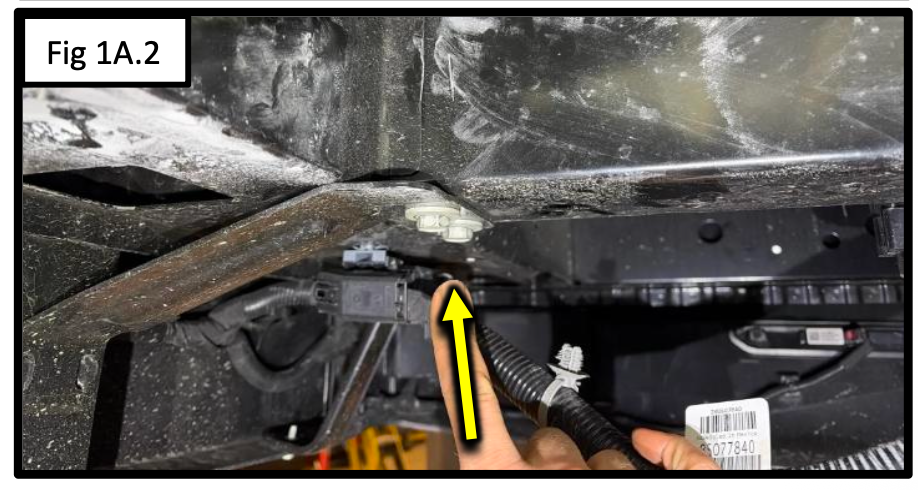
BrightDrop 600
- Lower the spare tire to create working room.
- On the driver side, detach the wire harness from the bottom of the frame.
- Remove the two 15mm bolts from the bottom frame bracket.
- Repeat the same bolt removal on the passenger side.
BrightDrop 400
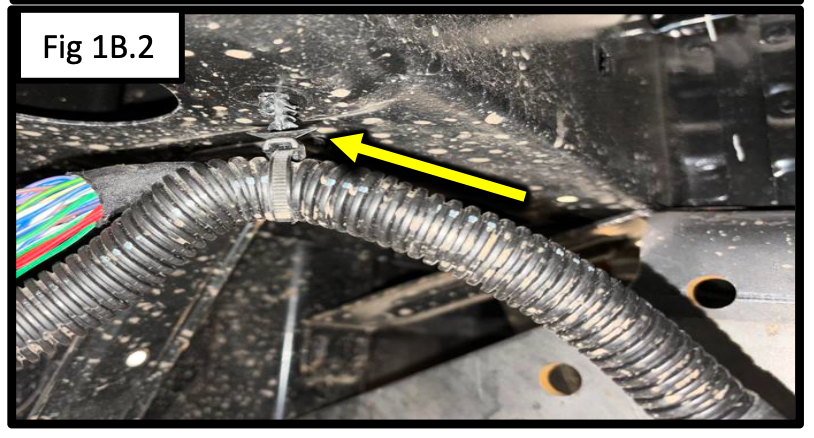
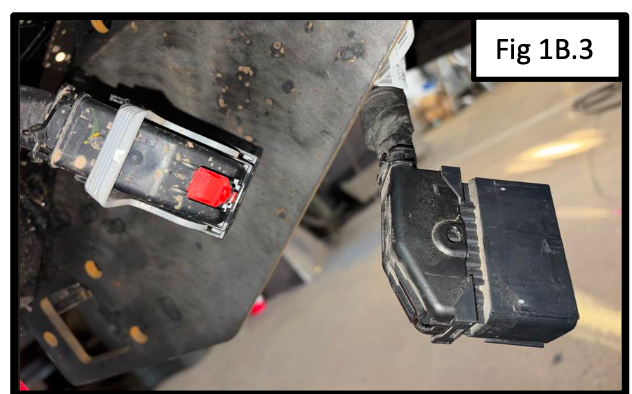
- On the driver side, detach and unplug the wire harness from the bottom of the frame.
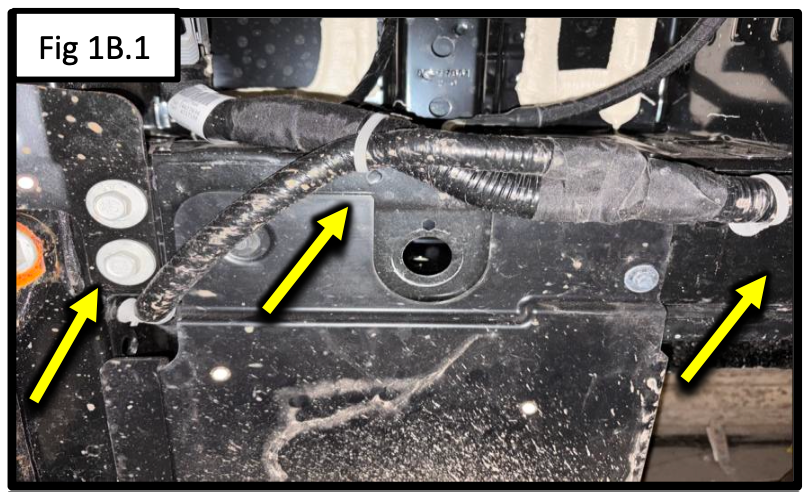
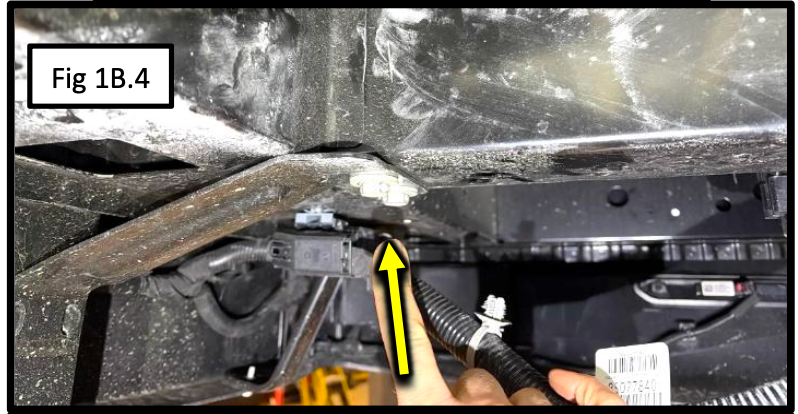
2. Remove the two 15mm bolts from the bottom frame bracket.
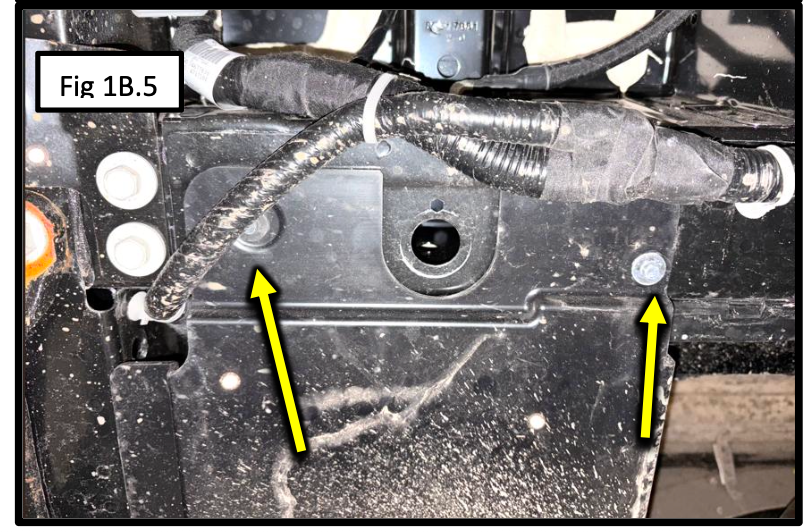
3. Repeat the process on the passenger side.
4. Remove the plastic cover on the driver side. This cover will not be reinstalled.
Step 2: Mark and Drill Frame Hole (BrightDrop 400 Only)
If you're installing on the BrightDrop 400, an additional mounting hole must be drilled.
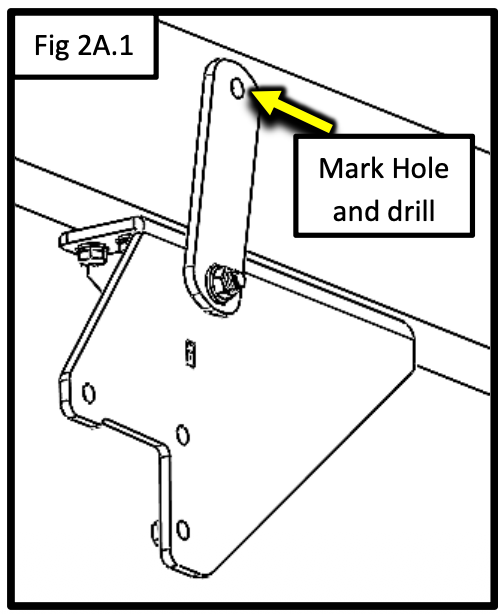
- Attach the driver side frame plate using the factory bolts removed earlier and snug them down.
- Temporarily attach the support strap to the frame plate with a 1/2" bolt and nut.
- Press the strap against the frame, angling slightly toward the front of the vehicle.
- Mark the top mounting hole location.
- Remove the frame plate and strap.
- Drill the marked hole using a 17/32" drill bit.
This drilled hole will become Hole A for the next step.
Step 3: Fish the Frame Hardware
Using the included bolt fisher, install the mounting hardware inside the frame.
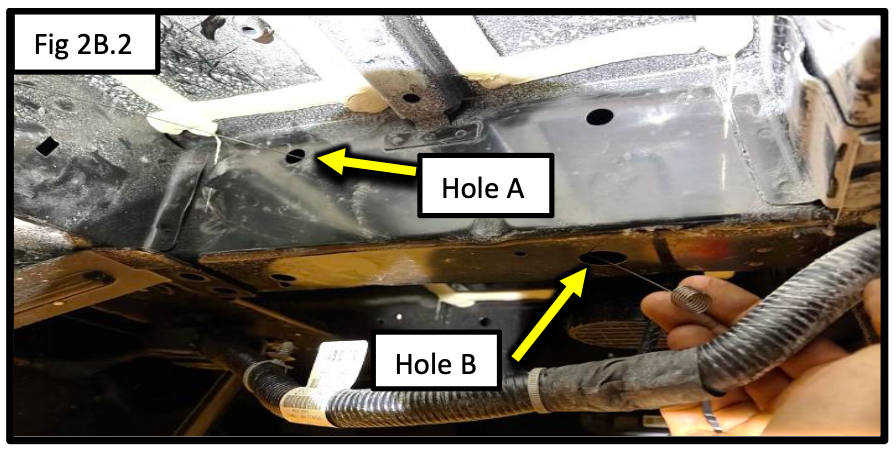
- Insert the coiled end of the bolt fisher through Hole A and guide it out through Hole B.
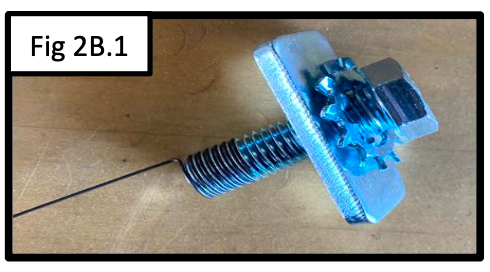
- Attach the following hardware to the bolt fisher:
- 1/2" x 2" bolt
- Inner tooth lock washer
- 1" x 2" plate washer
- Pull the bolt fisher to draw the hardware through the frame so the bolt exits Hole A.
Feed the hardware pieces one at a time through Hole B if necessary.
Step 4: Install the Support Straps
- Remove the bolt fisher.
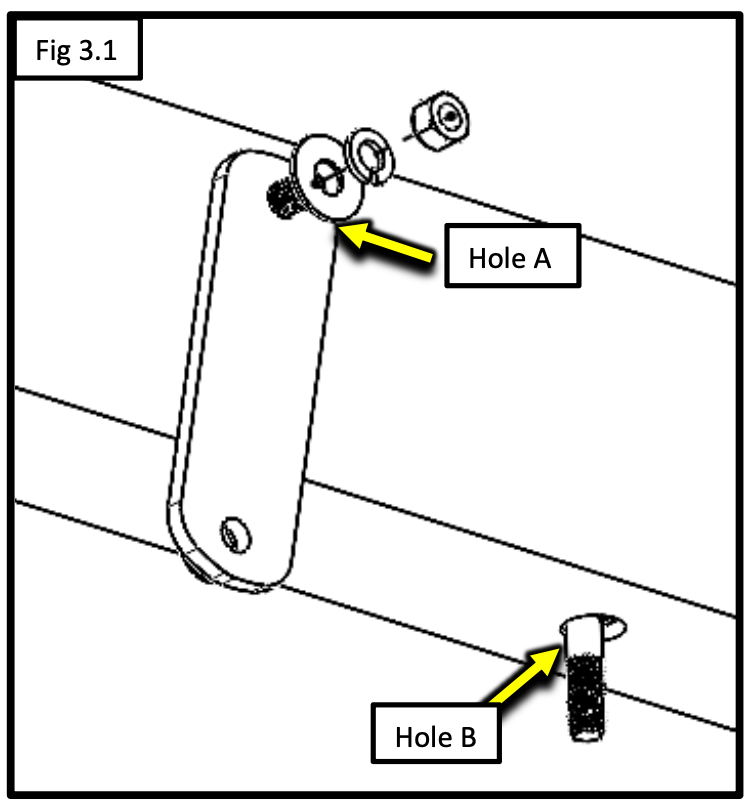
- Attach the support strap using:
- 1/2" flat washer
- 1/2" split lock washer
- 1/2" hex nut
- Leave the hardware loose for adjustment.
Next, fish another 1/2" x 2" bolt through Hole B using the bolt fisher and repeat the process on the passenger side.
Step 5: Install the Frame Plates
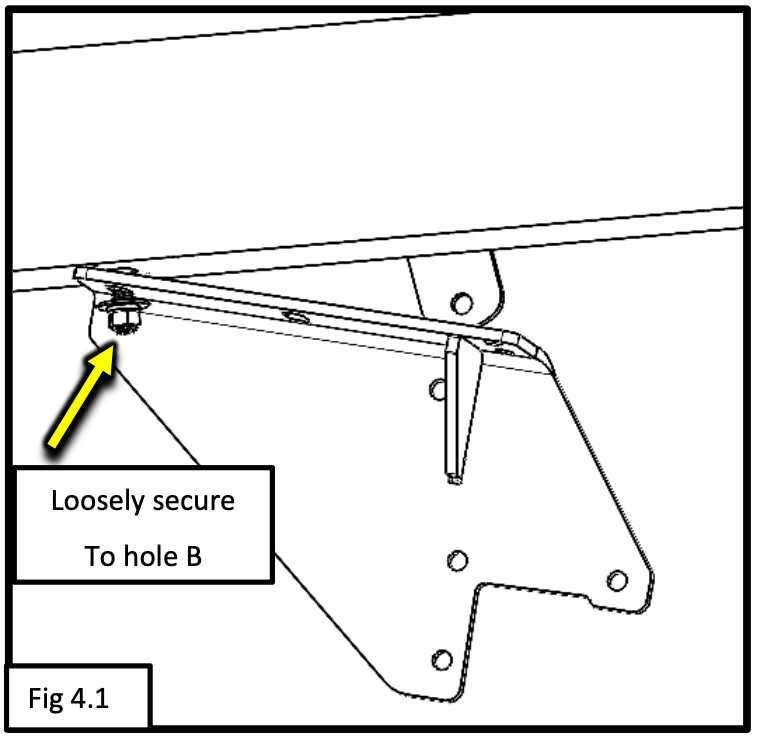
- Hang the driver-side frame plate onto the bolt protruding from Hole B.
- Secure loosely using:
- 1/2" flat washer
- 1/2" split lock washer
- 1/2" hex nut
Repeat this process on the passenger side.
Keeping the hardware loose at this stage will make the hitch installation easier.
Step 6: Install the Hitch Cross Tube
Now it's time to raise the hitch into position.
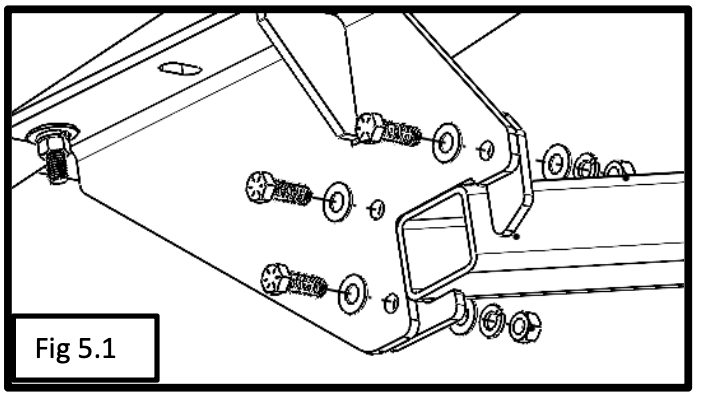
- Lift the cross tube into place between the frame plates.
- Install three 1/2" x 1-1/2" bolts per side through the cross tube and frame plates.
- Secure each bolt with:
- 1/2" flat washer
- 1/2" split lock washer
- 1/2" hex nut
Next:
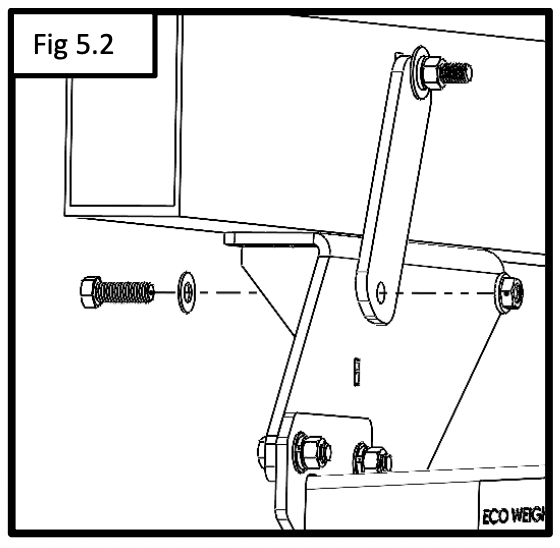
- Rotate the hitch upward into its final position.
- Attach the frame plates to the support straps using:
- 1/2" x 1-1/2" bolts
- Serrated flange nuts
Step 7: Install Factory Frame Bolts
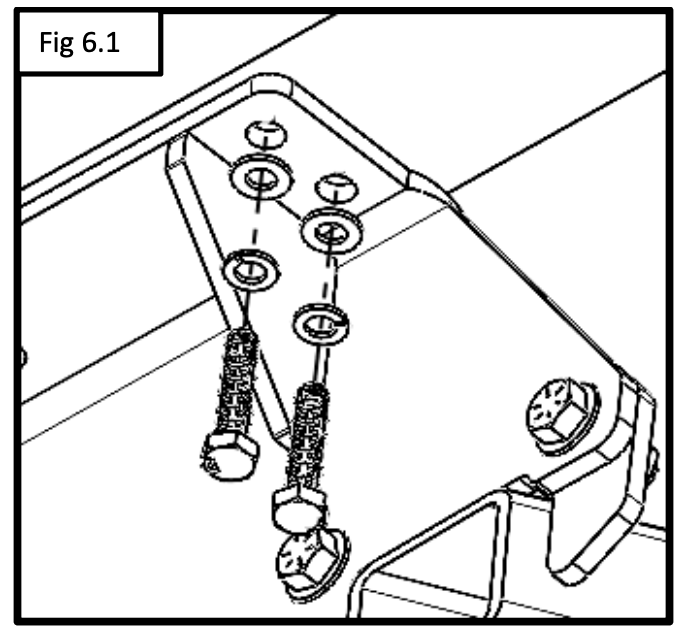
Install the provided M10 bolts into the factory holes in the frame using:
- M10 split lock washers
- Flat washers
Step 8: Tighten and Torque Hardware
Once everything is aligned, tighten the hardware in the following order:
- Tighten the six 1/2" bolts connecting the cross tube to the frame plates.
- Tighten the four metric bolts in the bottom of the frame.
- Tighten the forward 1/2" bolts in the bottom of the frame.
Final Torque Specs
- 1/2" hardware: 64 ft-lbs (86 Nm)
- M10 hardware: 50 ft-lbs (67 Nm)
Installation Complete
Your EcoHitch X7524S is now installed and ready to work with your Chevy BrightDrop EV.
This hitch gives your BrightDrop the versatility to support cargo carriers, racks, and other hitch-mounted accessories, helping fleet vehicles handle more jobs with fewer trips.
Take a moment to double-check all hardware torque and wiring clearances before putting the vehicle back into service.