

Ready to transform your Subaru into a hauling hero? We’ve got your back (or rather your rear) with this step-by-step guide on how to install the 2024 Subaru Impreza Hatchback trailer hitch by EcoHitch®! With meticulous attention to detail and a bit of elbow grease, you’ll successfully install the Subaru Impreza hatchback EcoHitch®. Let’s delve into this step-by-step process.
Step 1:
- Chock the front wheels. Trust me, we don’t want your car taking off without you.
- Raise the rear of the vehicle and place it on jack stands.
Note: If using a hoist/lift, utilize the Subaru approved lifting points. Safety first because crushed mechanic is not a good look.
Step 2:
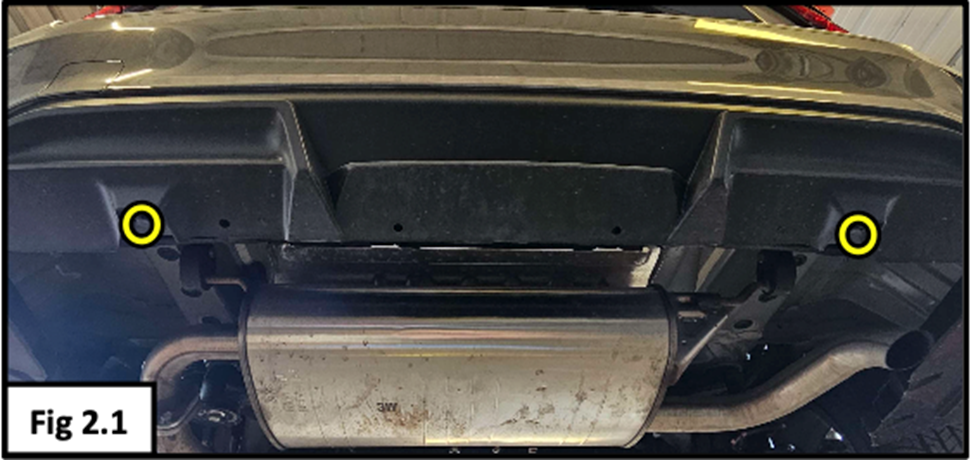
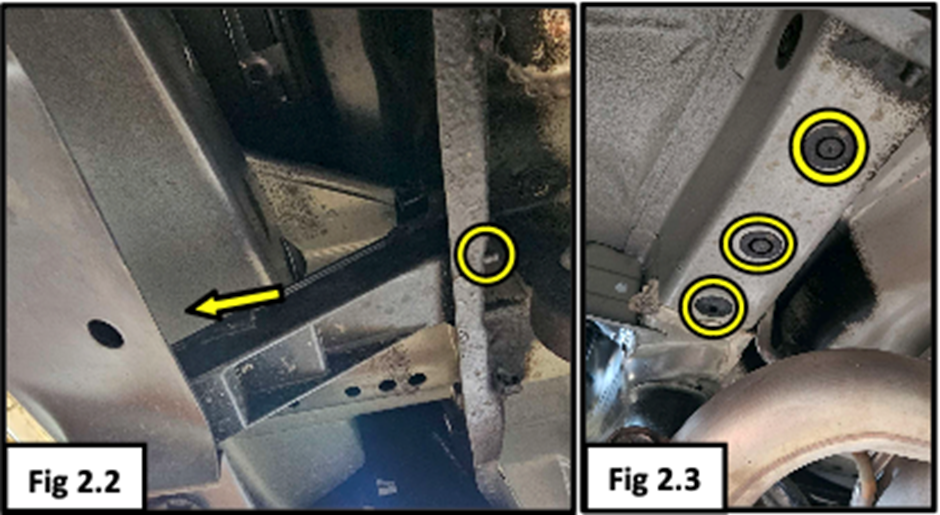
- Remove the two clips on the bottom bumper panel. Shown in Figure 2.1 and 2.2.
- Unfasten the screw located above the plastic bracket using an M10 socket. See Figure 2.2.
- Remove the rubber covers located under the frame as shown in Figure 2.3.
- Repeat the previous step on the other side of the vehicle. Yes, both sides need attention.
Step 3:
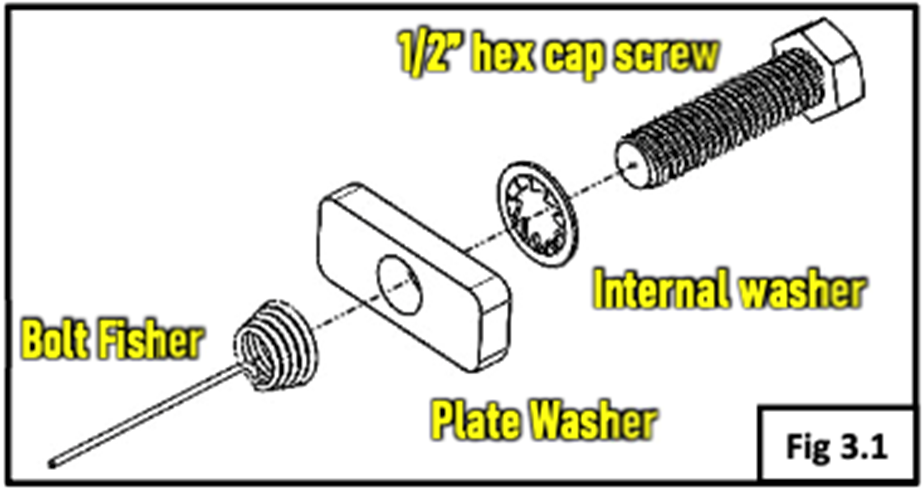
- Place a 1/2” Internal Lock Washer followed by a Plate Washer on the threaded end of a 1/2” x 1-1/2” Hex Bolt. It’s like dressing your bolt for a night out. Then thread a bolt fisher onto the prepared bolt. See fig 3.1.
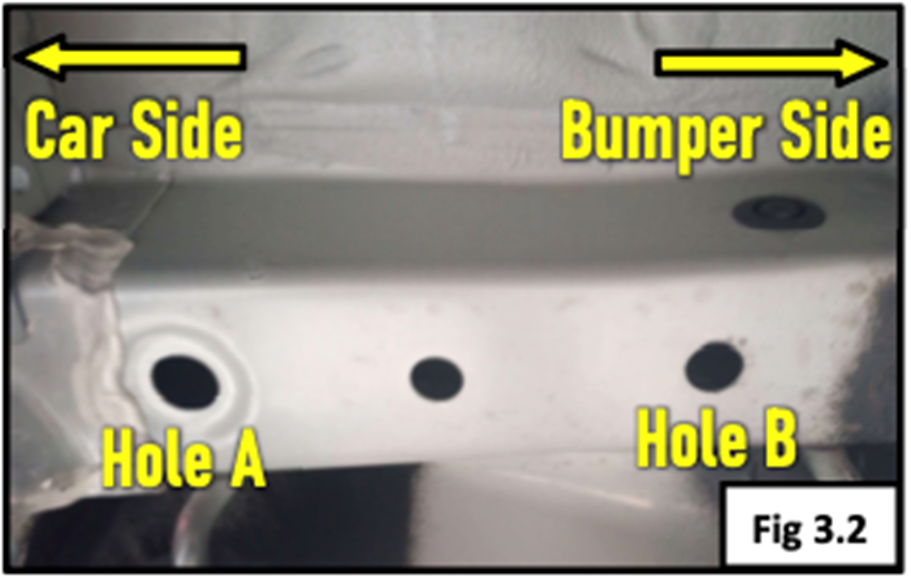
- Insert the assembly into hole A and fish it out from hole B. shown in fig 3.2

- Remove the bolt fisher and reuse with the remaining bolts.
- Prepare another bolt the same way.
- Insert the assembly into hole A one piece at a time and fish back out from hole A. The result should look like the one shown in fig 3.3.
Step 4:
- Repeat steps 2 and 3 on the other side of the vehicle so that all four bolts are hanging down through the frame.
Step 5:
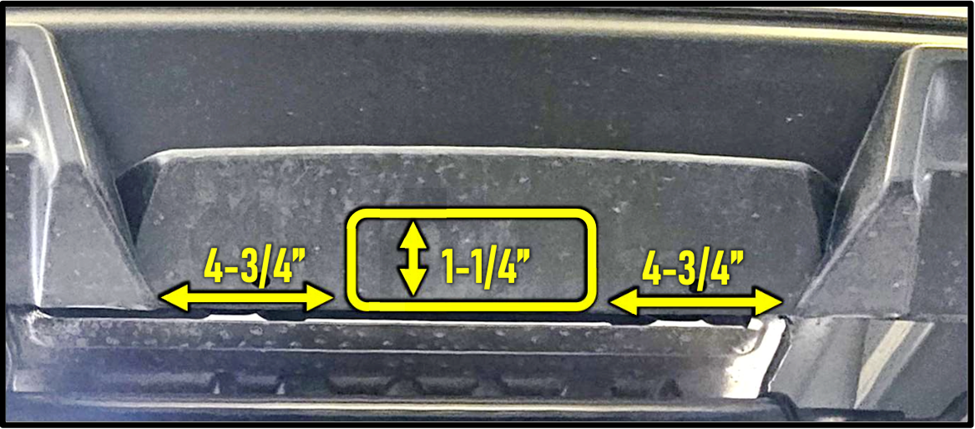
- Cut off the highlighted sections from the back of the bottom bumper panel using a reciprocating body saw. See Fig. 5.1. Precision is key, so channel your inner sculptor.
Step 6:
- Align the side plates of the hitch with the bolts hanging down. Think of it as matchmaking for car parts.
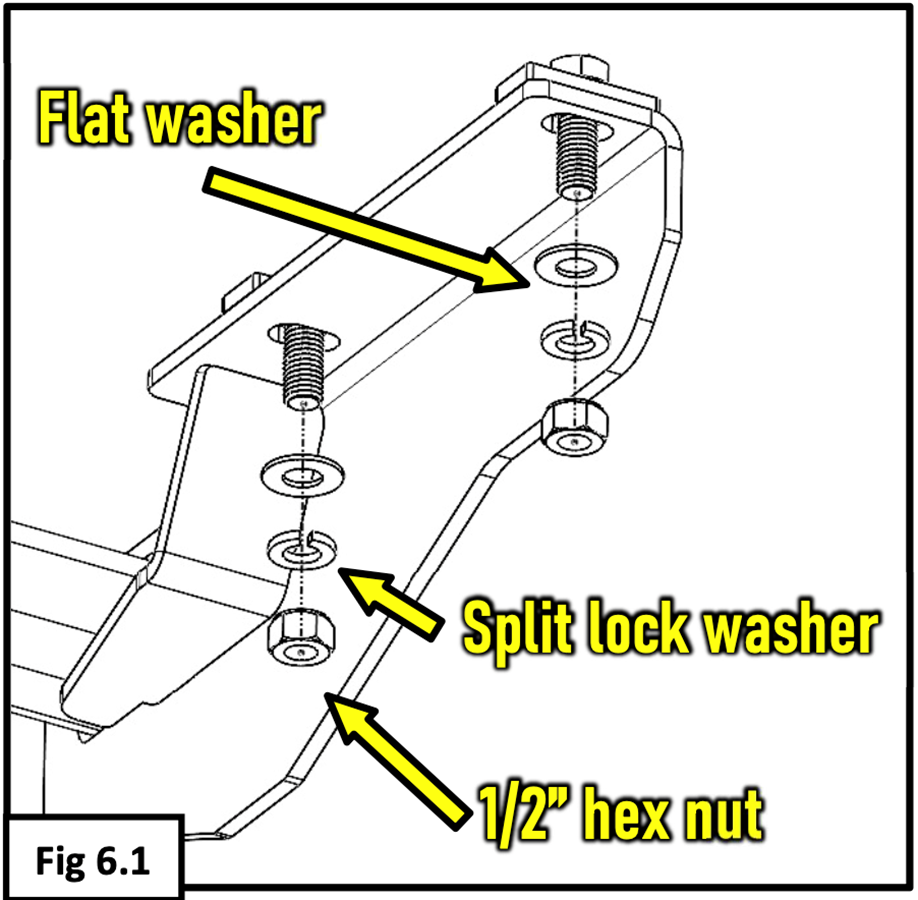
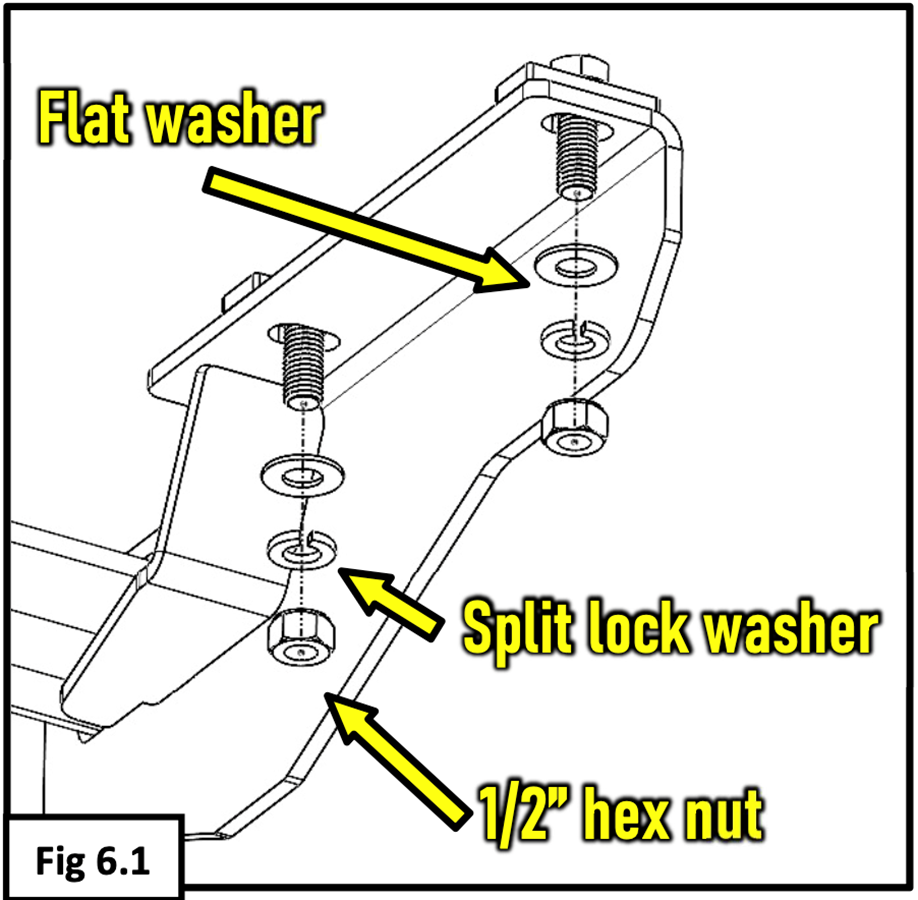
- Secure the hardware with a 1/2” flat washer, 1/2” split lock washer, and 1/2” hex nut. Tighten it like you’re hugging a long-lost friend. See figure 6.1.
- Center the hitch and torque the 1/2” bolts to 90ft-lbs (130Nm). Use your inner Hulk here, but don’t overdo it.
Step 7:
- Insert 3/8” hex cap screws with a 3/8” flat washer to the brackets underneath the crosstube and the attachable bumper brackets. These screws are the unsung heroes of your hitch setup.
- Fasten each bracket with a 3/8” nylock hex nut and flat washer. See figure 7.1. Nuts, washers, screws—they’re like the Avengers of your car’s underbelly.
Step 8:
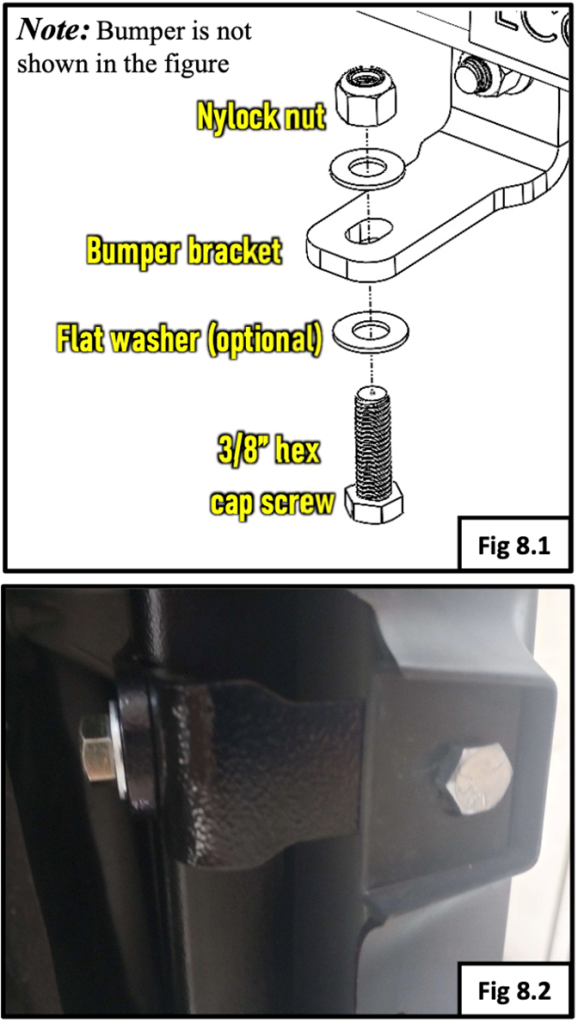
- Replace the removed clip in step 2, by inserting 3/8” hex cap screws (with 3/8” flat washers - optional) to the bottom holes on the bumper. It’s the final touch, like putting a cherry on top of your hitch sundae.
- Fasten the hardware with 3/8” nylock hex nuts and flat washers. See figures 8.1 and 8.2.
- Snug the bolts so the bumper is secure. Do not overtighten. Think Goldilocks here—not too tight, not too loose, just right.
Congratulations! You've successfully installed the 2024 Subaru Impreza Hatchback EcoHitch®. With this sleek addition, your Impreza is now ready to tackle any towing challenge with ease and style. Visit https://torkliftcentral.com/subaru-impreza-hatchback-trailer-hitch-stainless-steel-by-ecohitchr and get yours today. For further inquiries or assistance, feel free to reach out to our expert team. Happy trails!