

Ready to transform your Tesla into a hauling hero? We’ve got your back (or rather your rear) with this step-by-step guide on how to install the 2024 Tesla Model 3 trailer hitch by EcoHitch®! With meticulous attention to detail and a bit of elbow grease, you’ll successfully install the Tesla Model 3 EcoHitch®. Let’s delve into this step-by-step process.
Step 1:
- Chock the front wheels. Because rolling away mid-installation is a little too much excitement.
- Raise the rear of the vehicle and place it on jack stands. You’re going to want to keep that car suspended and your toes intact.
Note: If you’ve got access to a hoist/lift, make sure to use the Tesla-approved lifting points. Wouldn’t want Elon to disapprove.
Step 2:
- Open the trunk and unscrew the two plastic bolts holding the trim pieces. See fig 2.1-2.2.
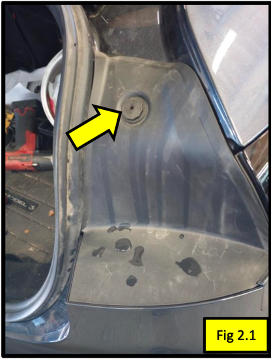
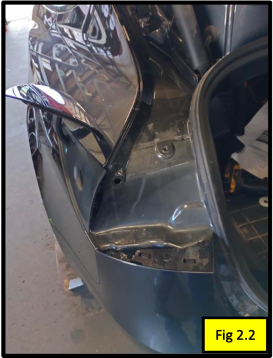
- Remove the trim pieces and set them aside. Somewhere safe, where they won’t mysteriously disappear.
Note: For ease of access, you might want to raise the charging port shield. See fig 2.3.
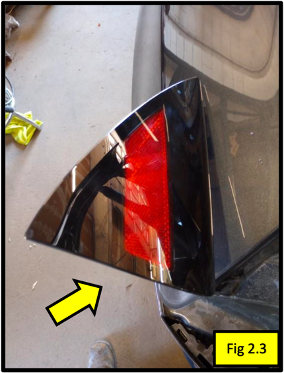
Step 3:
- Remove the two bolts shown in Fig 3.1-3.2 and set them aside. Don’t worry, you’ll need them later, so resist the urge to toss them in the “random bolts” drawer.
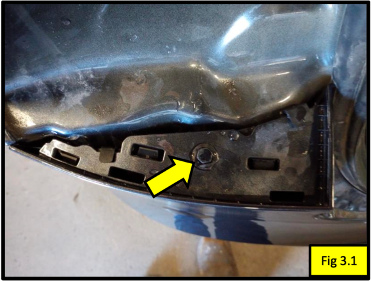
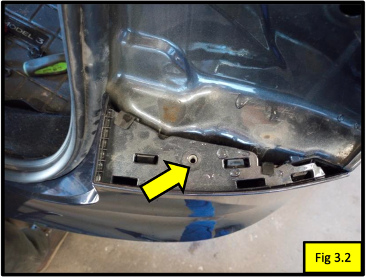
- Under the vehicle, locate the factory knockout panel. With a Flathead screwdriver or trim tool, turn the screws to release the panel. Remove the panel and set it aside. Note: If you decide to remove the adapter when the hitch is not in use, you may reinstall the panel. See fig 3.3.

Step 4:
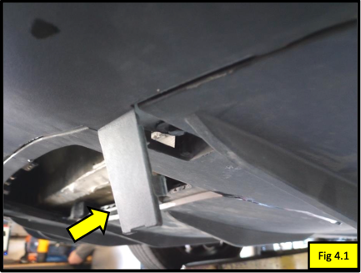
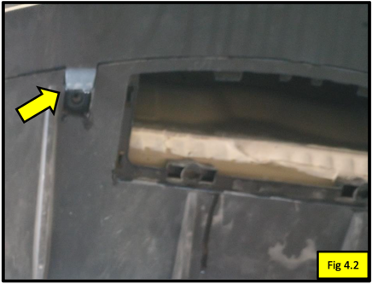
- With a Flathead screwdriver or trim tool, pry up the two panels concealing the bolts to the left and right of the knockout panel. See fig 4.1-4.2
- Remove the bolts located under the panels and, you guessed it, set them aside.
Step 5:
- On the Driver’s side of the vehicle, remove the three bolts securing the bumper to the bottom of the vehicle, followed by the forward-most bolt securing the trim piece —Lets kindly show them the exit. See fig 5.1.

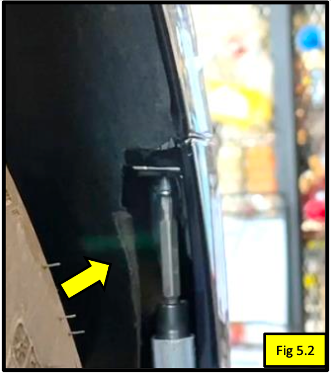
- In the Driver Side rear wheel well, remove the Torx bolt shown in Fig 5.2.
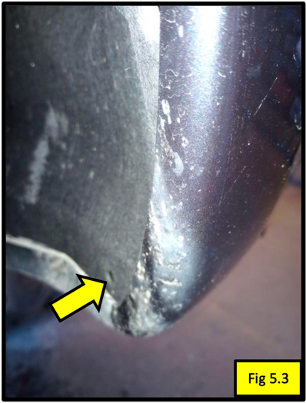
- With a trim removal tool, remove the three plastic clips along the lower wheel well, starting with the one shown in Fig 5.3. These clips have been hanging out long enough—time for them to retire.
- Repeat Step 5 on the Passenger side of the vehicle. Because why should the driver’s side have all the fun?
Step 6:
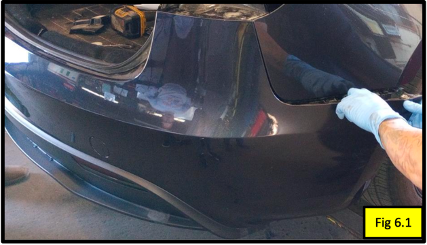
- Starting on the Driver’s side, use a trim removal tool to gently pry the bumper loose See Fig 6.1. Think of it as a delicate dance—don’t get too aggressive.
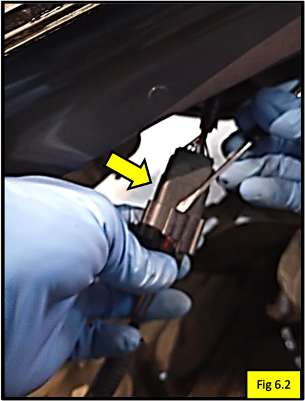
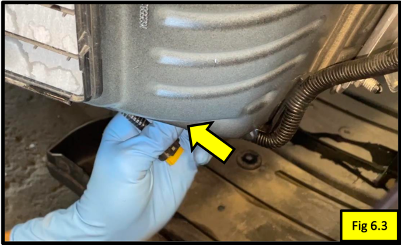
- Disconnect the bumper wiring harnesses located on both the Passenger and Driver’s sides (See Fig 6.2-6.3). Its time for them to take a break.
- Store the bumper in a safe place. Preferably not on the garage floor where you’ll trip over it later.
Step 7:
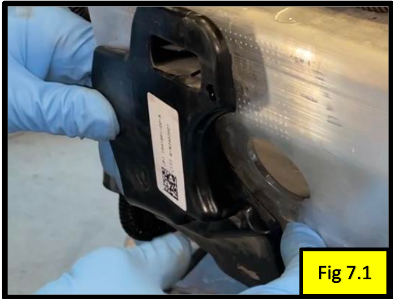
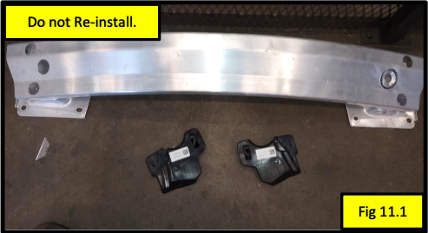
- Remove the Passenger and Driver side bumper brackets. See Fig 7.1. They’ve served their purpose, but it’s time to say goodbye. They won’t be reinstalled.
Step 8:
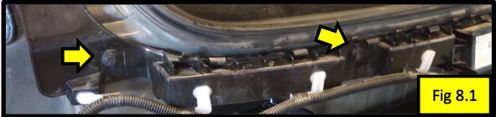
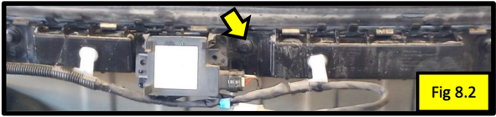
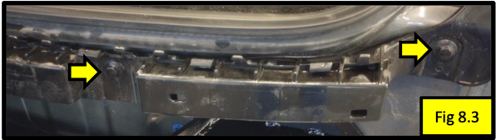
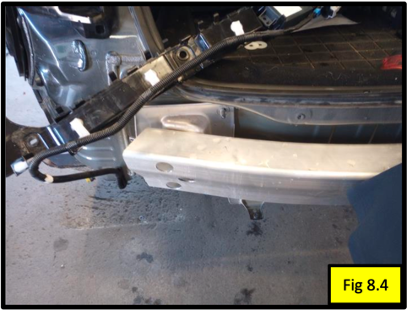
- Remove the 5 bolts securing the wiring harness to the rear of the vehicle. Temporarily place the wire harness in the trunk. (See Fig 8.1-8.4). It’s like giving it a little vacation before it has to go back to work.
Step 9:
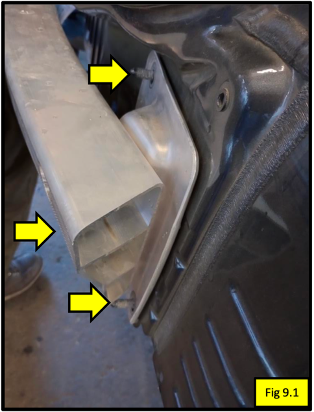
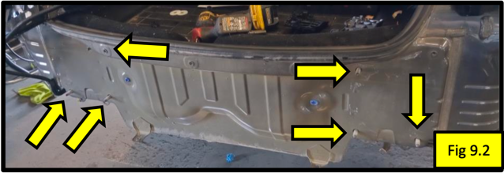
- Remove the three nuts securing the Rear Crossmember to the vehicle on the passenger side and set them aside—they’ll be reused. Repeat on the Driver’s side (See Fig 9.1-9.2).
- Remove the factory crossmember. It won’t be making a comeback, so feel free to find it a new home.
Step 10:
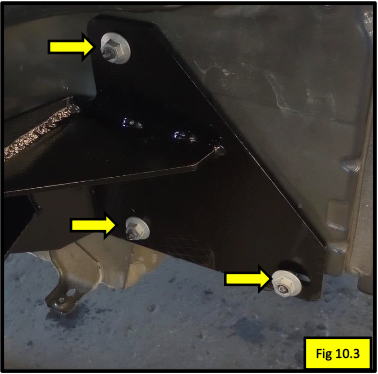
- Place a Nylon Washer on each of the factory studs shown in Fig 10.1-10.2.
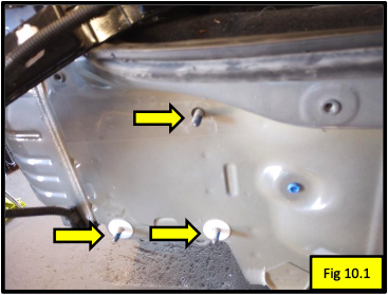

Place the Hitch over the factory studs and secure each stud with the factory nuts removed in Step 9. Torque each nut to 50 Ft Lbs. or 68 Nm (See Fig 10.3). Don’t skimp on the torque.
Step 11:
Reinstall the factory hardware in reverse order, excluding the Driver and Passenger Bumper Brackets and Rear Crossmember. (See Fig 11.1). Might feel like mind game but you’ve got this.
Step 12:
- Slide the insert adapter into the receiver of the hitch.
- Secure the adapter with one 5/16” flat washer, one 5/8” split lock washer, and a 5/8” Grade 5 Hex Bolt (See Fig 12.1).
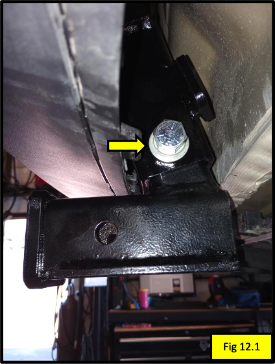
- Torque the 5/8” bolt to 120 ft-lbs (160 Nm). Really put some muscle into it.
- Re-torque the bolt before each use. That bolt is going to need a reminder to stay put.
Congratulations! You've successfully installed the 2024 Tesla Model 3 EcoHitch®. With this sleek addition, your Model 3 is now ready to tackle any towing challenge with ease and style. Visit https://torkliftcentral.com/tesla-model-3-trailer-hitch-stainless-steel-by-ecohitchr and get yours today. For further inquiries or assistance, feel free to reach out to our expert team. Happy trails!