

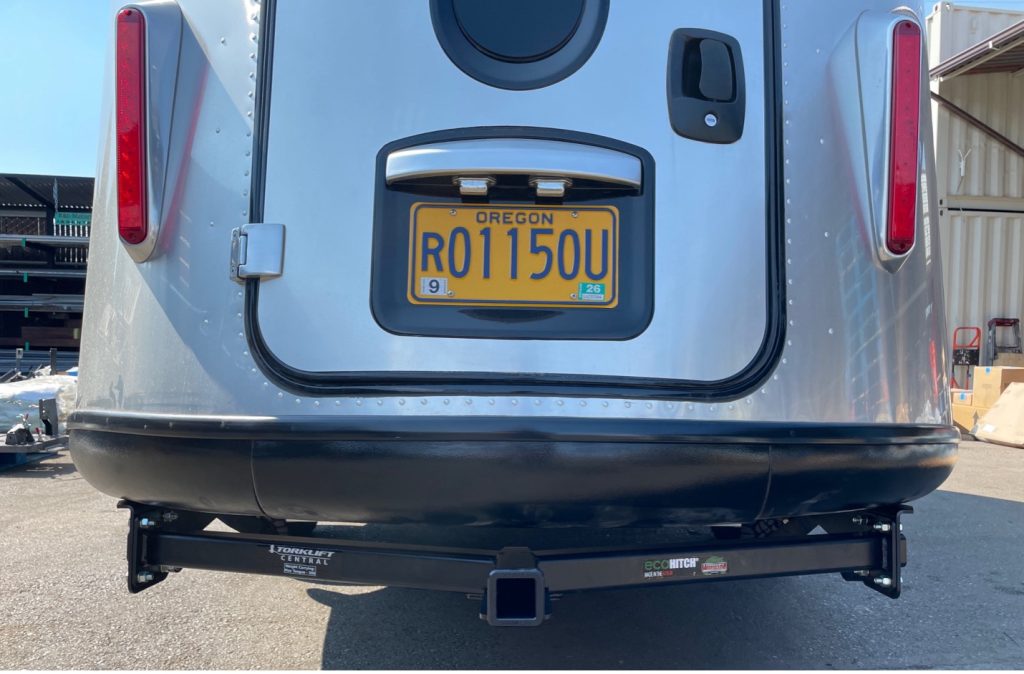
The Airstream Basecamp is built for adventure and now, with the Torklift TailoredHItch, you can add even more utility to your rig. Whether you're hauling a bike rack or cargo tray this custom-fit hitch is designed to integrate with the Basecamp's frame to offer maximum ground clearance and the highest tongue weight capacity on the market.
Here's a step-by-step installation guide to help you or your installer get it done right.
Step 1: Remove the Jacks and Lower Cover
- Chock the tires, then lower the tongue jack to raise the rear of the trailer.
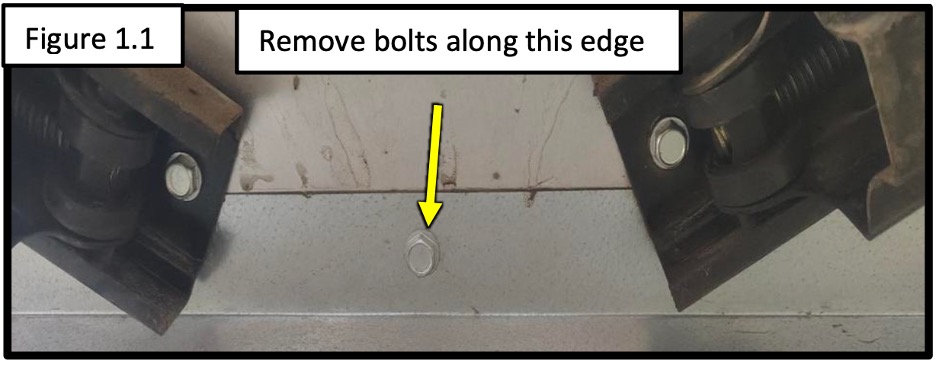
- From underneath, locate and remove the bolts holding the rear stabilizer jacks and the lower cover. Set all hardware aside for reinstallation (Figure 1.1).
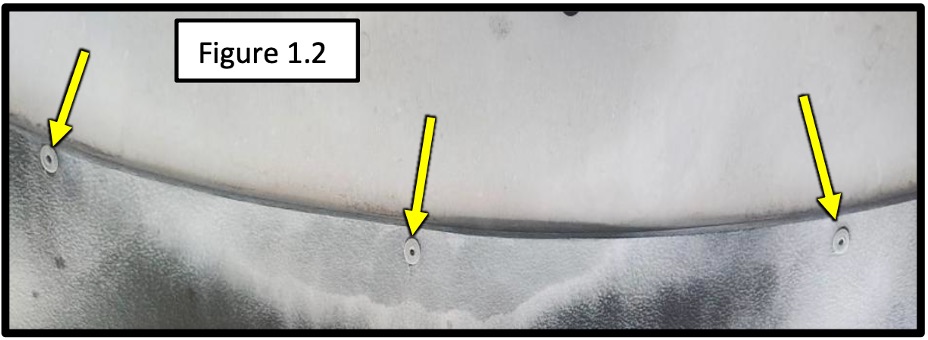
- Use a 1/4" drill bit to carefully drill out only the heads of the rivets securing the lower cover (about 20). Do not drill into the cover or bumper (Figure 1.2).
- Remove the cover and use pliers to pick out the remaining rivet stems. Set the panel aside.
Step 2: Mark and Drill the Frame
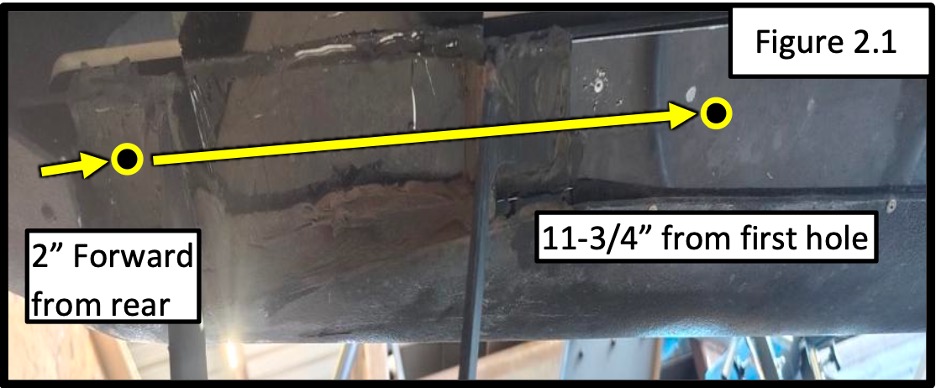
- From the rear bottom edge of the frame. measure 2 inches forward and mark the underside of the frame flange (Figure 2.1).
- Measure 11-3/4 inches forward from that first mark to make your second mark.
- Repeat the measurements and marking on the opposite side of the trailer.
- Drill both holes on each side with a 9/16" bit.
- Place the frame support brackets into position and drop two 1/2" bolts through to hold alignment.
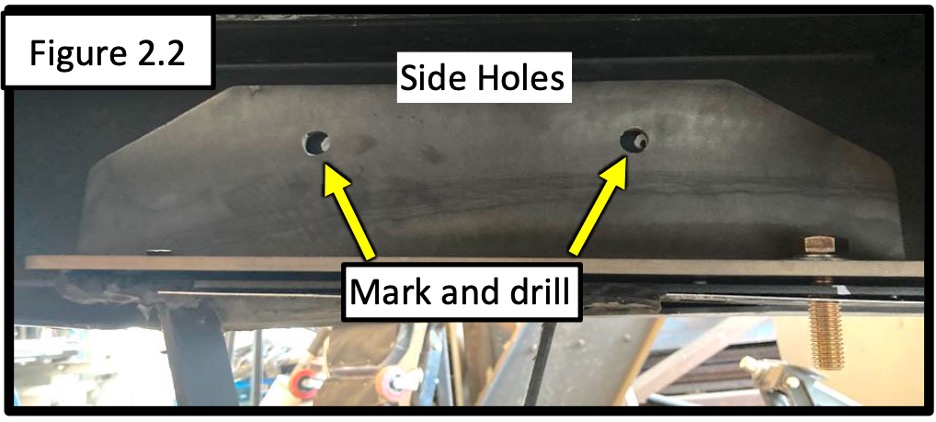
- Mark the side wall of the frame using the support plates (Figure 2.3).
- Remove the plates and drill those side holes to 9/16".
Step 3: Fish and Install the Side Bolts
- Reinstall the frame support plates.
- Insert the coiled end of the bolt fisher into the frontmost side holes, feeding it through to the rear frame opening.
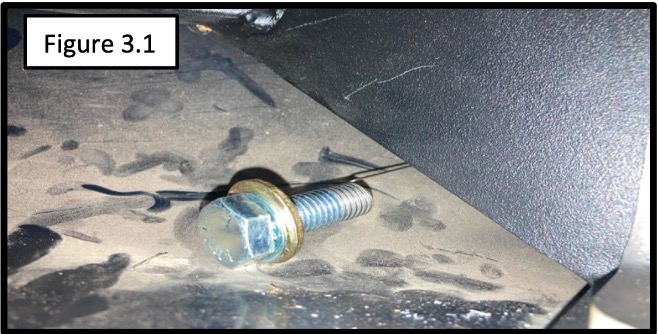
- Attach a 1/2" x 1-1/2" hex bolt with a flat washer and internal tooth lock washer to the coiled end (Figure 3.1).
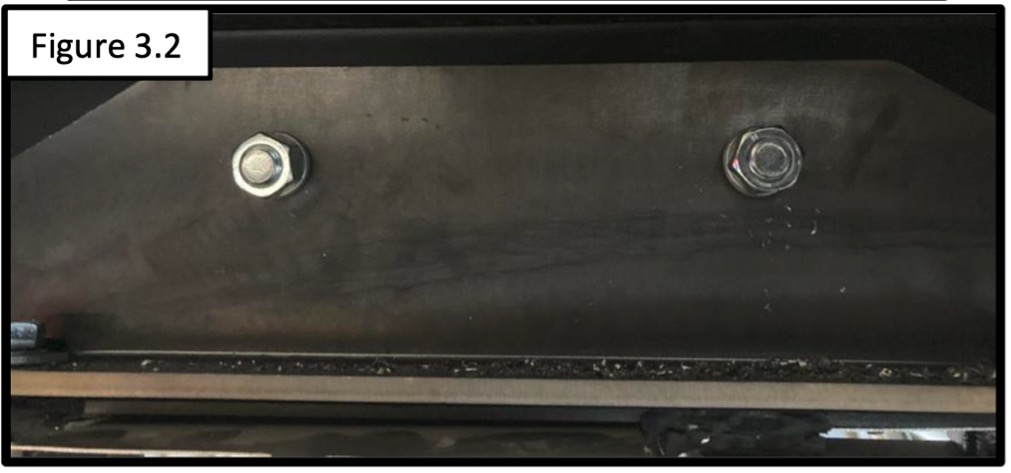
- Pull the bolt through so the threads protrude from the side hole (Figure 3.2).
- Add a split lock washer and hex nut to secure it.
- Repeat this process for the other side holes.
- Torque all side bolts to 64 ft-lbs (87 Nm).
Step 4: Trim and Reinstall the Lower Panel
- Hold the lower panel in place and mark where the new holes will align using the existing rear holes as a guide.
- Drill through the panel at the newly marked forward hole locations.
- Insert four 1/2" x 2-1/2" bolts with internal tooth lock washers and flat washers through the frame support plates.
- Life the panel into place, aligning the bolts so they pass through.
- Reinstall the stabilizer jacks using the original hardware.
- Use #12-14 self-drilling hex screws for the large holes.
Step 5: Install the Side Plates
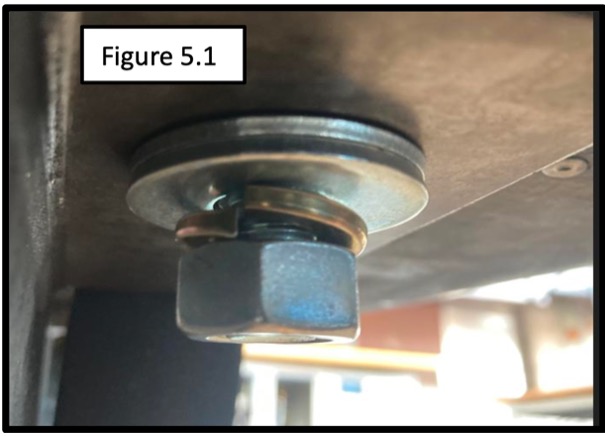
- Position the side plates and loosely install the rear bolts with:
- (2) 1/2" USS flat washers
- (1) split lock washer
- (1) hex nut (Figure 5.1)
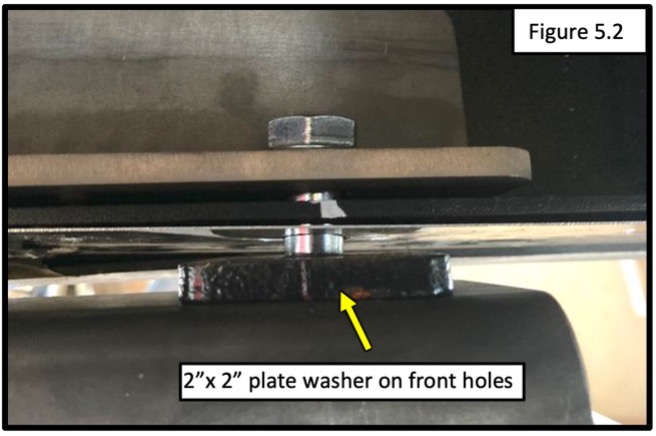
- On the front bolts, place a 2" x 2" plate washer between the side plate and frame.
- Secure with the same washer/nut combo as above (Figure 5.2).
- Leave all hardware slightly loose for final alignment.
Step 6: Install the Cross Tube
- With help, lift the cross tube into place between the side plates.
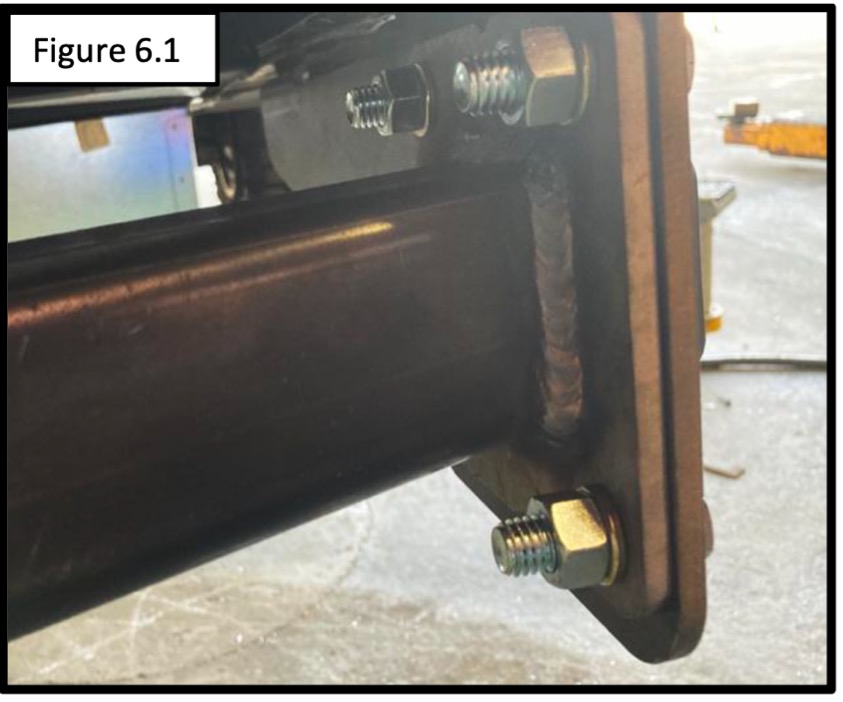
- Install eight 1/2" x 1-1/2" bolts through the side plates and into the cross tube rings.
- Fasten with split lock washers and hex nuts (Figure 6.1).
- Torque all cross tube bolts to 64 ft-lbs (87 Nm).
- Torque the remaining frame hardware to 64 ft-lbs (87 Nm).
Installation Complete!
Your Torklift TailoredHitch is now installed and ready for action! It's built tough to match your Basecamp's rugged capability - without sacrificing clearance or aesthetics.
Ready to Equip Your Basecamp?
Click here to view the product page and order the TailoredHitch for Airstream Basecamp