

Ready to transform your Volkswagen into a hauling hero? We’ve got your back (or rather your rear) with this step-by-step guide on how to install the 2022-2024 Volkswagen Golf R and Volkswagen GTI trailer hitch by EcoHitch®! With meticulous attention to detail and a bit of elbow grease, you’ll successfully install the Volkswagen Golf R and Volkswagen GTI EcoHitch®. Let’s delve into this step-by-step process.
Step 1:
- First, let's make sure those front tires don't decide to go on a solo adventure. Chock them up and raise the rear of the vehicle off the ground. Place it on ramps or suitable jack stands.
Note: if using a hoist/lift, utilize the Volkswagen approved lifting points.
Step 2:
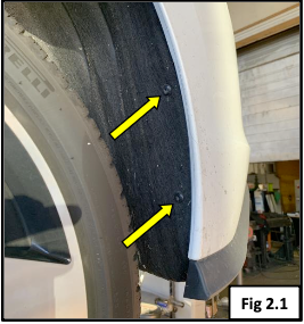
- Remove the rear fender liner T25 screws along the rear bumper. Repeat on the opposite side of the vehicle. See fig 2.1.
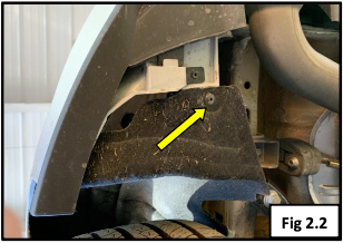
- Unfasten the fender liner T25 bolt chilling at the bottom of the vehicle. Repeat on the opposite side. See fig 2.2.
Step 3:
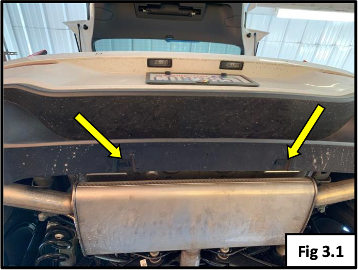
- Remove the two T15 screws and remove those plastic clips located at the bottom of the bumper cover. They've overstayed their welcome anyway. See fig 3.1.
Step 4:
- Peel back the fender liner to expose the T25 screw located towards the top of the bumper cover. See fig 4.1. Think of it as peeling a banana, but with fewer monkeys involved.
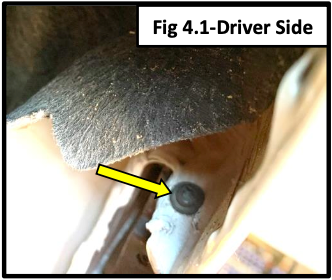
- Unfasten the T25 screw.
- Repeat on the opposite side of the vehicle.
Step 5:
- Open the hatch.
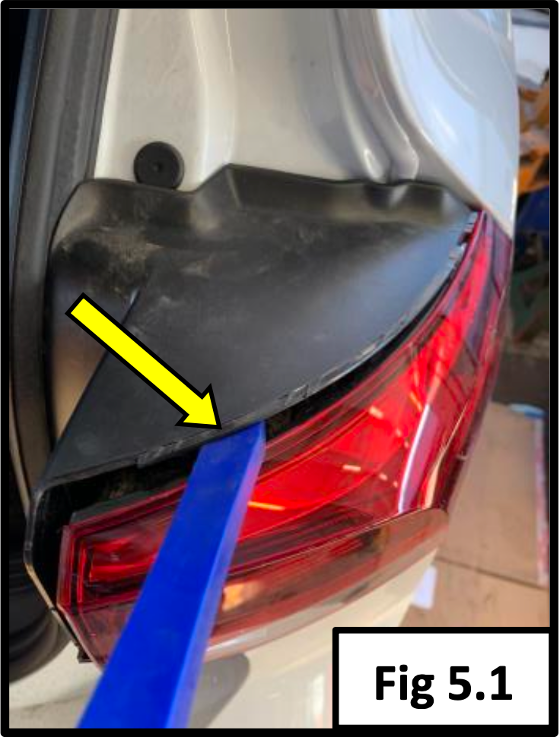
- Starting from one side of the vehicle, use a plastic pry tool to remove the taillight trim panel. See Figure 5.1. If it doesn’t come off easily, just remember that brute force is always the answer (kidding, don’t actually do that).
- Repeat on the opposite side of the vehicle.
Step 6:
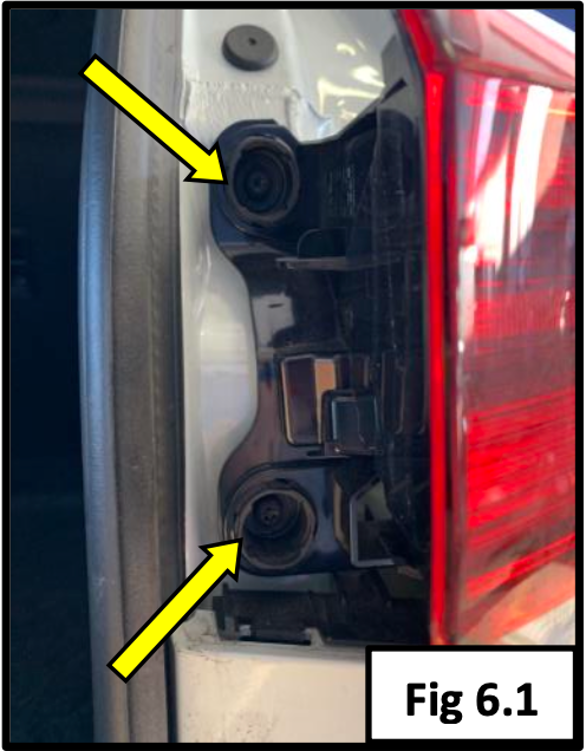
- Unfasten the T25 taillight bolts as seen in Fig. 6.1.
- Pull the taillights out and unclip the harness.
- Repeat on the opposite side of the vehicle. Because why should one side have all the fun?
Step 7:
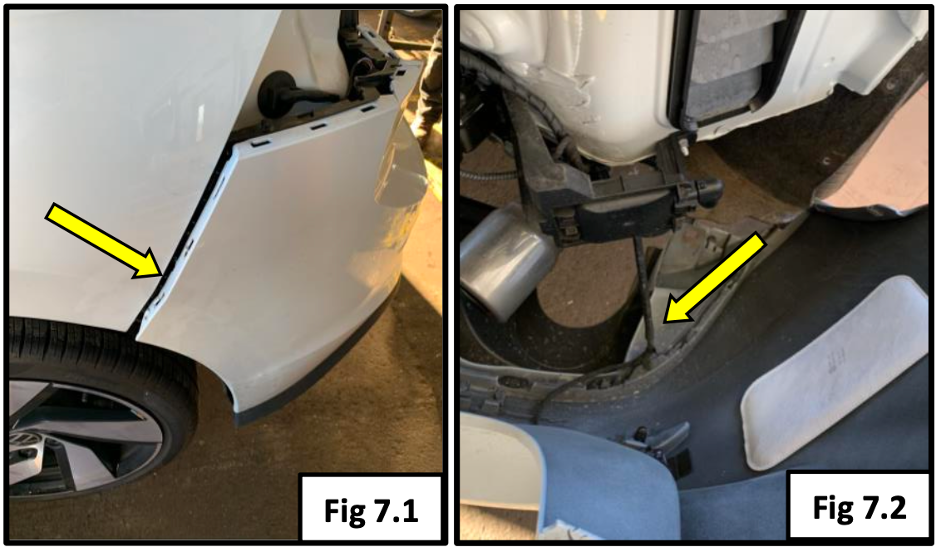
- Unclip the rear bumper cover by carefully pulling it outwards. See Fig. 7.1. Think of it as peeling an onion—tears optional.
- Unplug the wiring harness attached to the passenger side of the bumper cover. See Fig. 7.2.
- Fully detach the bumper cover from the vehicle and place it in a safe location.
Step 8:
- Unfasten the factory flange hex nut located next to the backing sensor on the passenger side of the rear cross member. See Fig. 8.1.
Step 9:
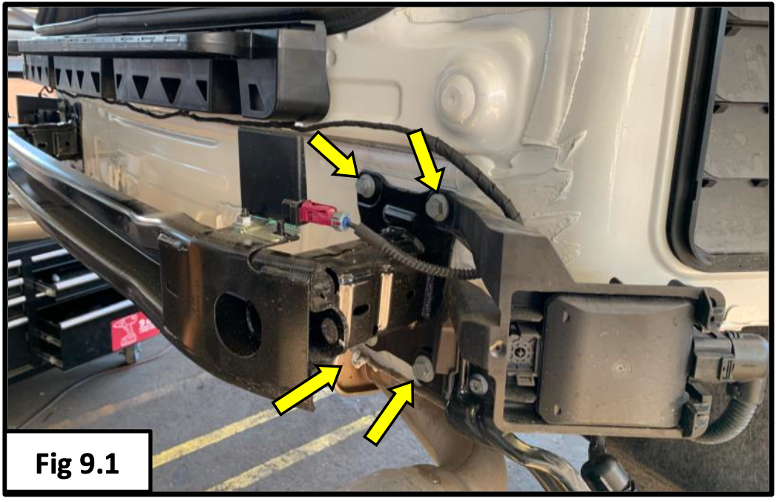
- Use a 13mm socket to remove all eight bolts on the rear cross member. See Fig. 9.1.
- Remove the rear cross member from the vehicle. The rear cross member will not be reinstalled. Think of it as sending it off to a well-deserved retirement.
Step 10:
- Install and center the hitch in place of the rear cross member over the holes in the frame.
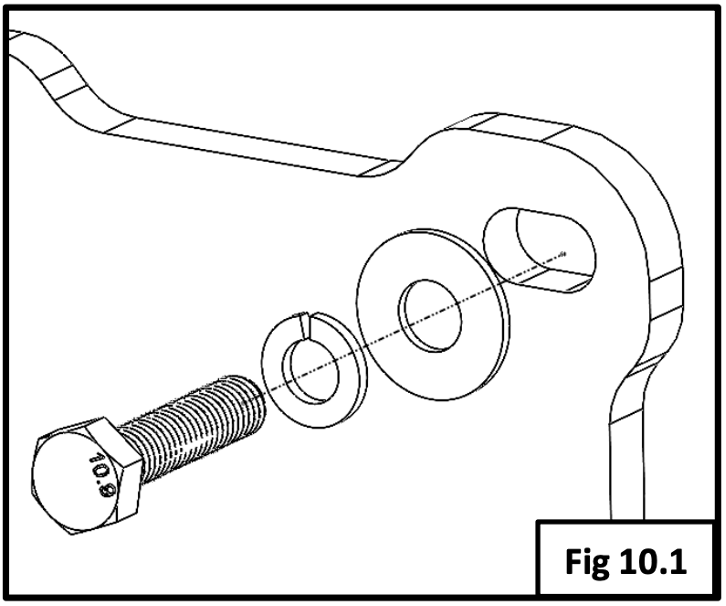
- Thread the M8 bolt with an M8 split lock washer and a 5/16” flat washer through the hitch and into the factory threaded holes. See Fig 10.1. Because what’s more fun than threading bolts? Almost anything, actually.
- Recenter the hitch if needed and torque the M8 bolts to 22 ft-lbs (30Nm).
Step 11:
- Insert the coiled end of a 1/2” bolt fisher into the rear-most hole in the bottom of the frame and through the hitch support bracket. Guide the bolt fisher out through the back of the frame and trailer hitch. See Figure 11.1. Fishing for bolts is way more exciting than real fishing, said no one ever.

- Place a 1/2” star lock washer followed by a 1”x 2” plate washer onto the threaded end of a 1/2” bolt. Thread the 1/2” bolt fisher onto the bolt fisher.
- Separate the hardware on the bolt fisher and feed them back into the hole one piece at a time.
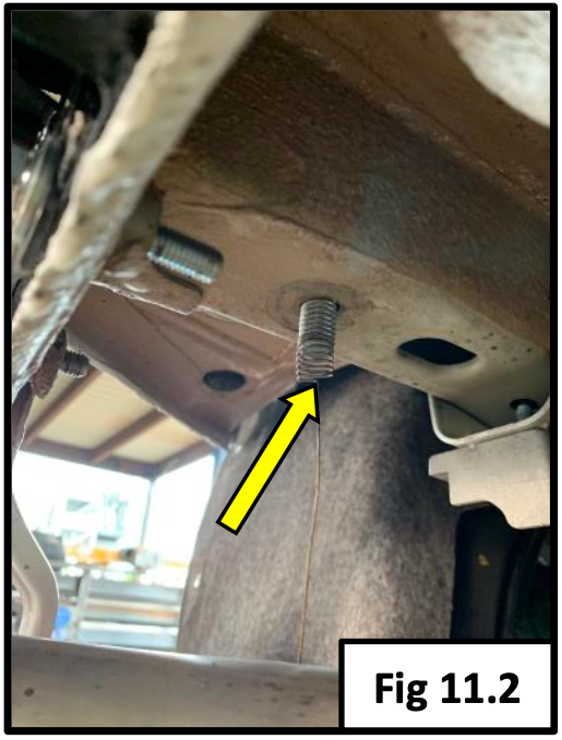
- Gently pull on the straight end of the bolt fisher until the threads of the bolt protrude down through the frame. See Figure 11.2. Almost there—keep pretending this is fun.
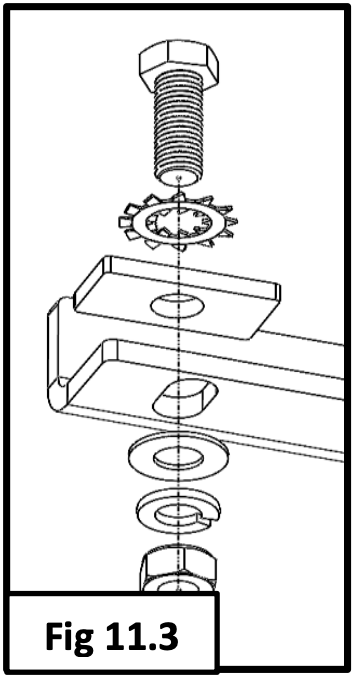
- Remove the bolt fisher and fasten the assembly with a 1/2" flat washer, 1/2” split lock washer, and 1/2” hex nut. See Fig. 11.3. Secure it like your sanity depends on it.
- Torque the 1/2” nut to 57 ft-lbs. (77 Nm). Finally, something that involves real force.
- Repeat this step on the opposite side of the vehicle. Because symmetry is the spice of life.
Step 12:
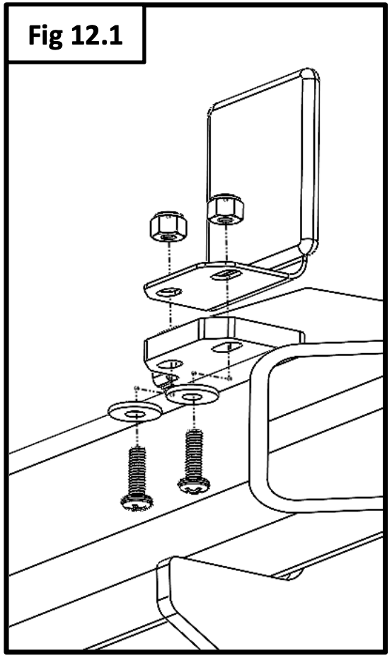
- Attach the backing sensor to the bracket located on the passenger side of the vehicle using the #12-24 and 1/4” hardware as shown in Figure 12.1.
Step 13:
- If equipped, remove the license plate from the bumper.
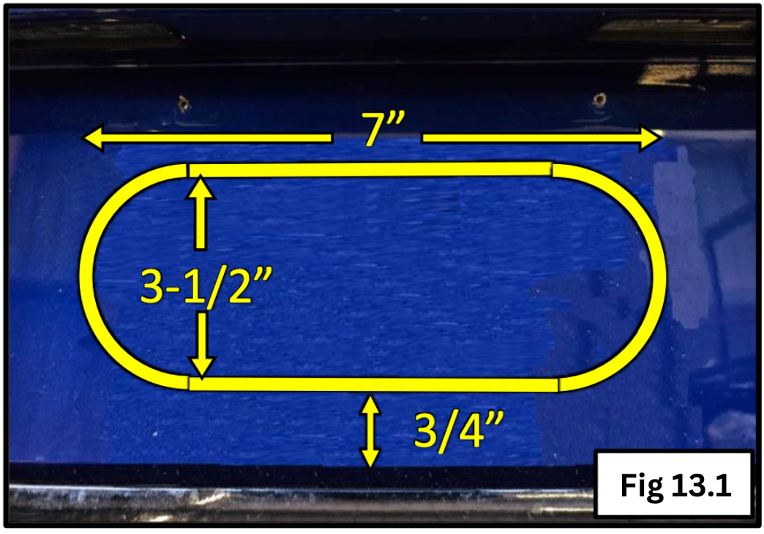
- Mark and cut out the highlighted sections of the bumper using a reciprocating body saw or other plastic cutting tool. See Fig 13.1.
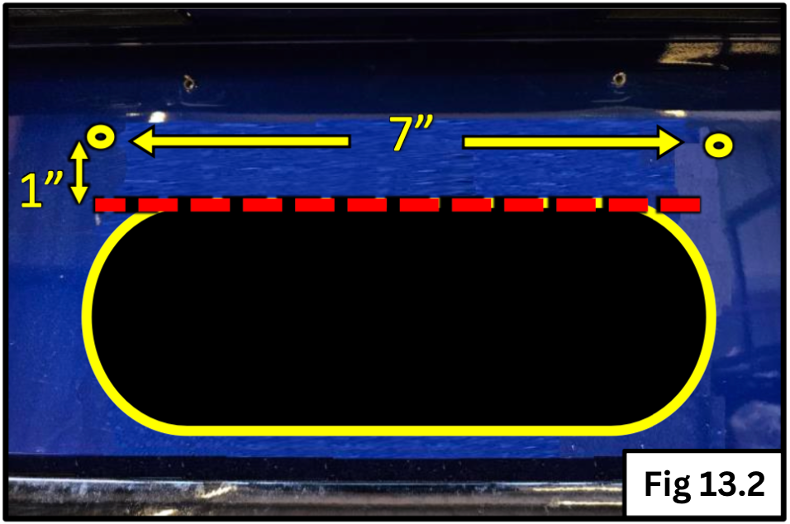
- Drill two 1/4” holes, 1” from the top edge of the slot cut out, 7” apart from each other. See Fig 13.2.
- Please follow the flip kit instructions for its installation.
- Reinstall all factory components in the reverse order of removal. It’s like hitting the rewind button on your automotive escapade.
Congratulations! You've successfully installed the 2022-2024 Volkswaqen Golf R and Volkswagen GTI EcoHitch®. With this sleek addition, your model is now ready to tackle any towing challenge with ease and style. Visit https://torkliftcentral.com/vw-golf-r-trailer-hitch-stainless-steel-by-ecohitchr and get yours today. For further inquiries or assistance, feel free to reach out to our expert team. Happy trails!