

Ready to transform your Toyota into a hauling hero? We’ve got your back (or rather your rear) with this step-by-step guide on how to install the 2022-2024 Toyota Corolla Cross Hybrid trailer hitch by EcoHitch®! With meticulous attention to detail and a bit of elbow grease, you’ll successfully install the Toyota Cross EcoHitch®. Let’s delve into this step-by-step process.
Step 1:
- Chock the front wheels and use a floor jack to raise the rear of the vehicle off the ground – we don’t want your car staging a getaway. Support both side of the vehicle with jack stands to prevent injury. If you’re using a hoist/lift, stick to the Toyota approved lifting points.
Step 2:
- Remove the two plastic clips (one per side) connecting the bottom of the bumper cover to the rear of the vehicle. See fig 2.1.
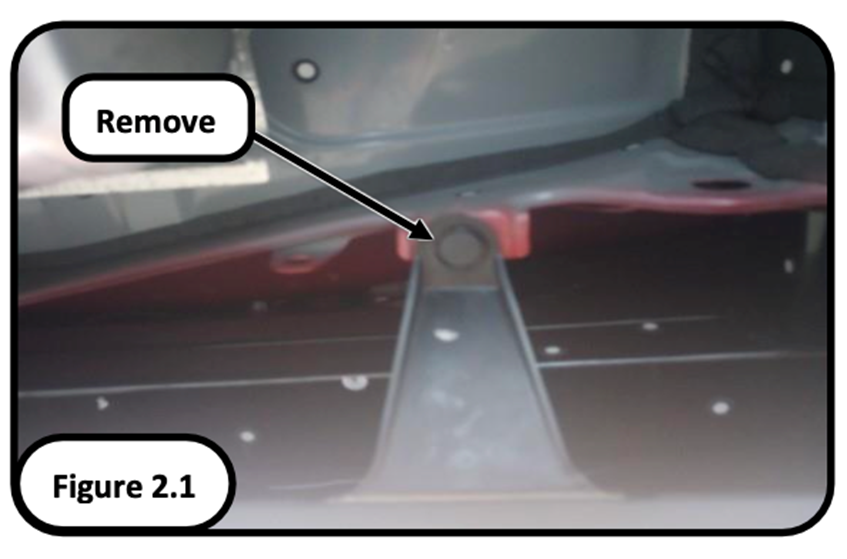
- Reach up behind the bumper cover and remove the 8 screws (4 per side) attaching the rear crossmember to the vehicle. Save the hardware as it will be reinstalled later.
- Lift the driver side of the rear crossmember up and towards the rear to detach it from the vehicle. Only one side at a time, we’re not flipping cars here.
Step 3:
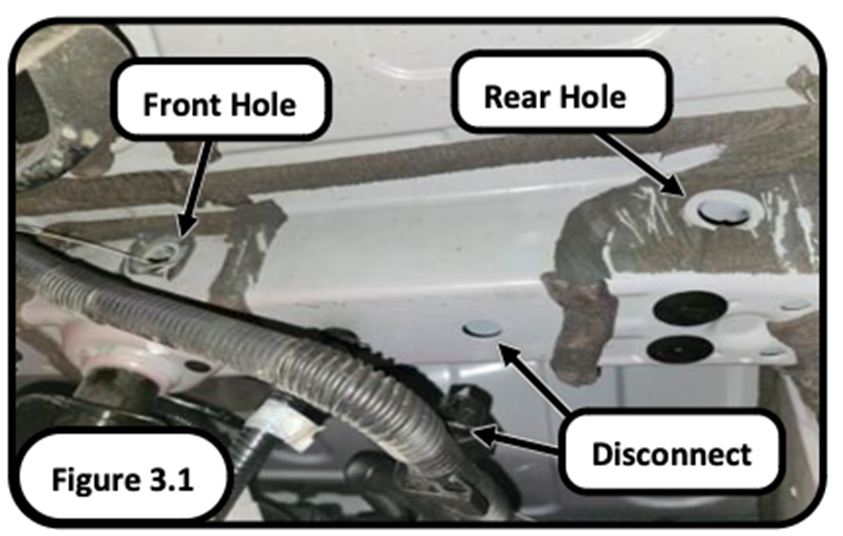
- On the outside of the driver side frame rail, scrape away the seam sealer to reveal two holes in the side of the frame like an archeologist revealing ancient relics.
- Scrape any seam sealer between the holes. Disconnect the wiring harness from the bottom of the frame rail. See fig 3.1.
Step 4:
- Like a pro angler, insert the coiled end of a bolt fisher into the front hole in the side of the frame. Guide the bolt fisher through the frame rail and out the large rectangle hole in the back of the frame exposed in Step 2. See fig 3.1 and 4.1.
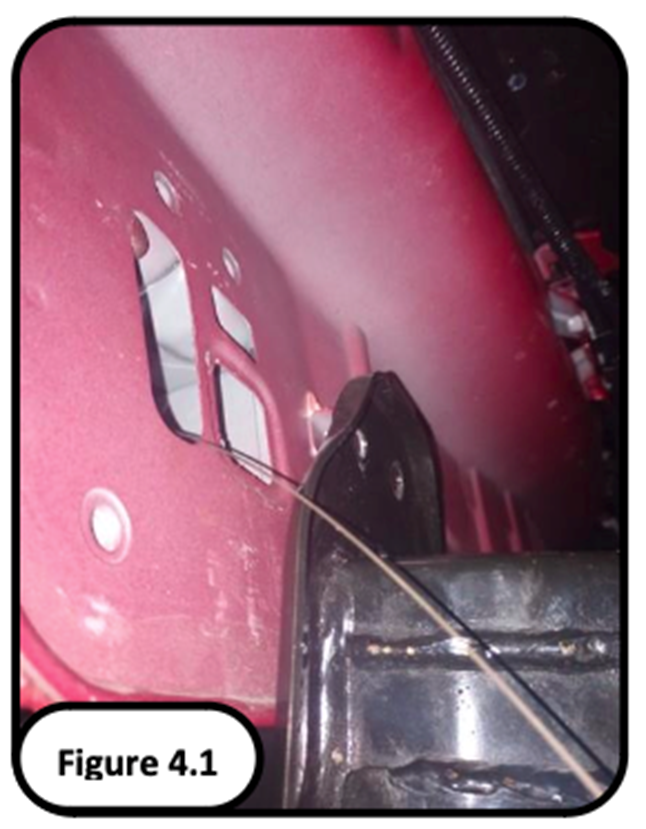
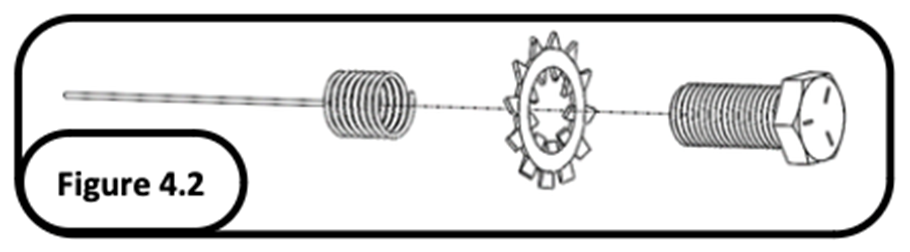
- Thread a 1/2"-13 x 1-1/4” Grade 5 Hex bolt with one 1/2" star washer into the coiled end of the bolt fisher. We’re not fishing for bolts here, just coaxing them out. See fig 4.2.
- Gently tug on the straight end of the bolt fisher you see the threads start peeking out of the front-most hole in the side of the frame.
- There is an obstruction inside the frame that will prevent the threads of the bolt from passing through the hole. Using a small screwdriver, reach inside the frame and lift the head of the bolt upwards and move it towards the front of the vehicle. Remember, slow and steady wins the race. No need to rush – the bolt isn’t going anywhere without you.
- Once the bolt head has passed the obstruction, gently pull on the straight end of the bolt fisher until the threads fully protrude from the frame. You may need to use a screwdriver to re-align the star washer with the bolt. Leave the bolt fisher attached.
Step 5:
- Insert the coiled end of the other bolt fisher into the rear hole in the side of the frame. like threading a needle but with bigger bolts and fewer pricked fingers. Guide the bolts fisher out the same rectangle hole used in Step 4.
- Attach a 1/2”-13 x 1-1/2” Grade 5 Hex bolt with one 1/2" star washer and one 1" and 2" plate washer. See fig 5.1.

- Gently pull on the straight end of the bolt fisher until the threads fully protrude from the rear-most hole in the side of the frame. Leave the bolt fisher attached.
Step 6:
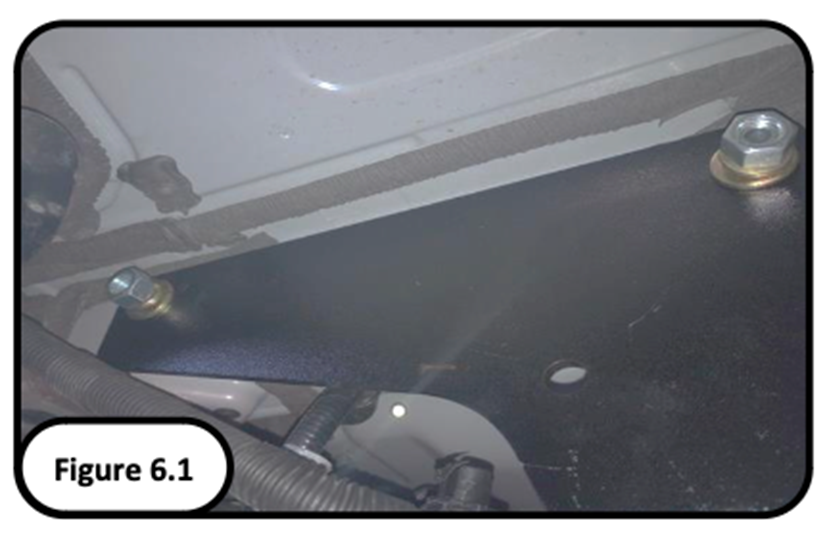
- Thread the bolt fishers through the top holes in one of the side plates.
- Guide the side plate up to the frame rail, making sure those bolts don’t pull a Houdini on you and disappear back into the frame.
- Once the side plate is in place, carefully remove one of the bolt fishers. Pull down on the side plate to wedge the bolt in the hole.
- Secure the bolt with one 1/2” SAE flat washer, one 1/2" split lock washer, and a 1/2"-13 Grade 5 Hex nut..
- Repeat the process for the remaining bolt, leave all hardware extremely loose as the side plates will need to spread outwards to install the cross tube. See fig 6.1.
Step 7:
- Lift the driver side of the rear crossmember back up and towards the front of the vehicle to hang it back in position.
- Repeat steps 2-6 on the passenger side of the vehicle.
- Reinstall the rear crossmember to the vehicle. Torque the bolts to 20 ft-lbs (27Nm) for that perfect snug fit.
Step 8:
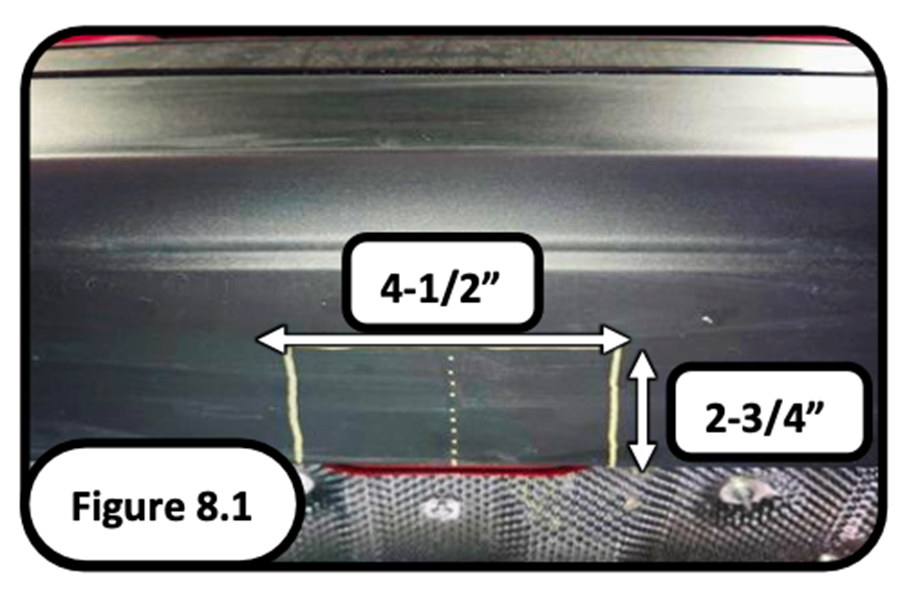
- Locate the center bottom edge of the bumper cover. This can be identified easily by the two small indentations in the edge of the plastic.
- Mark a centered rectangle from the edge of the bumper cover that is 2-3/4” deep and 4-1/2” wide. See fig 8.1.
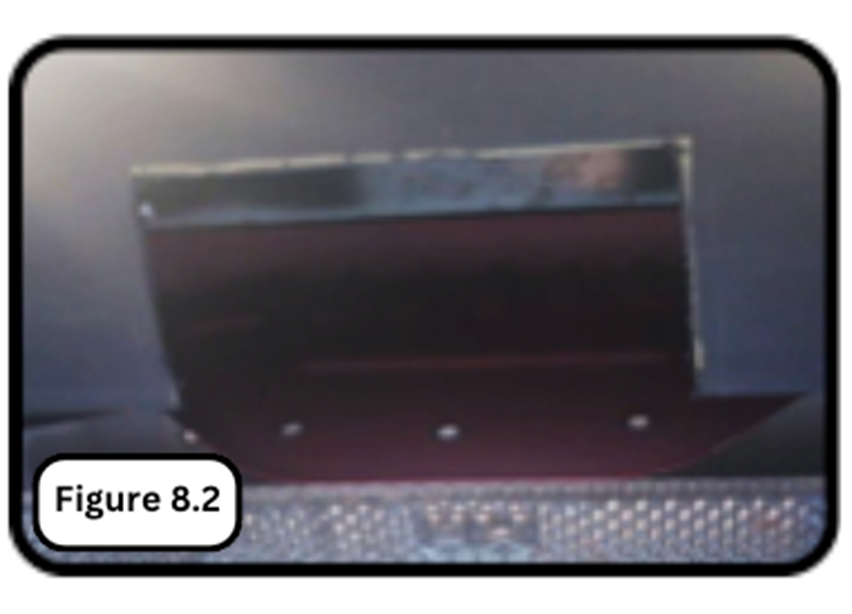
- Use a reciprocating body saw or other method to give your bumper a stylish new haircut along the marked line. See fig 8.2 for visuals.
Step 9:
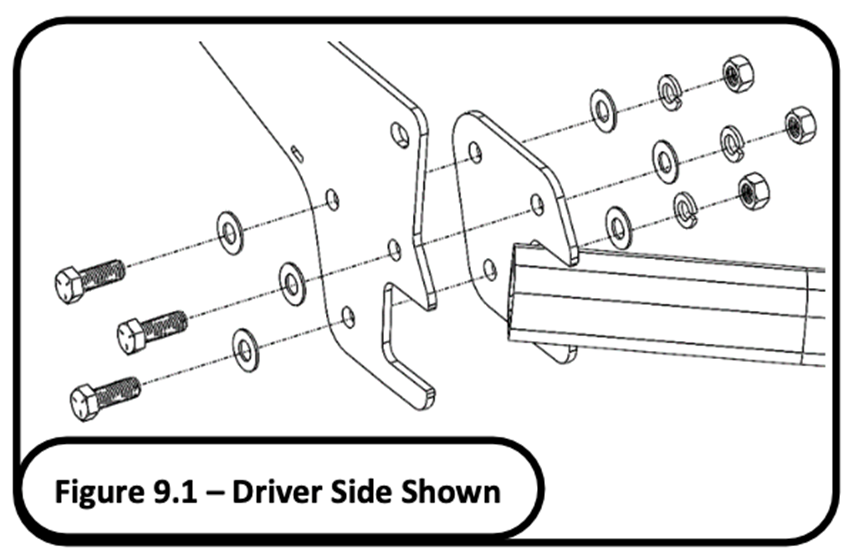
- Spread those side plates apart and lift the cross tube into position. This is where having a friend comes in handy, unless you’ve trained your pet monkey to lend a hand.
- Once everything’s in place, use the remaining 1/2"-13 Grade 5 hex bolts, 1/2" SAE flat washers, 1/2" Split lock washer, and 1/2"-13 Grade Hex 5 nuts to connect the cross tube to the side plates. It may be necessary to lift upwards on the hitch receiver to align the holes. See fig 9.1. Connect both sides of the cross tube.
Step 10:
- Torque those bolts like you’re tightening the lids on jars of pickles – 75 ft-lbs (100Nm). Torque the bolts connecting the side plates to the cross tube to 75 ft-lbs (100Nm).
- Reattach the plastic clips you removed earlier, like putting the finishing touches on a masterpiece.
- Don’t forget about the wiring harness-it’s got its own little home in the side plate just waiting for a cozy zip-tie hug, attach the wiring harness on the driver side to the small slotted hole in the side plate using the supplied zip-tie.
Step 11 (Optional):
- For the cherry on top, grab the 1/4" hardware and attach the 4-way plug bracket to the receiver hitch chain plate.
Congratulations! You've successfully installed the 2022-2024 Toyota Corolla Cross EcoHitch®. With this sleek addition, your Corolla Cross is now ready to tackle any towing challenge with ease and style. Visit https://torkliftcentral.com/toyota-corolla-cross-trailer-hitch-stainless-steel-by-ecohitchr and get yours today. For further inquiries or assistance, feel free to reach out to our expert team. Happy trails!