

The only rust free stainless steel trailer hitch for your Cadillac Optic!
Looking for the Cadillac Optiq trailer with the highest weight ratings on the market? With a tongue weight rating of 750 pounds, this hitch is designed to haul E-Bikes, cargo trays, camping gear, or other adventure essentials without breaking a sweat. The EcoHitch® is the perfect upgrade, offering a hidden, factory-look design while maintaining your vehicle’s elegant style and full towing capability.
This guide walks you through the installation process in an easy-to-understand way. Whether you're doing it yourself or want to know what your installer will be doing, we’ve broken it down for clarity.
What You’ll Need:
- Socket and Torx driver set
- Trim removal tools
- A ¼” drill bit and power drill
- Saw or rotary cutting tool (for bumper trimming)
- Jack stands or lift (optional, but helpful)
- An extra set of hands
Step-by-Step Installation
Step 1: Start with the Rear Trim
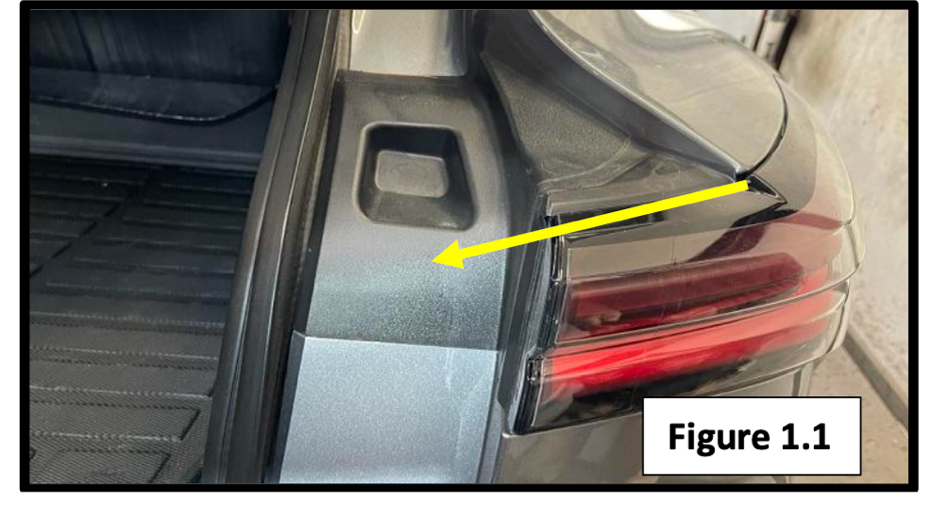
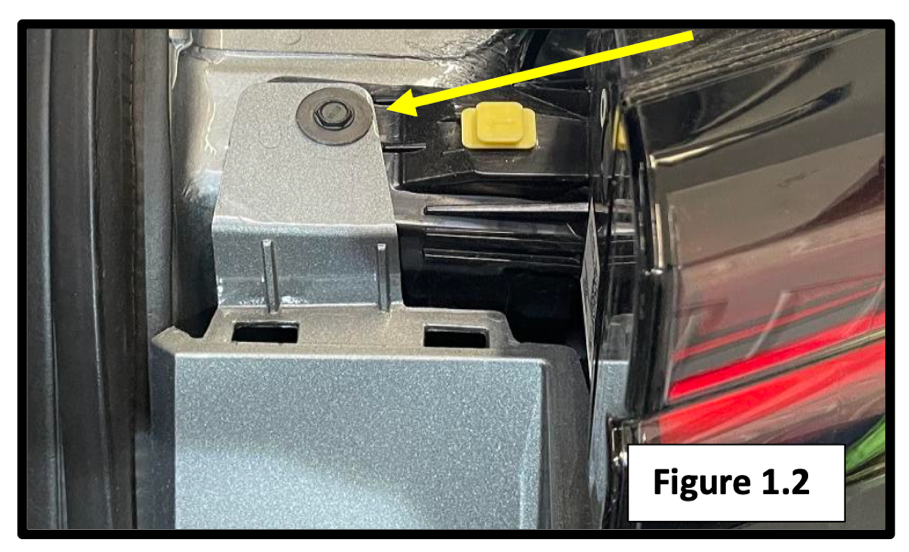
Pop off the small trim covers next to the rear taillights inside the hatch area. Underneath each, you’ll find a screw—remove it.
Step 2: Loosen the Bumper
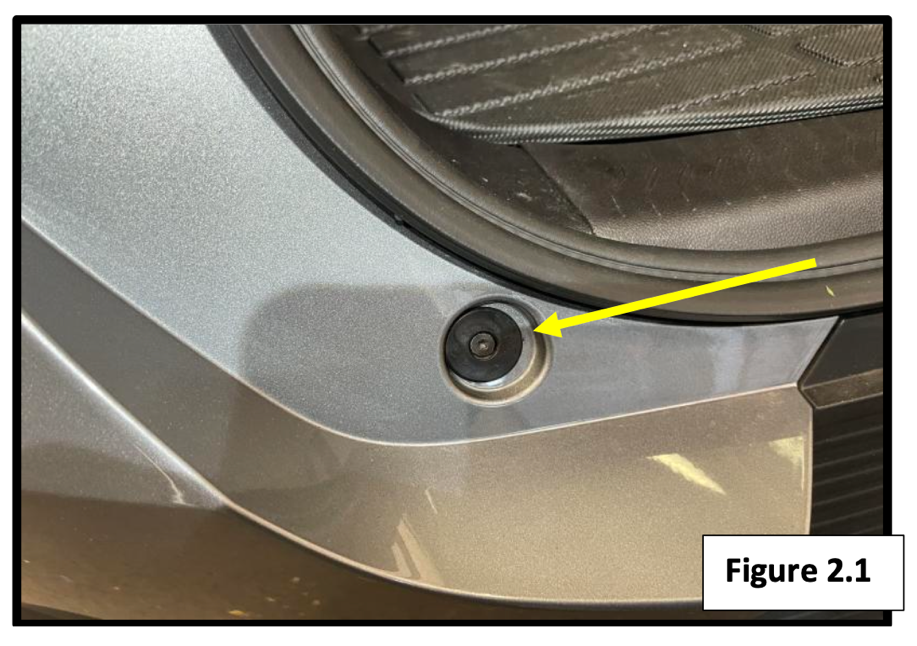
Near the bottom corners of the hatch, there are screws holding the bumper in place. Remove those as well.
Step 3: Remove the Rear Mudflaps
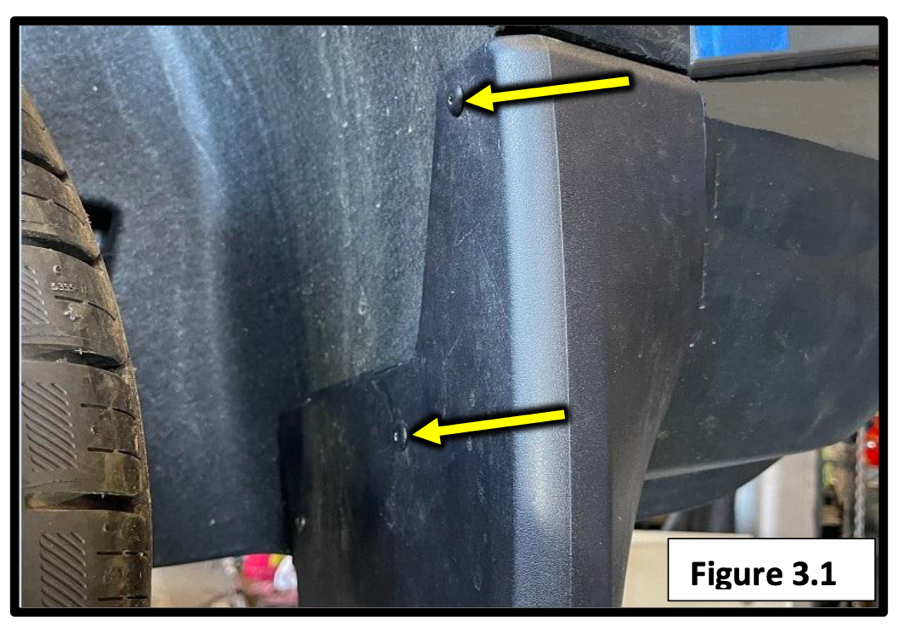
In each rear wheel well:
- Unscrew three Torx bolts
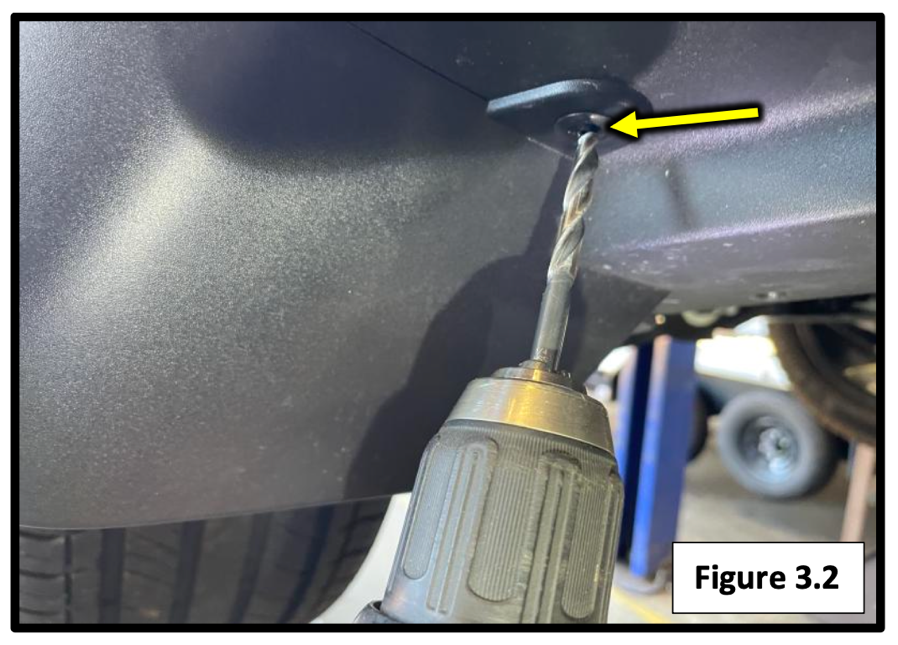
- Drill out the bottom rivet with a ¼” bit
- Drill through the hole where the rivet was, which you'll use later for reinstallation
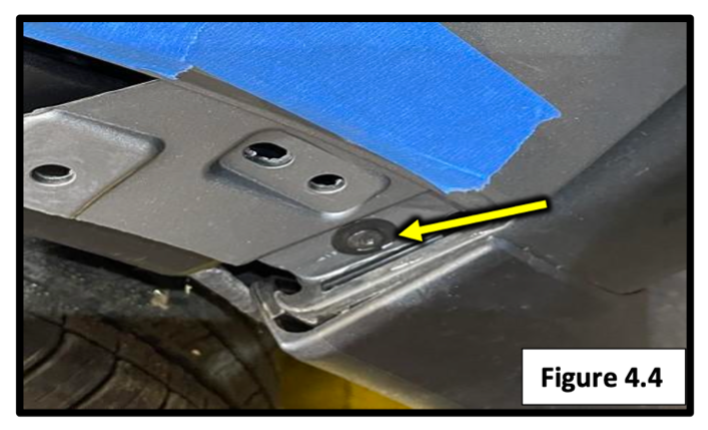
Step 4: Access Hidden Screws
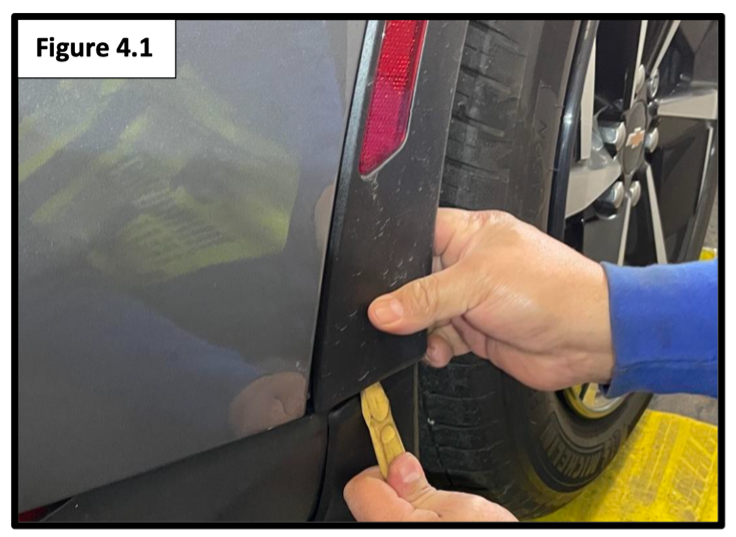
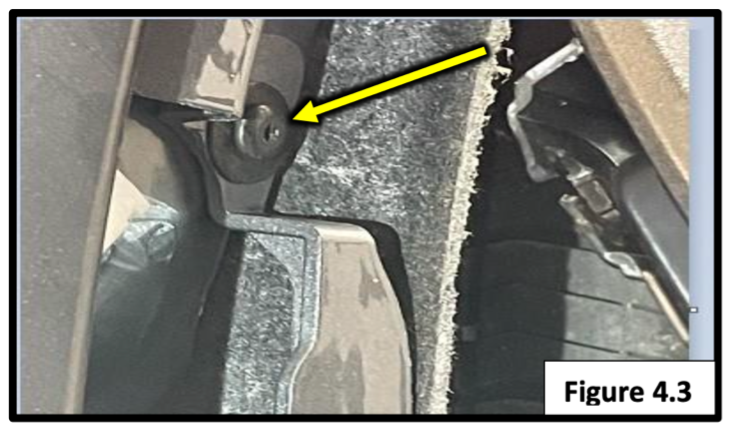
Use trim tools to gently pull the rear edge of the wheel well molding away from the bumper (tape your fenders first to prevent scratches). This reveals two hidden screws on each side—remove them.
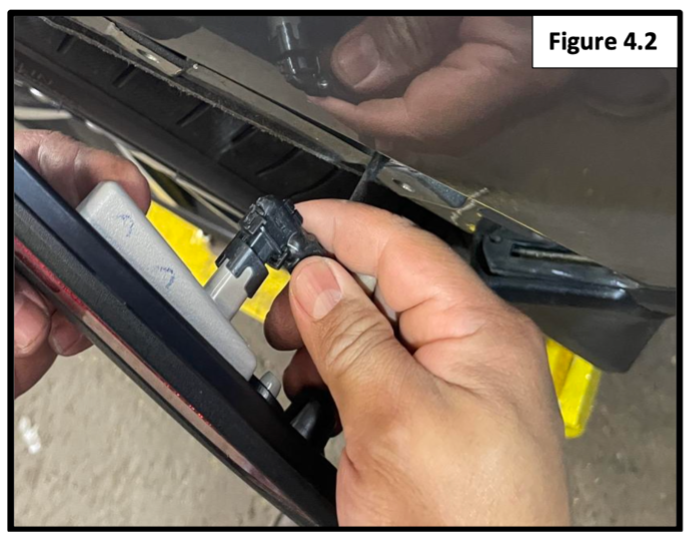
Unplug the small light connector in the wheel well for more space.
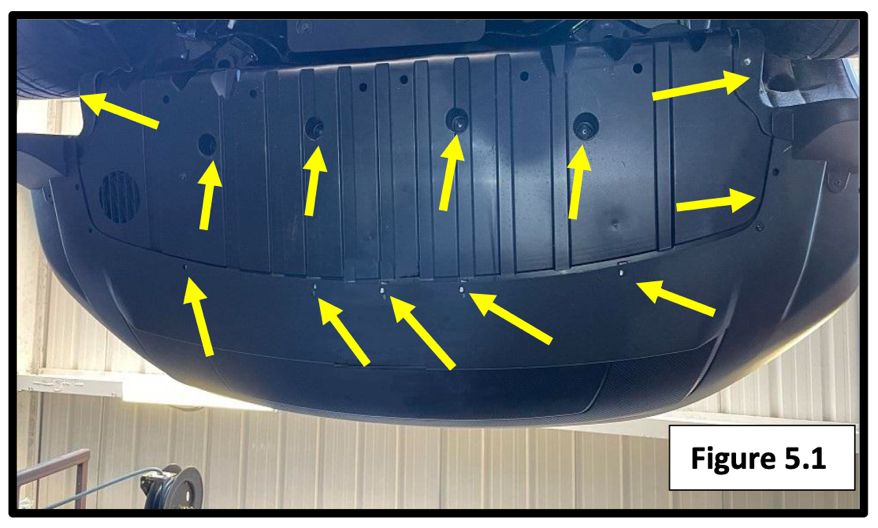
Step 5: Remove the Lower Panel
Under the back of the vehicle is a plastic cover. Unscrew it and set it aside.
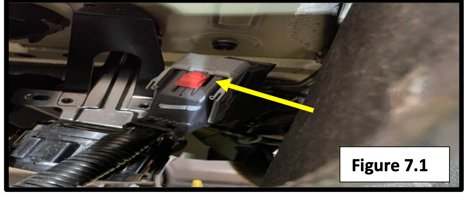
Step 6: Carefully Remove the Bumper
With an assistant:
- Start at the sides and gently pull the bumper outward and upward
- Use trim tools to help release clips around the taillights and bottom edge
- Disconnect the main wiring connector (look for the red locking tab)
Set the bumper aside safely—you’ll need to trim it later.
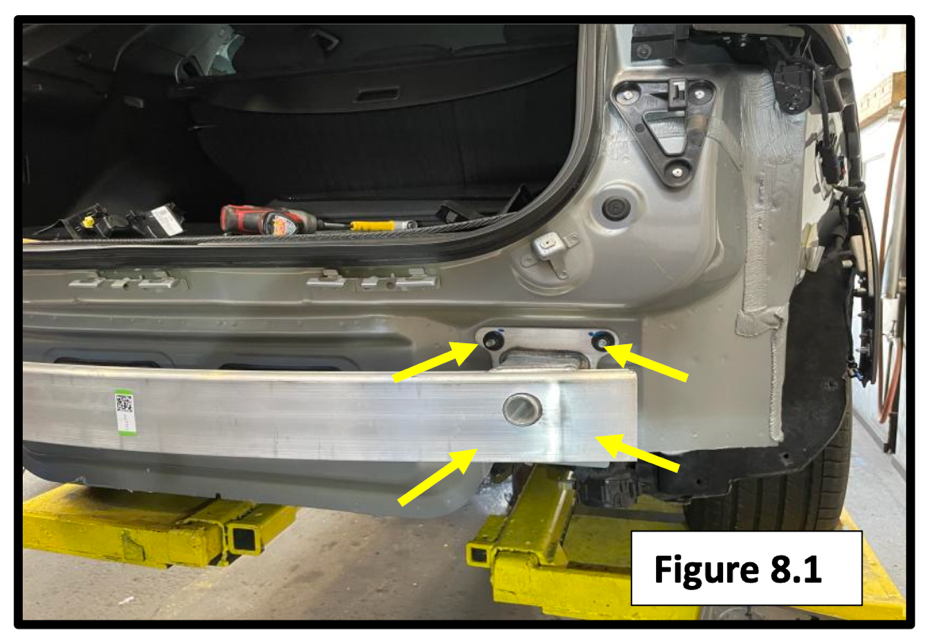
Step 7: Remove the Rear Crossmember
This metal support piece isn’t needed once the hitch is installed. Remove all 8 factory nuts (4 per side) and pull the crossmember off.
Step 8: Assemble the Hitch
- Attach the side plates to the hitch cross tube using the provided bolts and washers (leave them loose for now)
- Mount the hitch assembly onto the studs where the crossmember was
- Start tightening the original factory nuts
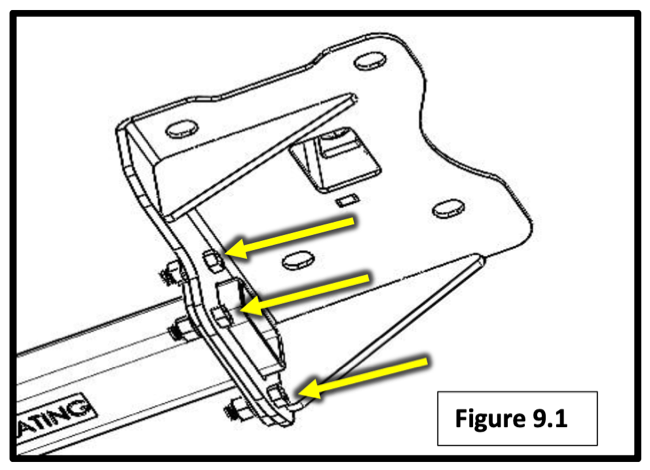
Step 9: Reinforce the Frame
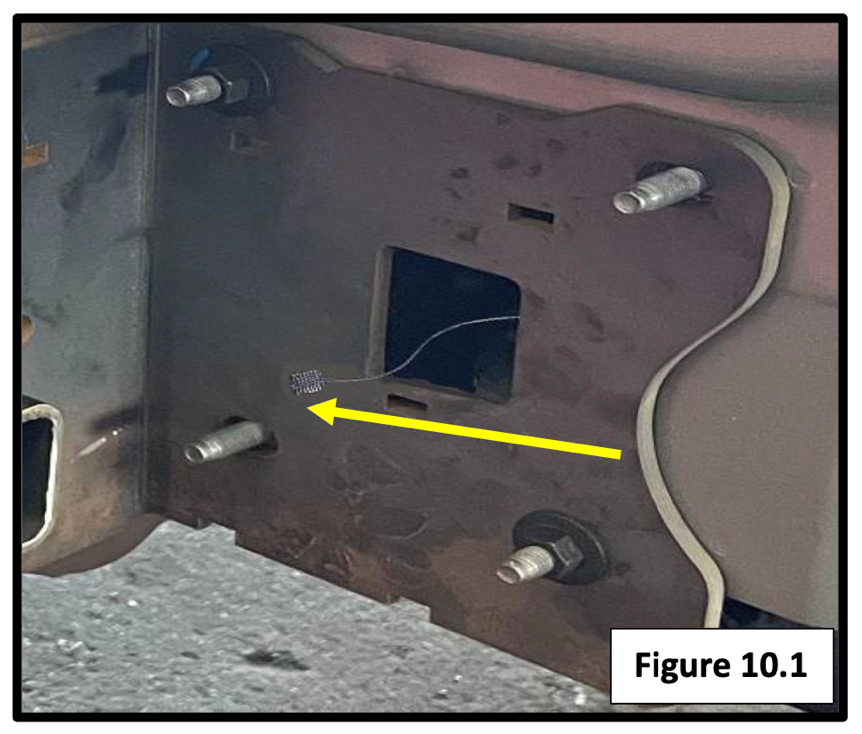
You’ll use a special tool (a bolt fisher) to fish a bolt through the frame and hitch plate:
- Feed it through the access hole in the bottom of the frame
- Attach the washered bolt to the coil end
- Pull it back through so it sticks out
- Add plate washer, lock washer, and nut
Repeat on both sides
Step 10: Tighten Everything Down
- Tighten the side plate bolts to 59 ft-lbs
- Tighten the factory nuts to 38 ft-lbs
- Tighten the fished bolts to 55 ft-lbs
Step 11: Trim the Bumper for Hitch Clearance
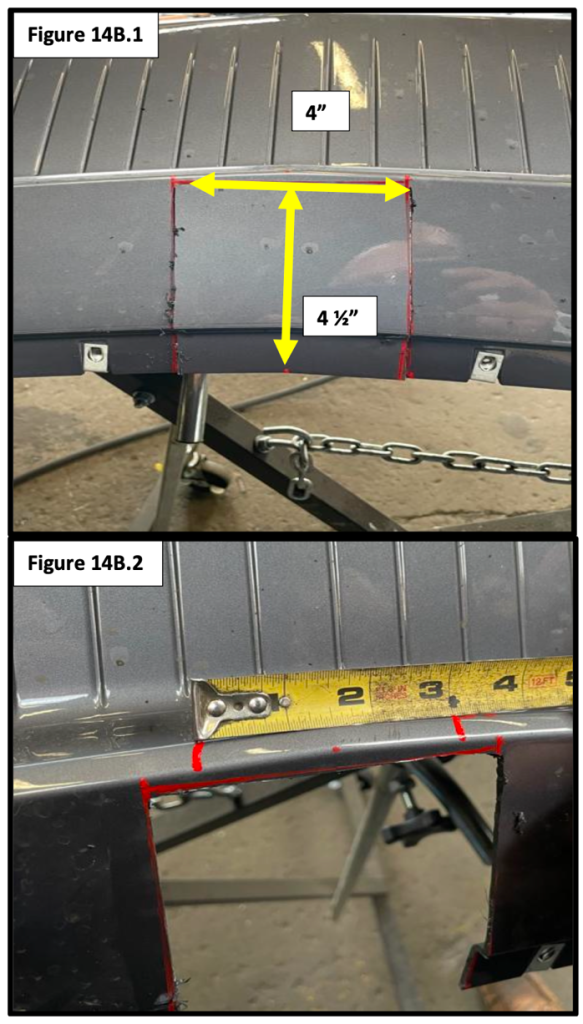
With the hitch securely installed, it’s time to make a clean cutout in the bumper to allow the receiver tube to pass through.
Here’s how to do it:
- Find the Centerline
- Locate the center of the bumper using a measuring tape.
- Mark it clearly with a piece of masking tape or chalk.
- Mark the Cut Area
- From the centerline, measure out 2¼ inches on each side and mark the edges.
- Then, measure 4½ inches upward from the lower edge of the bumper to mark the top of your main cutout area.
- You should now have a rectangle that is 4 inches wide by 4½ inches tall.
- Add the Upper Slot
- Just above this rectangle, mark an additional 3-inch wide by ½-inch tall slot, centered on the same centerline.
- This additional clearance ensures a proper fit around the hitch receiver tube.
- Make the Cut
- Use a reciprocating saw, rotary tool, or fine-toothed hand saw to carefully cut along the marked lines.
- Smooth any rough edges using sandpaper or a utility knife for a clean, professional finish.
This cut will allow the hitch to sit flush while maintaining a neat factory-like appearance.
Step 12: Reinstall the Bumper
Have your helper hold the bumper while you:
- Reconnect all wiring
- Snap the bumper back into place starting from the center out
- Reinstall all screws and trim clips
Step 13: Wrap It Up
- Reinstall the mudflaps using the original screws
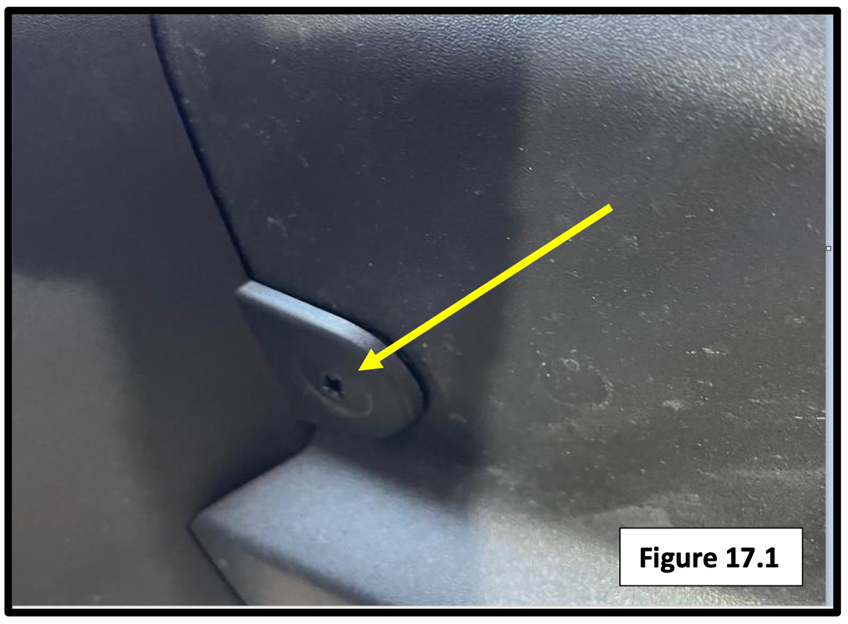
- Replace the rivets with the provided ¼” push-in fasteners
- Reattach the underbody plastic panel from Step 5
That’s It! Installation Complete.
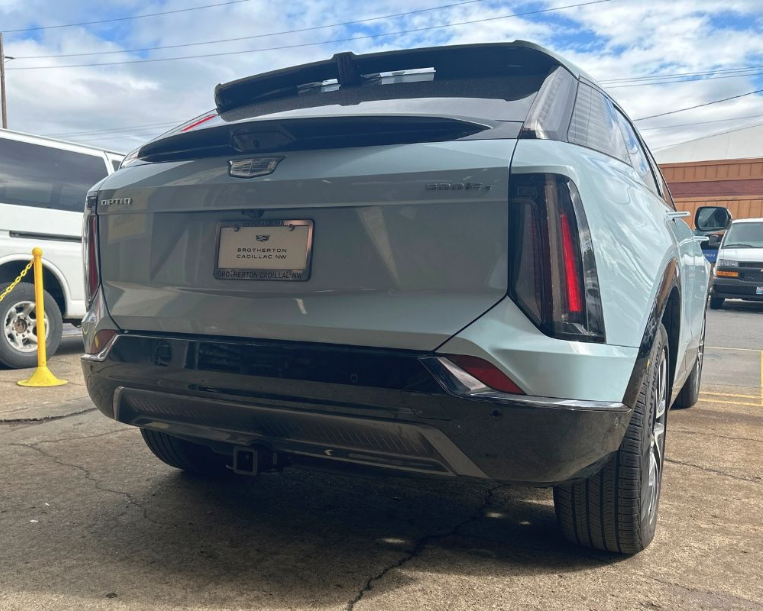
Your Cadillac Optiq is now fully equipped with a fully integrated, hidden EcoHitch that preserves the vehicle’s sleek design while adding serious functionality for bike racks, cargo trays, and more.
Learn More or Order Your EcoHitch