

A Simple Step-by-Step Guide
If you're upgrading your Toyota Crown Signia with a Torklift EcoHitch, you’re in the right place. This hitch is designed to maintain your vehicle’s sleek profile while giving you the strength to tow confidently. This Toyota Crown Signia trailer hitch has the highest weight ratings available to haul your bikes, cargo tray, or other adventure gear without breaking a sweat. Plus, this is the only hitch on the market that does NOT require bumper removal or exhaust modification for installation. Below, we’ll walk you through the installation process in clear and easy-to-follow steps.
Tools You'll Need:
Jack and jack stands or ramps, socket set, trim removal tool, and a torque wrench.
Step 1: Prep and Remove the Belly Panel
- Chock your front wheels for safety.
- Raise the rear of the vehicle using ramps or Toyota-approved lift points.
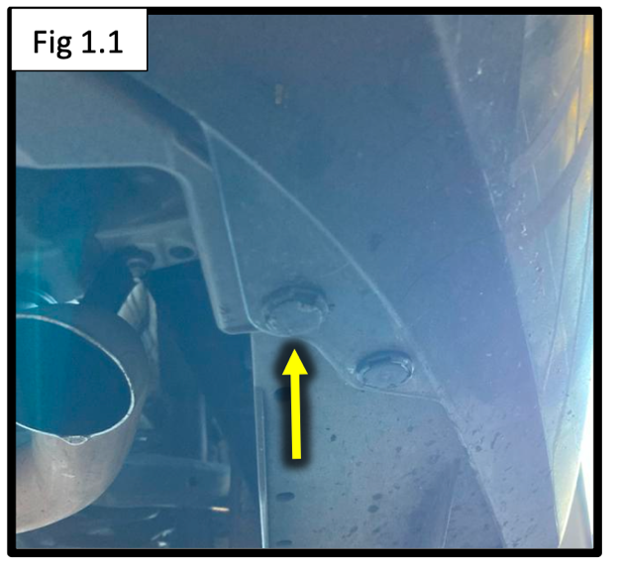
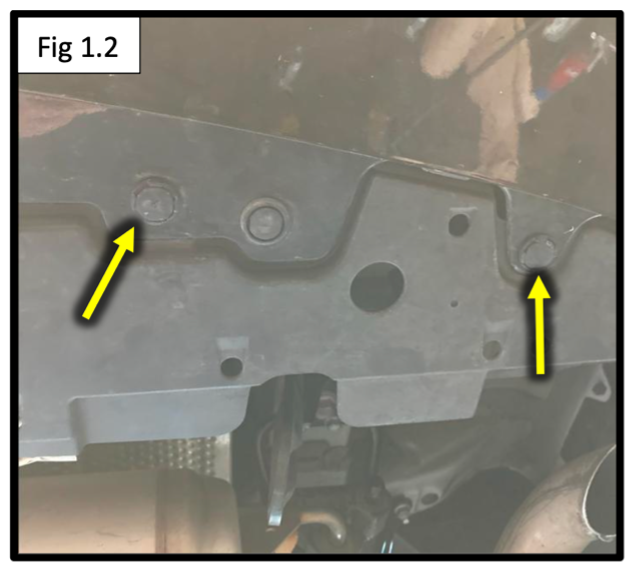
- Underneath the car, remove all plastic clips securing the rear belly panel (see images in your manual).
- Set the belly panel aside for reinstallation later.
Step 2: Remove the Tow Hook (Passenger Side)
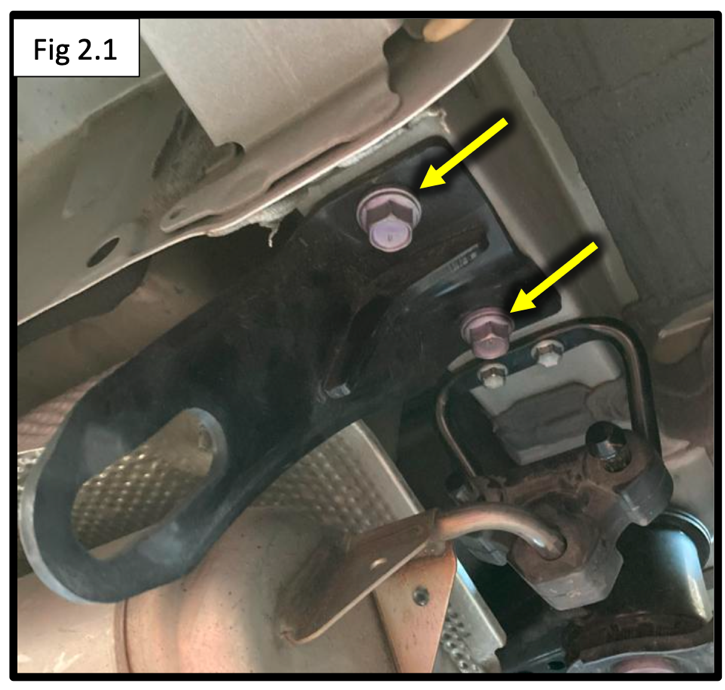
- Locate the metal tow hook on the passenger side frame rail.
- Remove it using a socket wrench.
- You won’t reinstall the tow hook, but keep the factory bolts—you’ll use them again.
Step 3: Prep the Driver Side Bolt (Fishing Method)
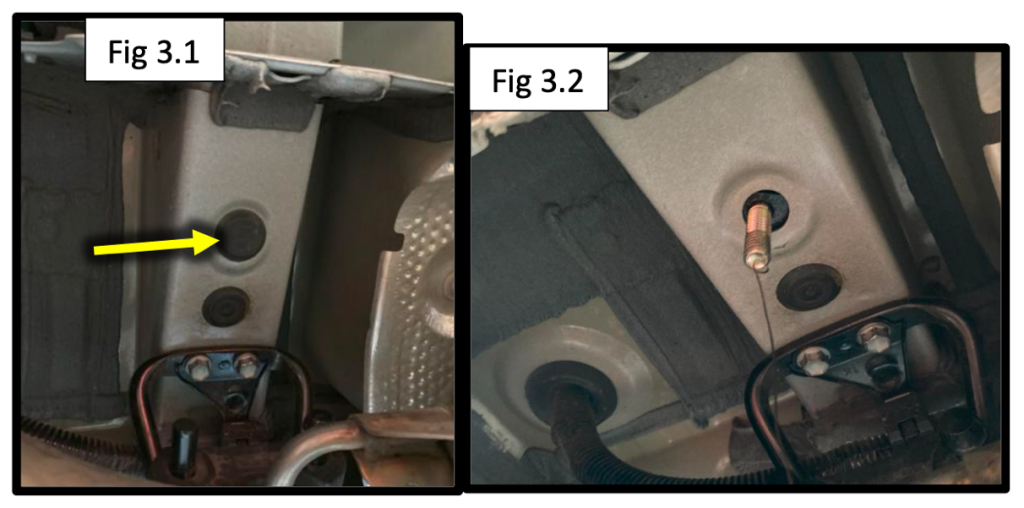
- On the driver’s side frame, remove the rubber plug at the back end.
- Attach a 3/8” bolt to a bolt fisher tool, along with a lock washer and rectangular plate washer.
- Insert the hardware into the frame hole one piece at a time, pulling it through so the bolt hangs downward.
Tip: This method is called "fishing" a bolt, and it helps secure bolts inside boxed frame rails.
Step 4: Mount the Side Plates
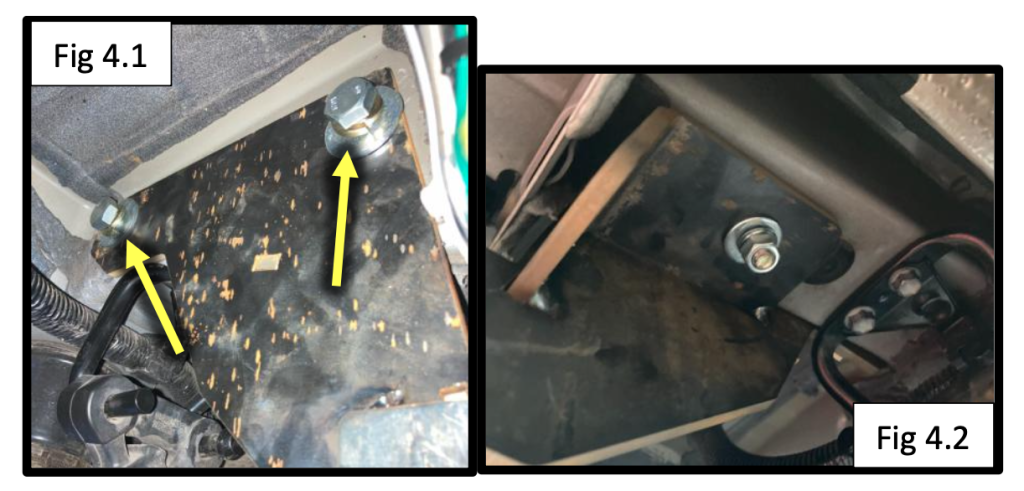
- Slide the driver-side plate onto the hanging bolt from Step 3.
- Use the supplied M12 bolts (with flat and lock washers) to secure the front and rear side plate holes to the frame—keep things loose for now.
- On the passenger side, use the same M12 bolts and reinstall the original factory bolts through the plate.
- Go back to the driver's side and finish securing the "fished" bolt with a flat washer, lock washer, and hex nut.
Step 5: Install the Cross Tube
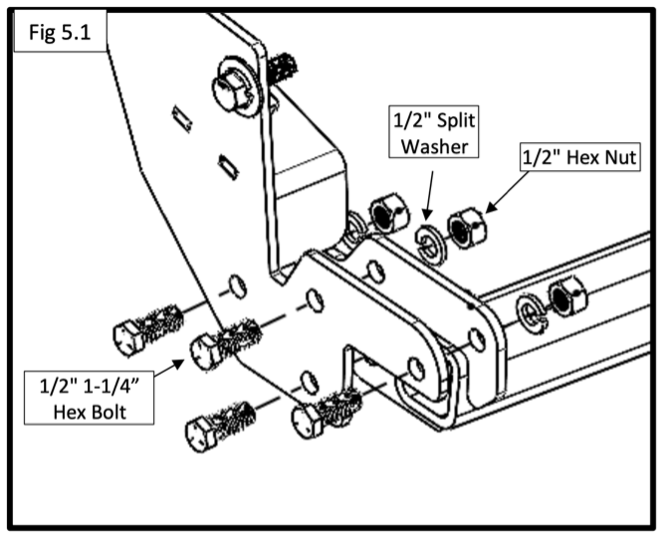
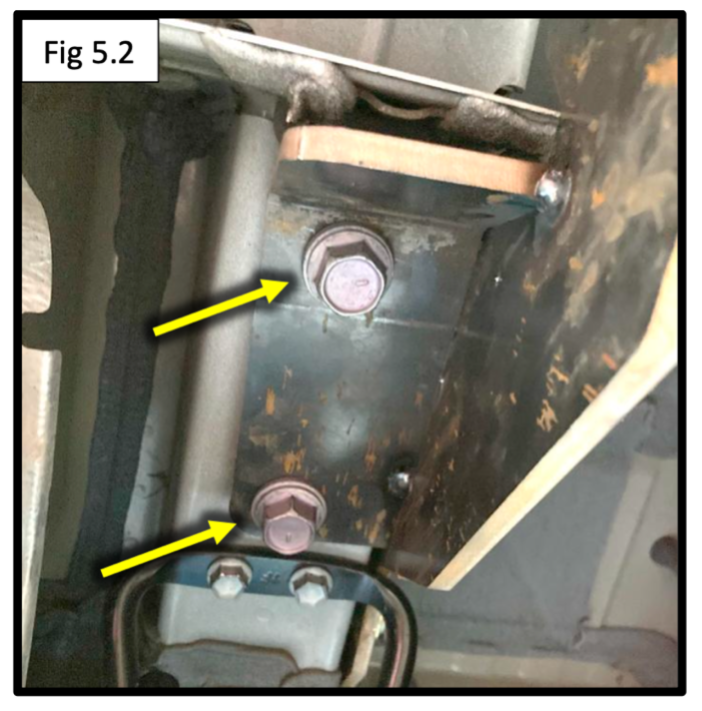
- With help from a friend, lift the hitch cross tube into place between the side plates.
- Secure it using the included 1/2" bolts, washers, and nuts.
- Tighten everything in this order:
- Passenger tow hook bolts – 90 ft-lbs
- Driver side 3/8” bolt – 26 ft-lbs
- M12 frame bolts – 90 ft-lbs
- 1/2” cross tube bolts – 64 ft-lbs
Step 6: Trim the Belly Panel for Hitch Clearance
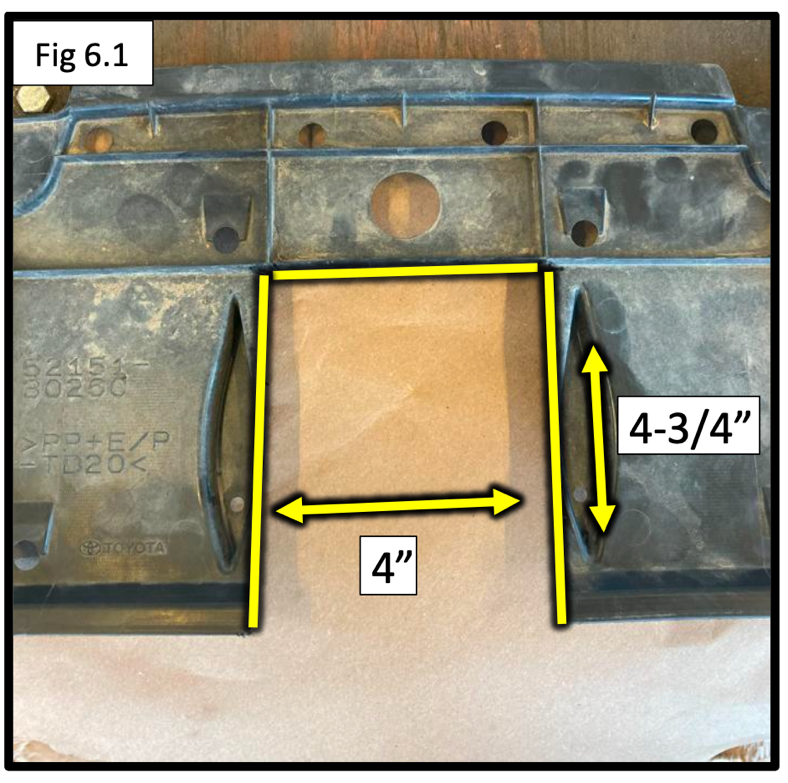
- Use the factory molding lines as a guide to cut a rectangular opening in the belly panel—approximately 4-3/4” wide by 4” long (see diagram in the manual).
- Carefully make the cut using a rotary or reciprocating saw.
- Once trimmed, reinstall the belly panel using the clips you removed in Step 1.
You're Done!
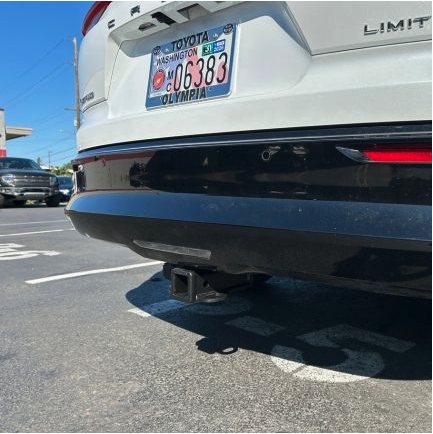
Your new EcoHitch is now fully installed and ready for towing. Whether you’re hauling bikes, gear, or a small trailer, this hitch is built to handle it with strength and style—all while maintaining the factory look of your Toyota Crown Signia.
Learn More or Order Your EcoHitch