

Step-by-step instructions from a pro installer
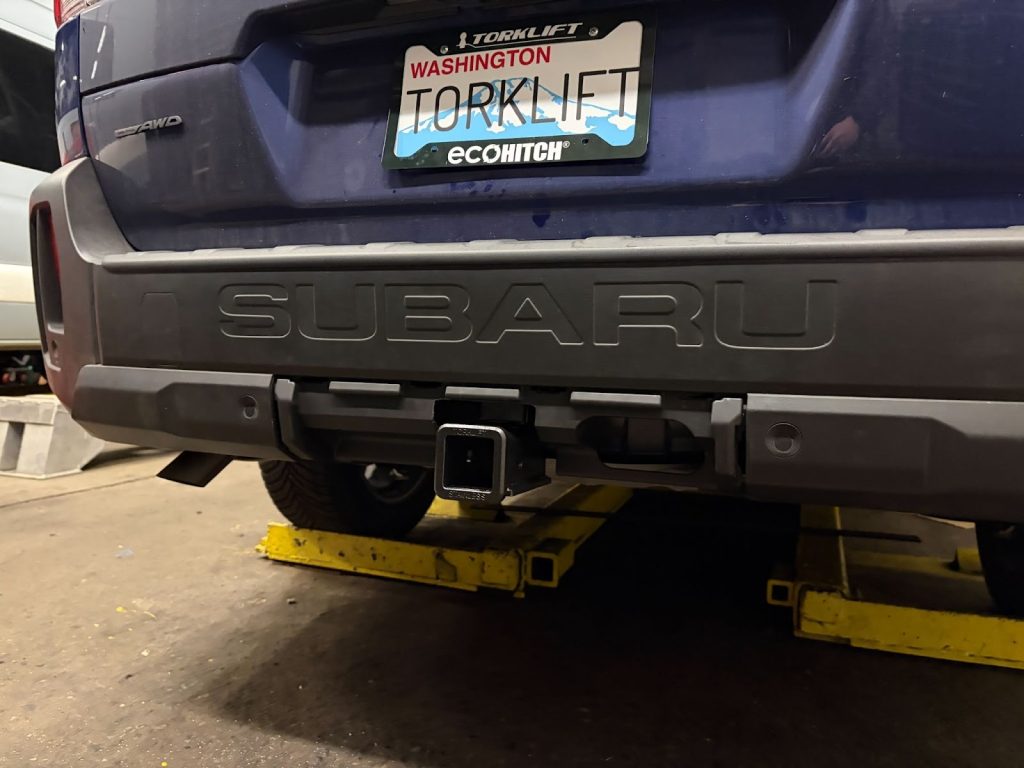
If you're ready to add towing or cargo capability to your 2026+ Subaru Outback, the EcoHitch X6096S is the best way to do it, designed to integrate seamlessly and sit completely hidden for a clean, factory-style finish. In this guide, we’ll walk you through the install process step by step, with a few pro tips to help make things easier.
Tools needed: Basic hand tools, torque wrench, panel clip tool, and optionally a lift or jack stands
Estimated time: =1–3 hours
Check out the detailed installation steps below or just watch the video:
Step 1: Remove the Tail Lights
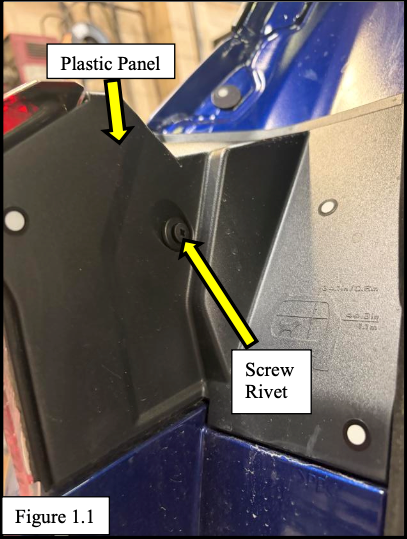
First, open your rear tailgate and remove the tail light cover panel. There’s a plastic screw rivet holding it in place, remove that and gently pop the panel off.
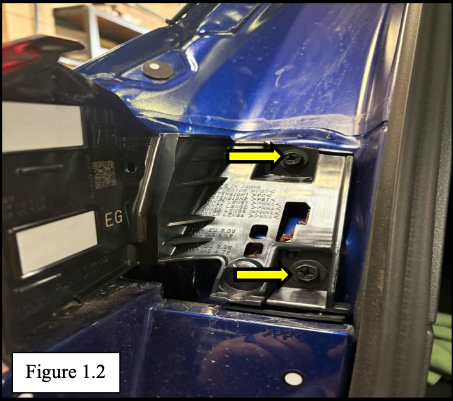
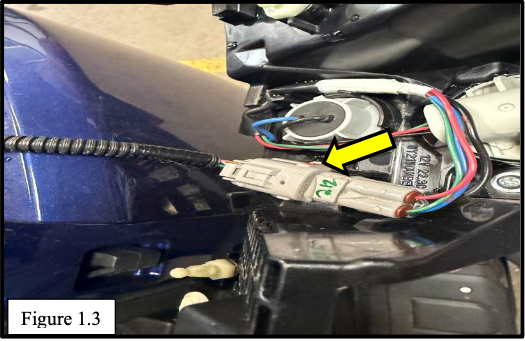
Then remove the two bolts securing each taillight to the body and pull the taillight straight back until it releases. Unplug the wiring harness before setting the taillight aside. Repeat this for both sides.
Step 2: Detach the Fender Trim and Mud Flaps
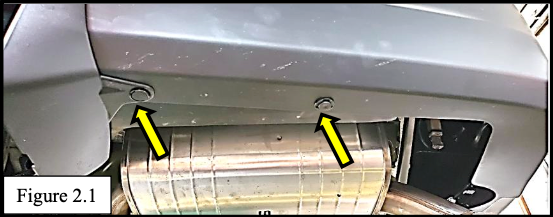
Underneath the bumper on both sides, remove two plastic rivets.
Then in the rear fender wells, remove three push clips and two screws holding each mud flap in place.
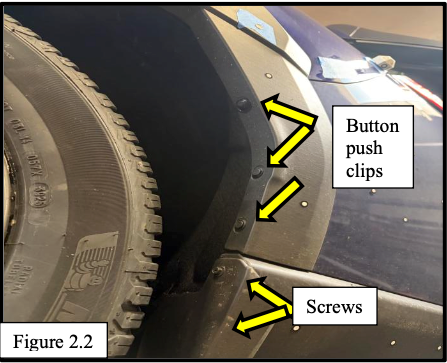
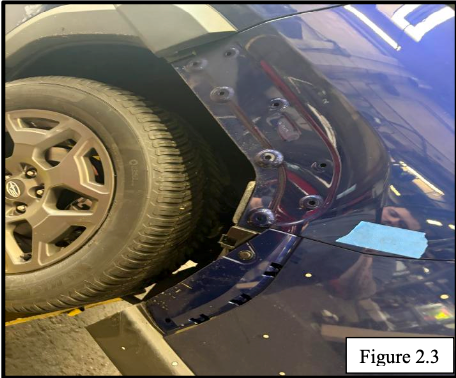
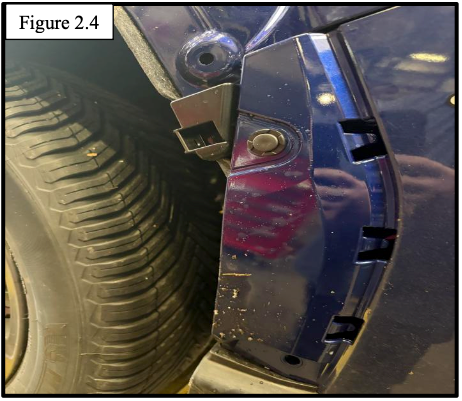
The mud flap and wheel lip trim should now be free, gently pull them away and remove the last plastic clip underneath.
Repeat this for both sides.
Step 3: Remove Lower Bumper Clips
Under the center of the bumper, remove three plastic rivets.
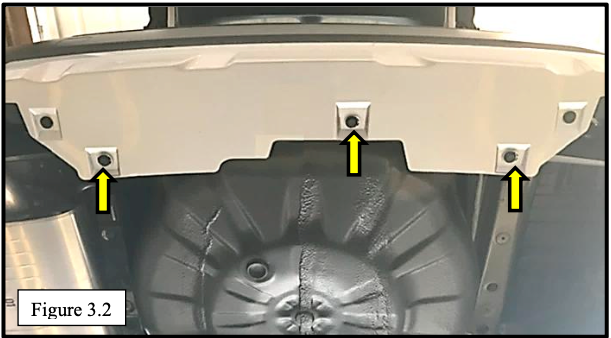
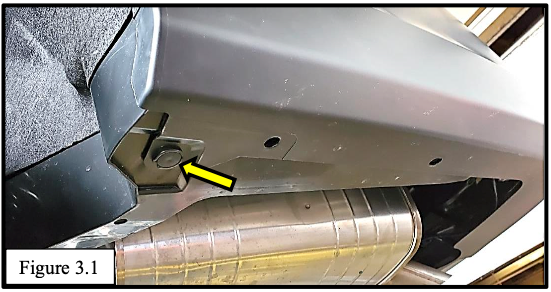
Then take out the single plastic rivet at the bottom of the bumper corner on each side. These help free the fascia for removal in the next step.
Step 4: Remove the Rear Bumper
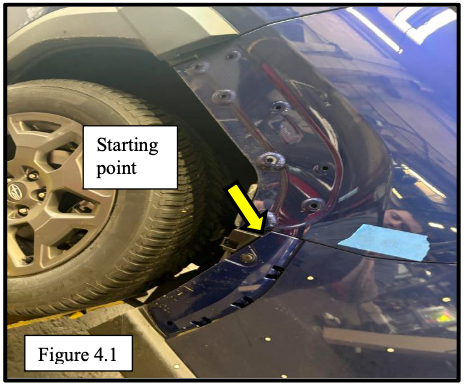
This step is easier with two people. Carefully start at the corners and unclip the bumper fascia from each side. Work your way toward the center.
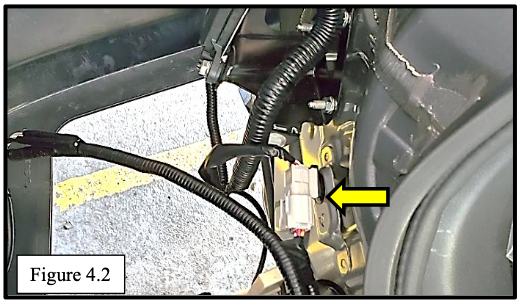
Before fully removing the bumper, disconnect the wiring harness at the rear frame. Now the bumper can be fully removed and placed somewhere safe.
Step 5: Remove the Factory Cross-Member
On the driver’s side, remove the small sensor from the frame cross-member.
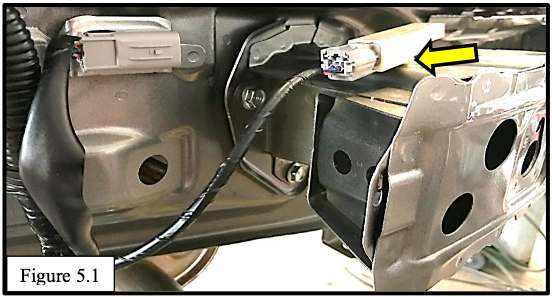
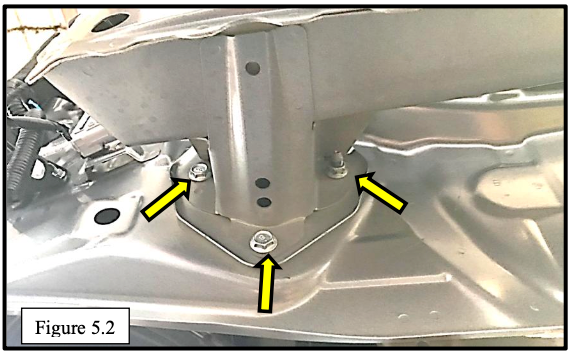
Then remove two bolts and one nut per side to detach the cross-member. This part will not be reused, the EcoHitch will take its place.
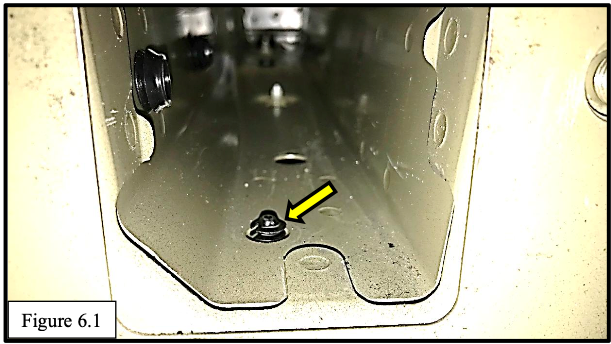
Step 6: Adjust the Frame Rivets
There’s a plastic rivet at the bottom rear edge of the frame on each side. Remove it, then reinstall it from inside the frame (upside down). This clears the space needed for the hitch installation.
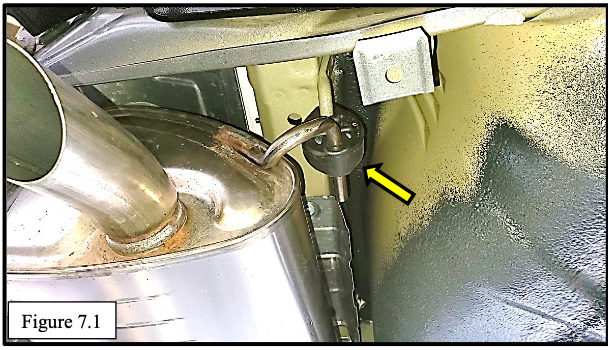
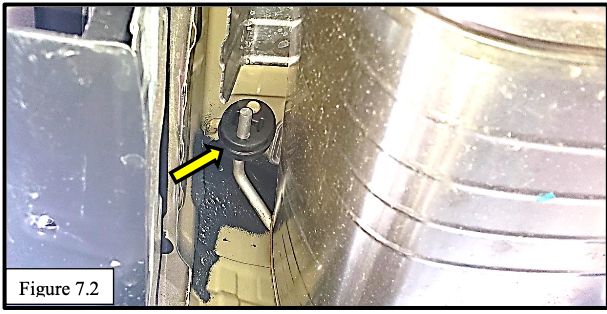
Step 7: Lower the Exhaust
Spray the exhaust hanger with WD-40 or silicone lube to make removal easier. Then slide the rubber hanger off the peg and gently lower the exhaust to give yourself room to work.
Step 8: Mount the Hitch
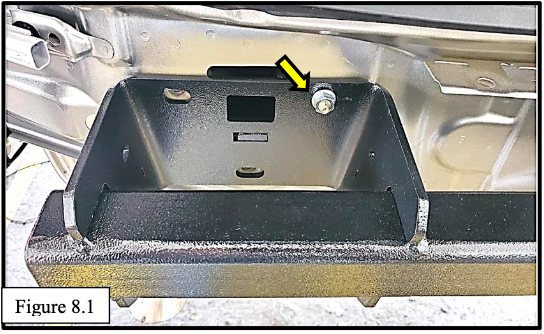
Raise the EcoHitch into position and align it with the factory cross-member studs.
Start by threading an M10 nut onto each stud to hold the hitch in place. Hand-tighten only for now.
Step 9: Fish the Frame Bolts
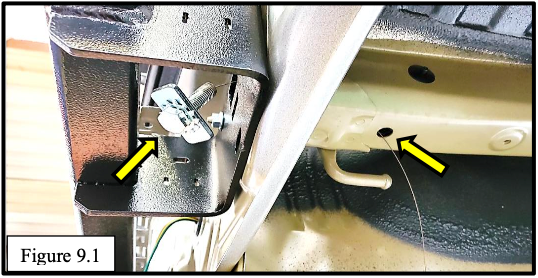
Now it’s time for the “fishing” trick. Feed the bolt fisher into the mounting hole under the frame and guide it out through the side plate opening on the hitch.
Attach your ½" bolt (with star washer and plate washer), and carefully pull the bolt through the frame so it protrudes through the hitch side plate. Repeat on the opposite side.
Once in place, secure each bolt with a flat washer, lock washer, and nut.
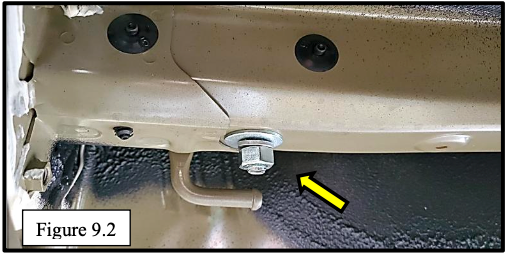
Pro tip: You can separate the washers and bolt on the wire to guide them through one at a time if needed.
Step 10: Insert Remaining Hitch Hardware
Insert an M10 bolt (with lock and flat washers) into the remaining two mounting holes per side. Then torque all hardware as follows:
- M10 hardware: 50 ft-lbs
- ½" hardware: 64 ft-lbs
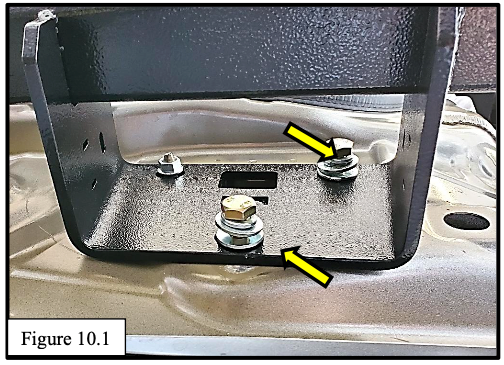
Now reattach the sensor to the driver-side plate of the hitch using the included zip tie.
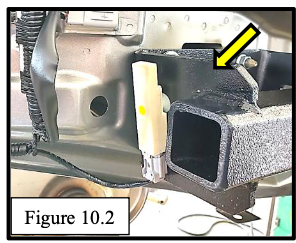
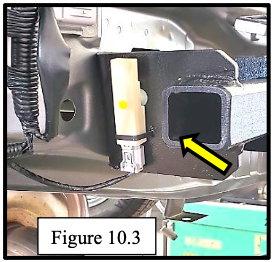
Step 11: Remove the Knockout Panel
On the bumper you removed earlier, pop out the factory knockout panel so the hitch receiver can pass through when reinstalled.
Step 12: Reinstall the Exhaust and Bumper
Slide the rubber exhaust hanger back into place, then reinstall the bumper fascia in reverse order.
Don’t forget to reconnect the wiring harness before fully snapping the bumper back in. Reattach all rivets, clips, and trim panels.
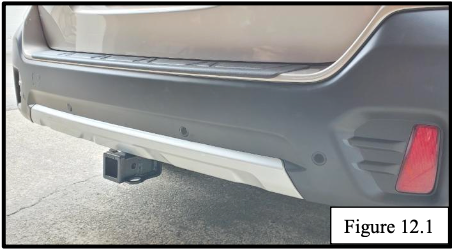
Step 13: Insert the Adapter
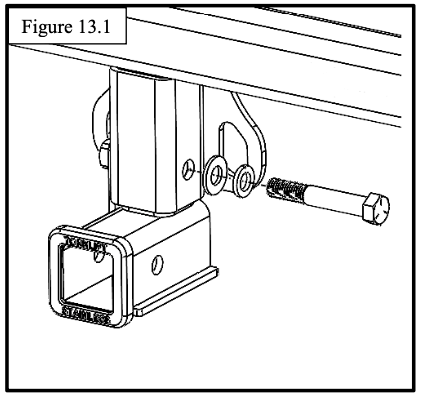
Slide the adapter sleeve into the receiver. Secure it with the included 5/8” bolt, flat washer, and lock washer.Torque the adapter bolt to 120 ft-lbs, and remember to re-torque before each use.
You're Done!
The EcoHitch for the Subaru Outback is now installed and ready for towing, hauling bikes, or hitting the trail. The entire hitch is hidden except the receiver, so you’ll enjoy a clean factory appearance with rugged capability underneath.
If you'd prefer to have it professionally installed or need support along the way, visit our Certified Installer Locator or contact our tech team at 800- 246-8132, we're happy to help.
Want a Visual Walkthrough?
Prefer to follow along with a video? We’ve got you covered!
Check out our step-by-step installation video for the 2026+ Subaru Outback EcoHitch on YouTube:
We walk you through every step, from removing the bumper to torqueing your bolts, so you can install with confidence.