

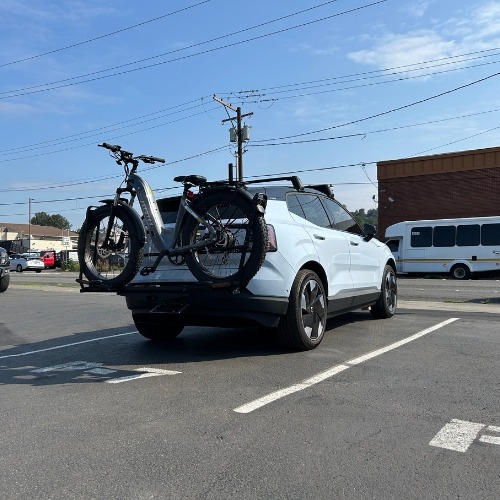
Step-by-Step Instructions from a Pro Installer
The Volvo EX30 is a sleek electric SUV and with the EcoHitch, you can add towing and accessory capability without compromising its design or clearance. The install isn’t overly complicated, but it does require some patience, the right tools, and a little finesse. Follow this step-by-step guide to install part number X5008S, our EcoHitch designed specifically for the EX30.
Or just watch the video:
What You’ll Need:
- Standard automotive toolset
- Flathead or panel removal tool
- Ratchet and torque wrench
- Trimming tool
- Safety glasses and gloves
Zip ties (optional for tidying harnesses)
Step 1: Prep the Rear Bumper Area
Start on the driver’s side, and repeat everything on the passenger side when prompted.
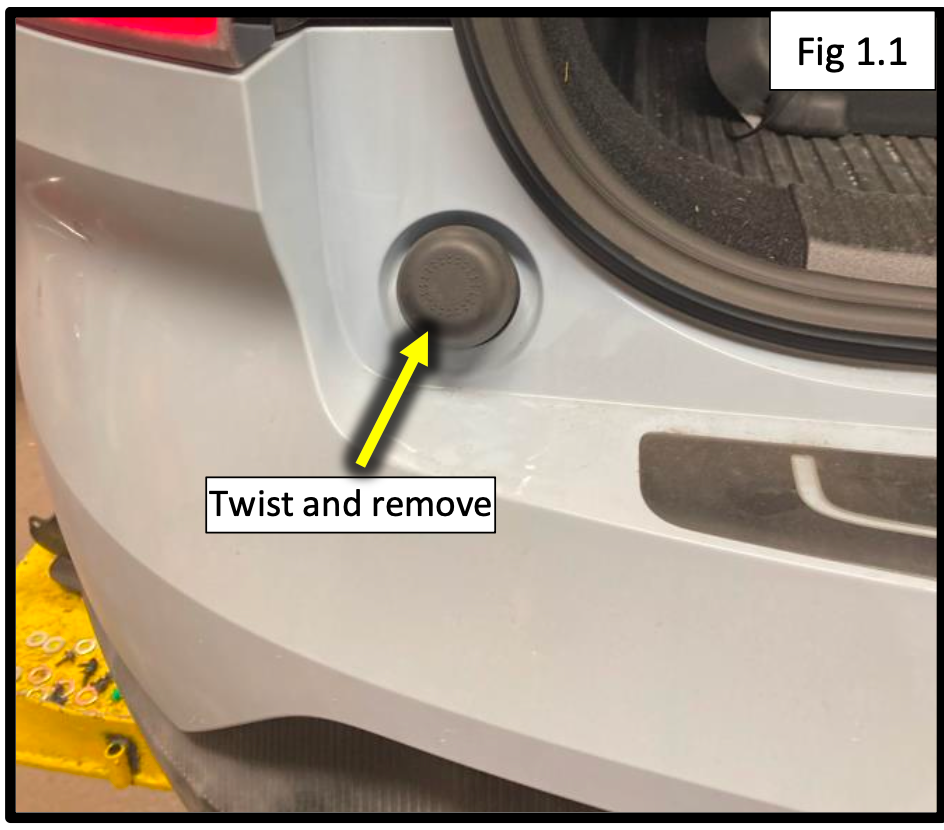
- Pop the rubber bumpers on the inside of the hatch (turn counterclockwise).
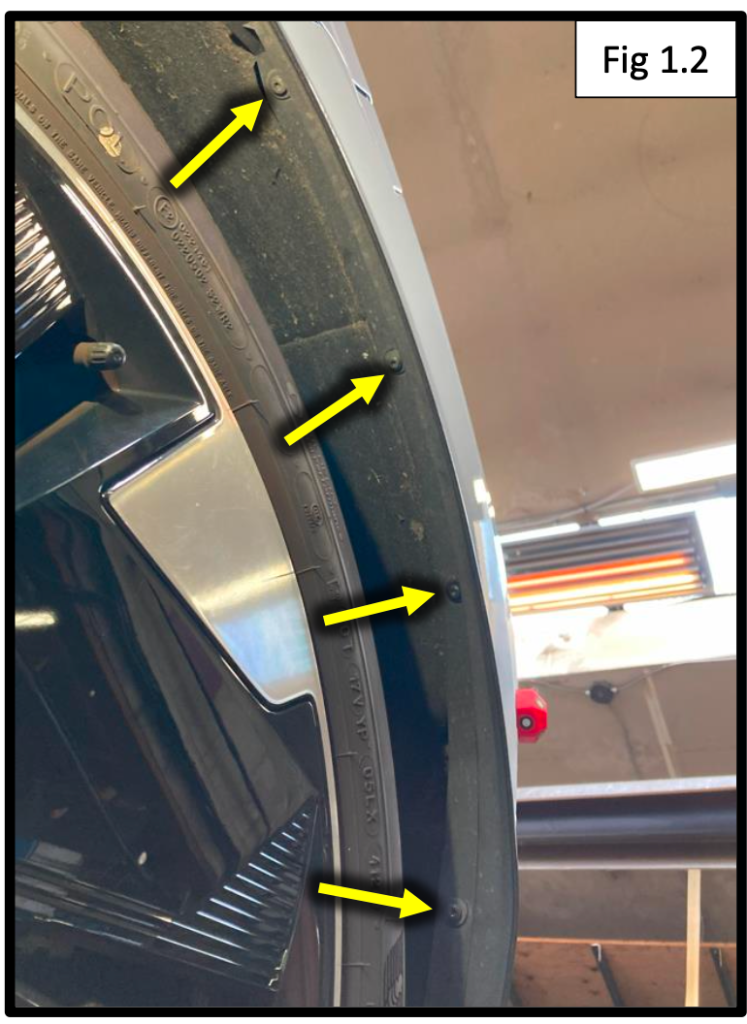
2. Remove the Torx screws in the wheel well and take off the inner trim.
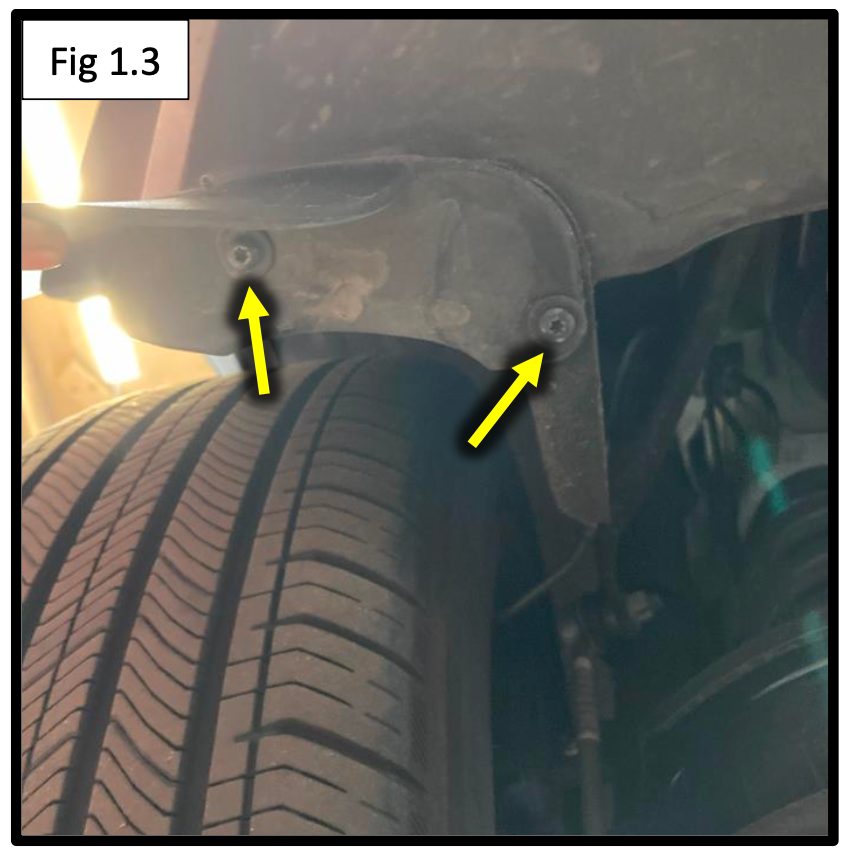
3. Take off the mud flaps and unscrew the bolts behind them.
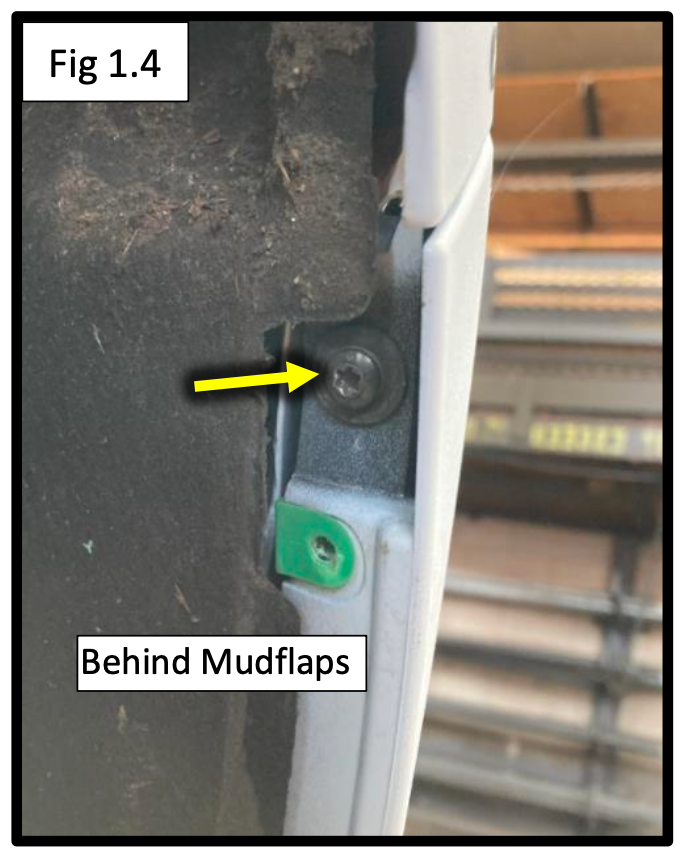
4. Remove the screws across the bottom of the bumper (near the diffuser).
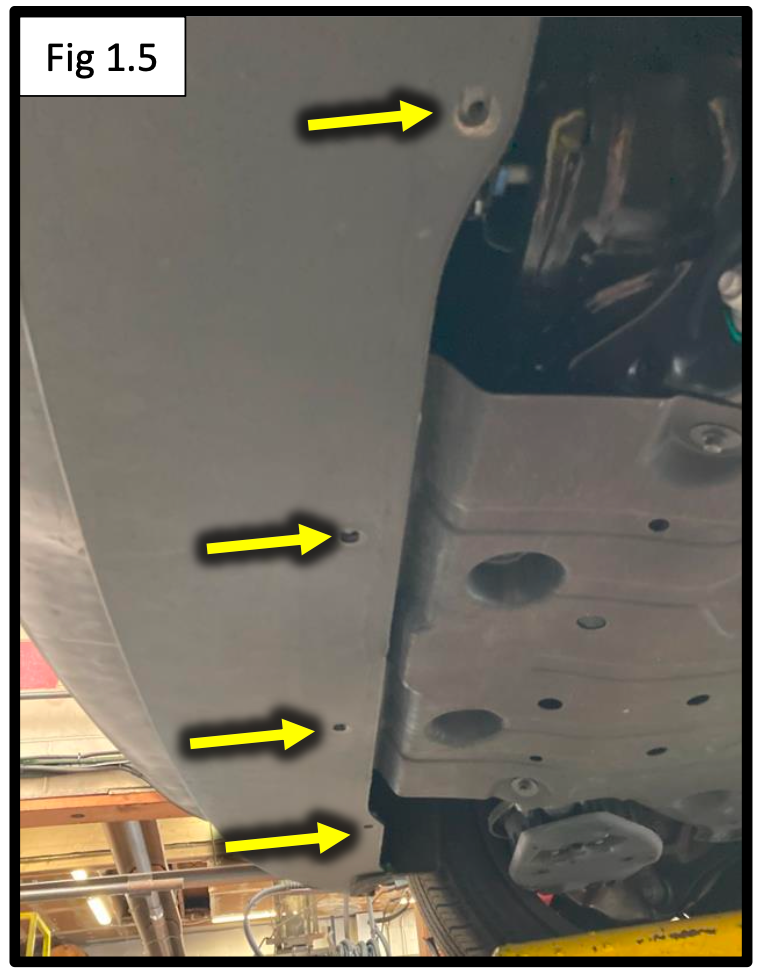
5. Gently pop out the wheel well inner trim.
You’ll now have a clear view of the inner bumper hardware and components.
Step 2: Remove the Rear Bumper
- Temporarily peel back the hatch weather seal from the lower edge.
- From the wheel wells, unclip the bumper fascia, working toward the center.
- Once the bumper is loose, unplug two harnesses on the passenger side (see Fig. 2.1).
- Set the bumper aside in a safe place, somewhere it won’t get scratched.
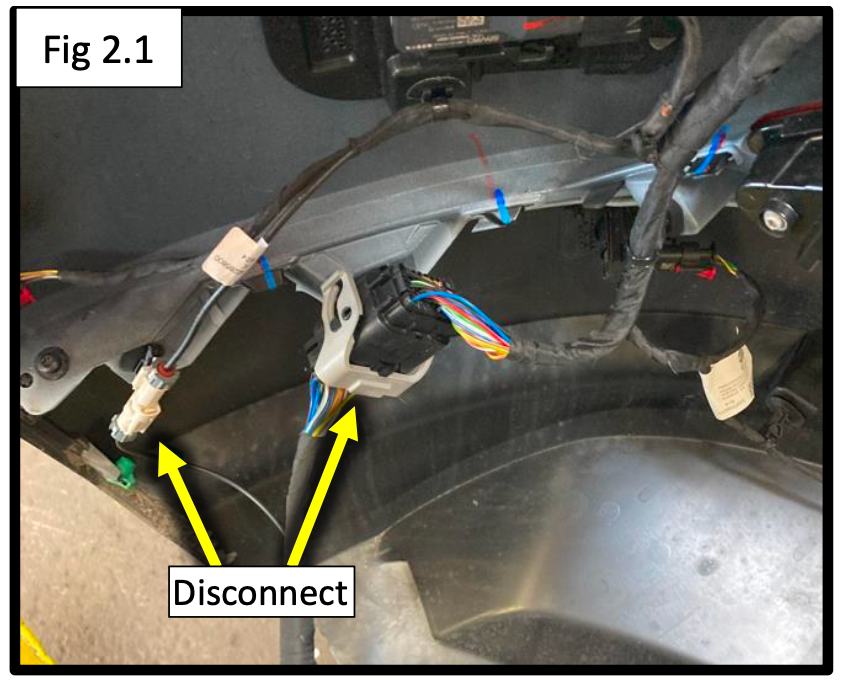
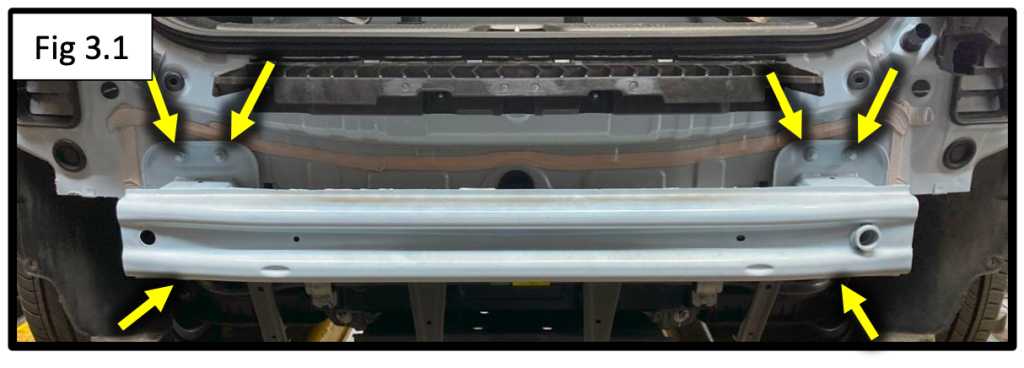
Step 3: Remove the Rear Crossmember
- You’ll see six factory nuts securing the crossmember to the frame. Remove these.
- Carefully remove the crossmember and set it aside. It won’t be reused.
- Lift the EcoHitch into position, aligning it with the same studs.
- Hand-tighten the factory nuts with the hitch centered.
Step 4: Install Frame Support Brackets
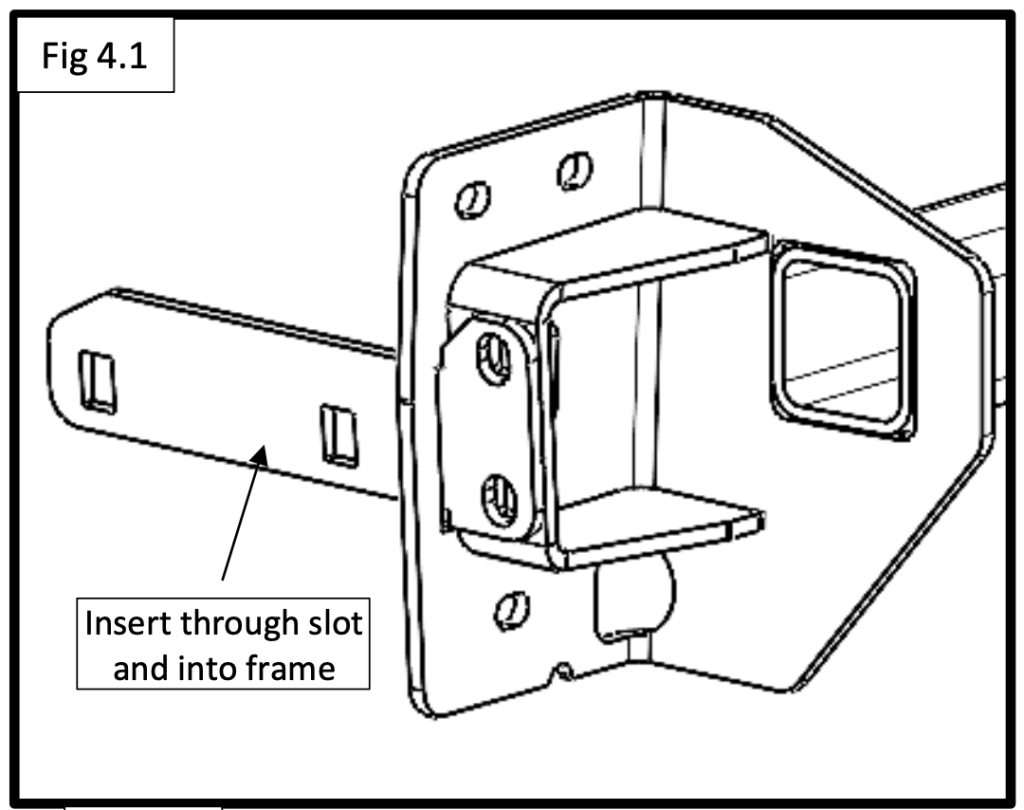
- Insert the inner frame support bracket through the side plate slot and into the frame (see Fig. 4.1).
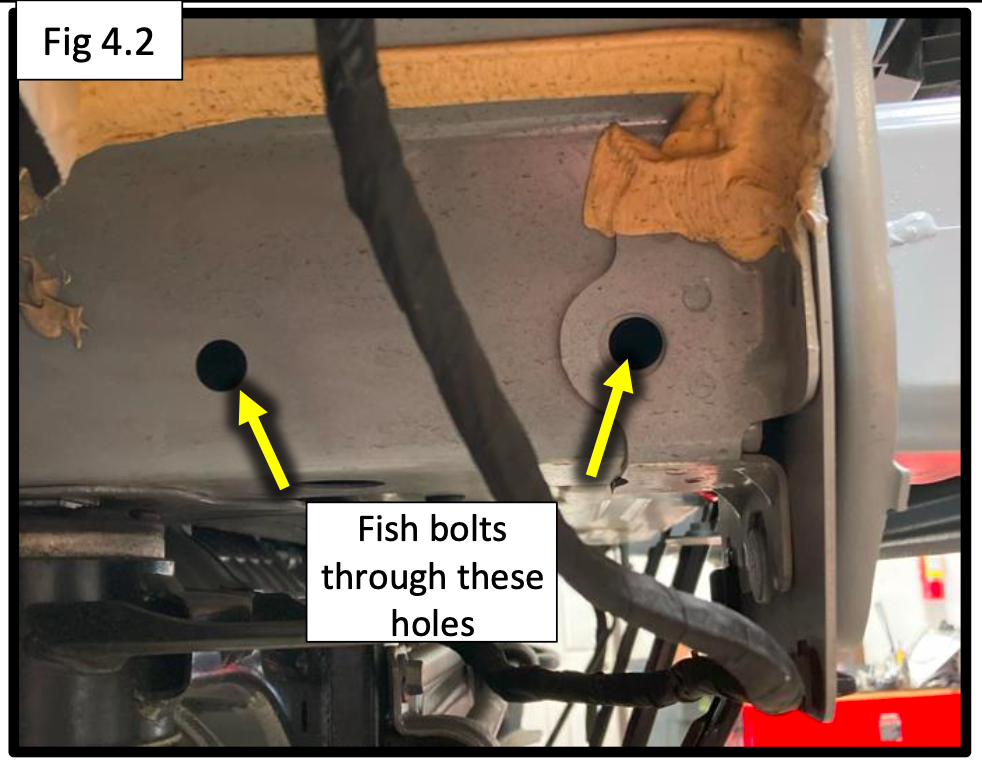
2. Use the bolt fisher to guide a ½" carriage bolt from the rear side hole out through the hitch side plate (Fig. 4.2–4.3).
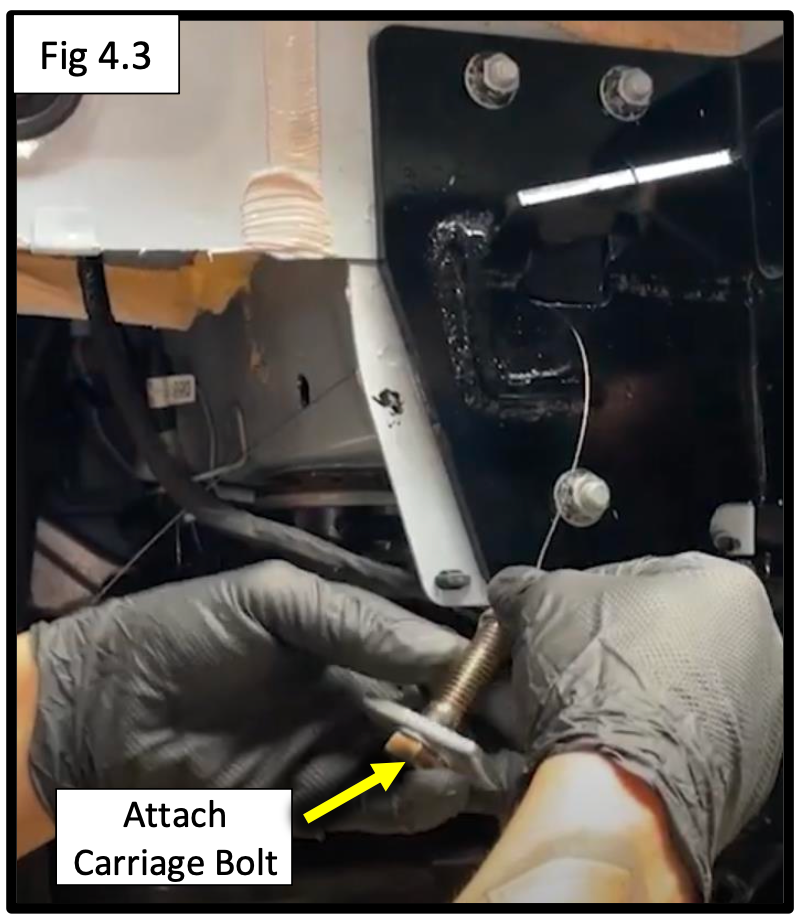
3. Remove the bolt fisher and secure with:
- ½" flat washer
- ½" split lock washer
- ½" hex nut
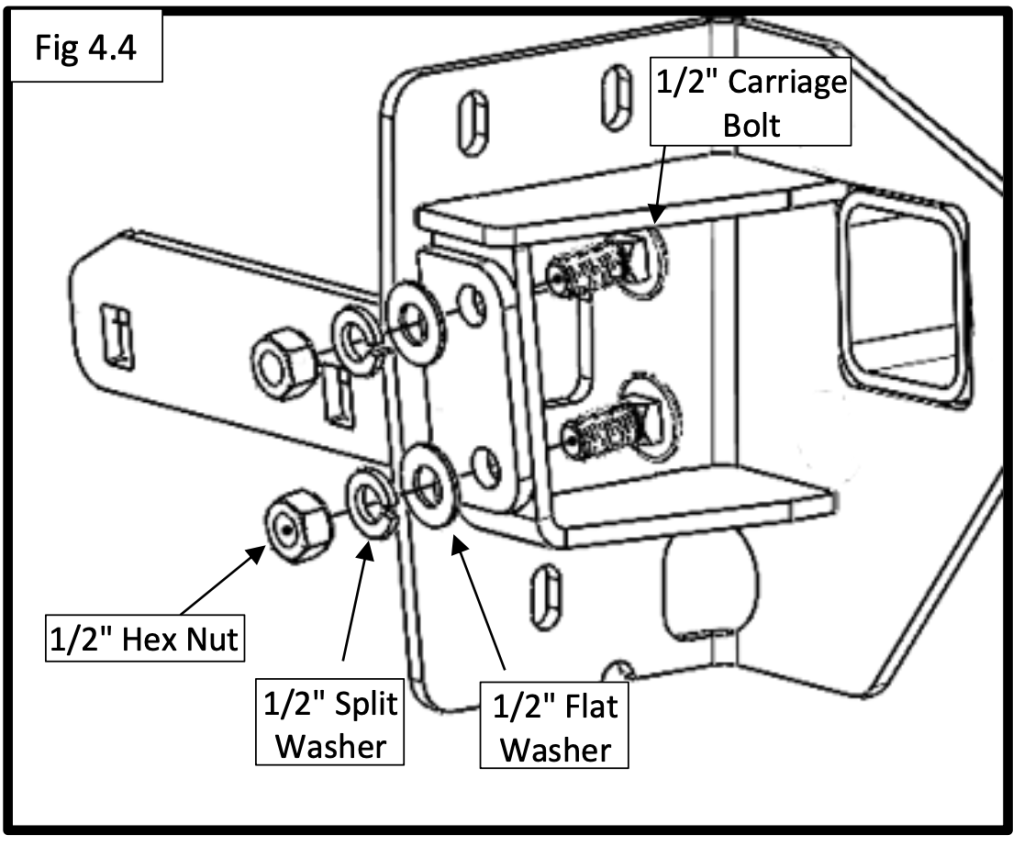
4. Repeat for the front mounting hole.
5. Do the same process on the passenger side, installing its frame support.
6. With all hardware in place:
- Torque factory stud nuts to 45 ft-lbs
- Torque all ½” hardware to 64 ft-lbs
Step 5: Trim the Bumper and Install License Plate Flip Kit
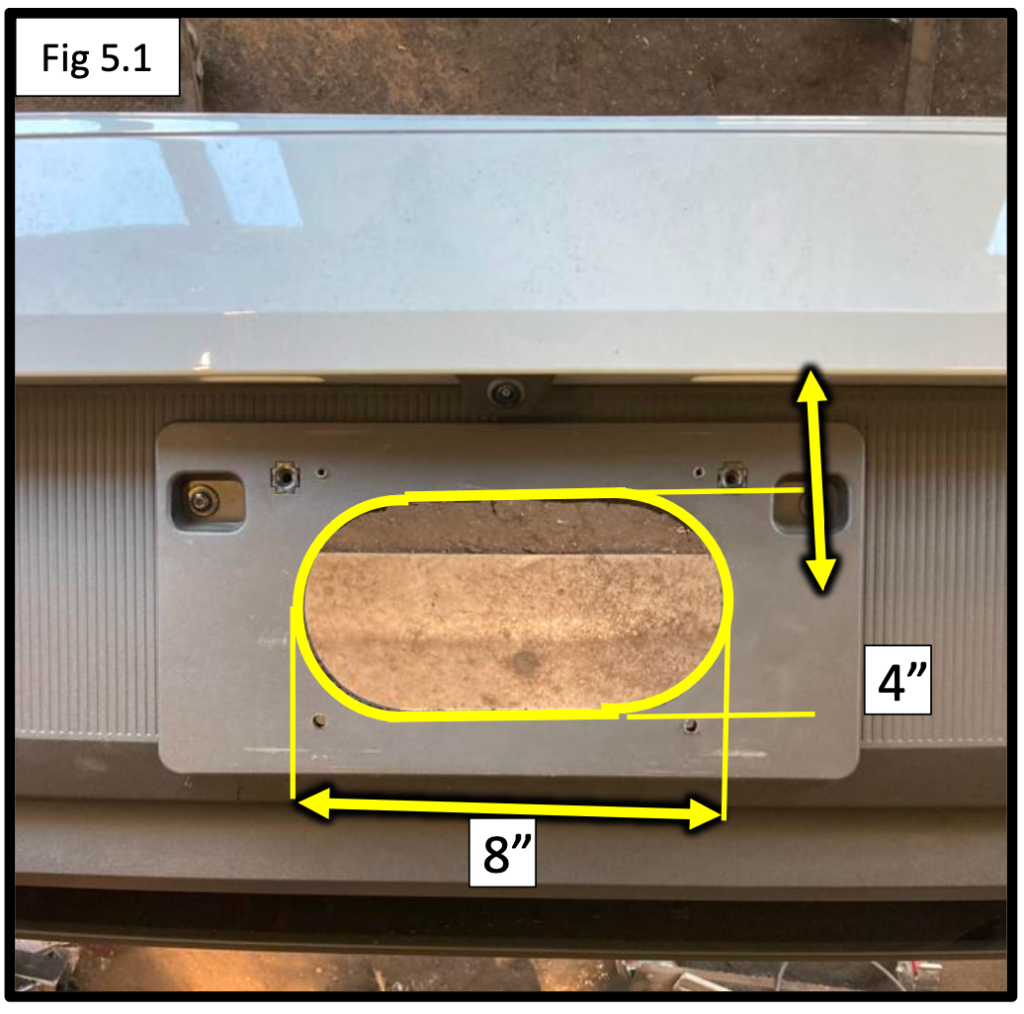
- Measure and cut a 4” x 8” opening in the center of the bumper, just behind the license plate (Fig. 5.1).
2. Install the XA4000 License Plate Flip Kit using the supplied ¼” button head screws (Fig. 5.2).
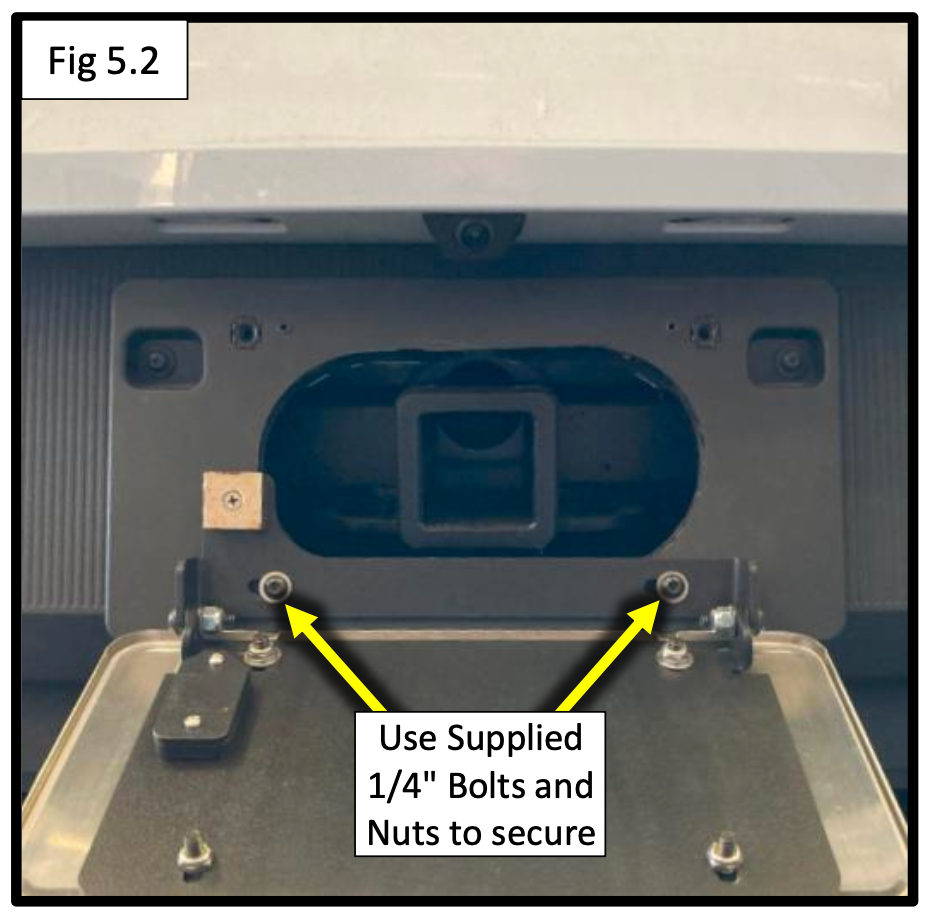
3. This allows your receiver to hide behind the plate, sleek, functional, and discreet.
Final Step: Reassemble and Test
- Reinstall the bumper fascia by reversing the steps from earlier.
- Reconnect wiring harnesses and check the taillights for proper function.
- Double-check all torque specs and re-secure the weather seal.
- Enjoy your newly installed EcoHitch!
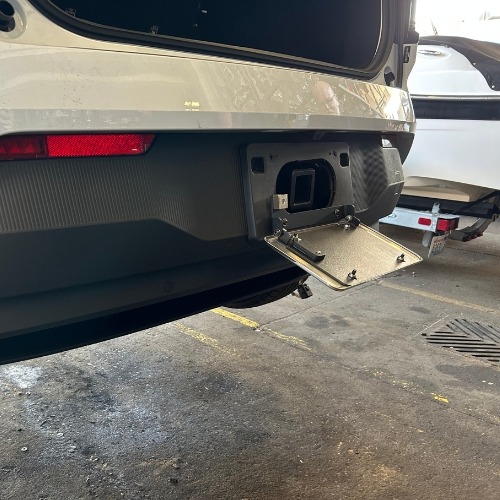
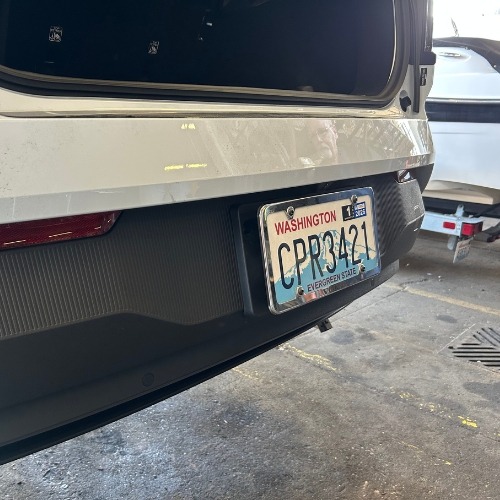
Installation Complete!
Whether you’re towing a lightweight trailer, mounting a bike rack, or carrying extra cargo, this EcoHitch will rise to the occasion, without affecting the clean lines or function of your Volvo EX30.
If you’re not ready to install it yourself, no worries our Certified Torklift Installers are always ready to help. And don’t forget to check out the YouTube install video if you prefer to follow along with visual instruction.