

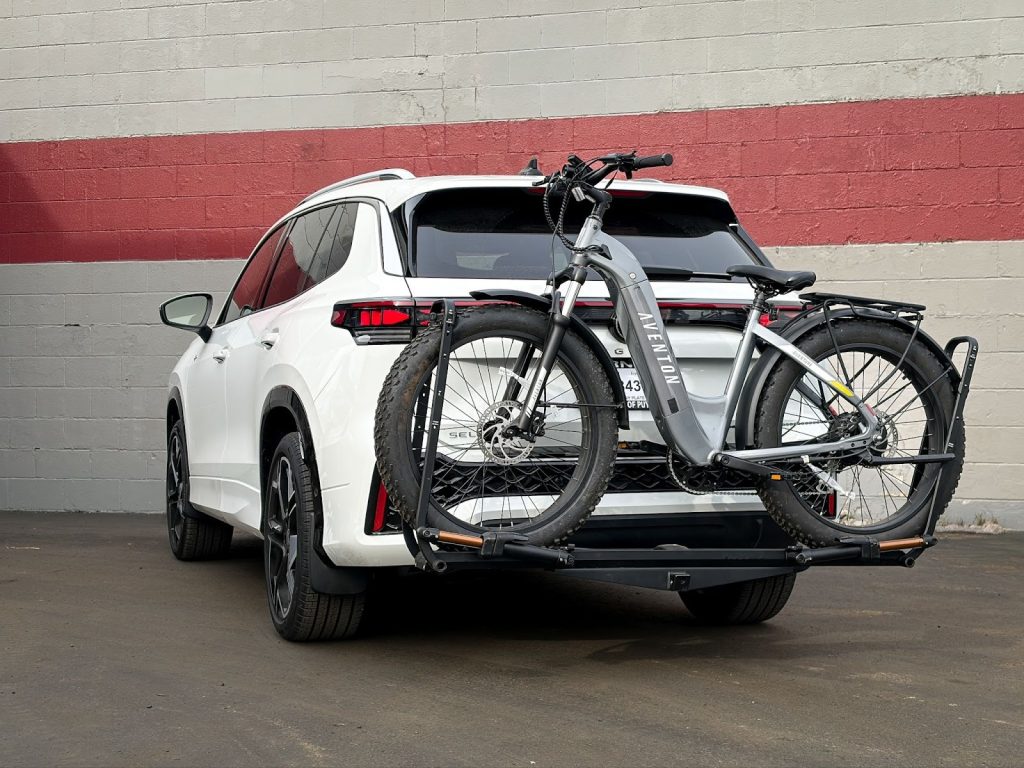
This content is accurate as of February 26, 2026. Fitment details may change, so for the latest information, please visit the EcoHitch product page.
Adding an EcoHitch to your 2025+ Volkswagen Tiguan is one of the best upgrades you can make for versatility, whether you're hauling bikes, a cargo tray, or towing a light trailer. The good news? This install is completely manageable with the right tools, a little patience, and a methodical approach.
I’ll walk you through this step-by-step, just like we would in the shop.
Or just watch the video:
Before You Begin
Tools you’ll want ready:
- Jack stands, ramps, or hoist
- Wheel chocks
- Trim removal tools
- Socket set (metric)
- Torque wrench
- Bolt fisher (included)
- Masking tape & marker
- Cutting tool (oscillating tool or air saw works great)
Always work safely. Set the parking brake and chock the front wheels before lifting the vehicle.
Step 1: Safely Raise and Secure the Vehicle
Lift the rear of the Tiguan using suitable jack stands, ramps, or a hoist.
Make sure:
- Parking brake is engaged
- Front wheels are chocked
- Vehicle is stable before crawling underneath
Take your time here. Safe setup makes everything easier.
Step 2: Remove Fender Well Hardware
Inside both rear wheel wells:
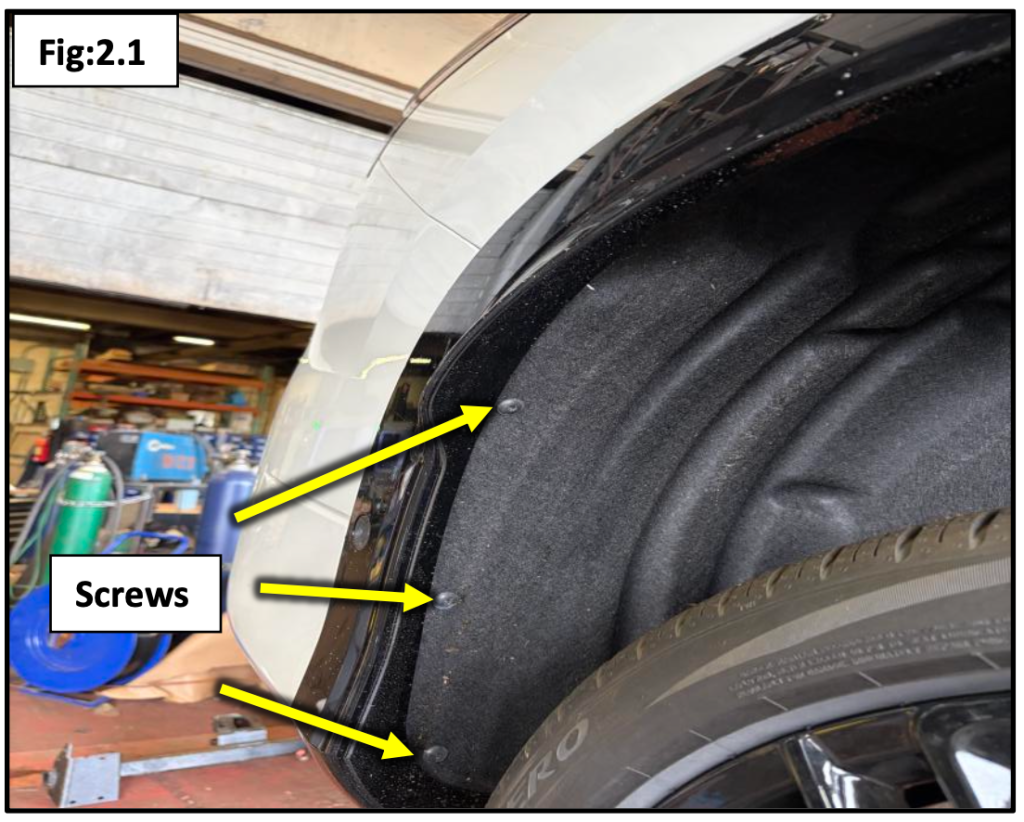
- Remove the screws (Figure 2.1)
- Push the fabric liner inward to expose hidden retainers
- If equipped, remove mudflaps and any additional hardware
Keep all hardware organized, you’ll reuse most of it.
Step 3: Remove Fender Trim
From inside the wheel wells:
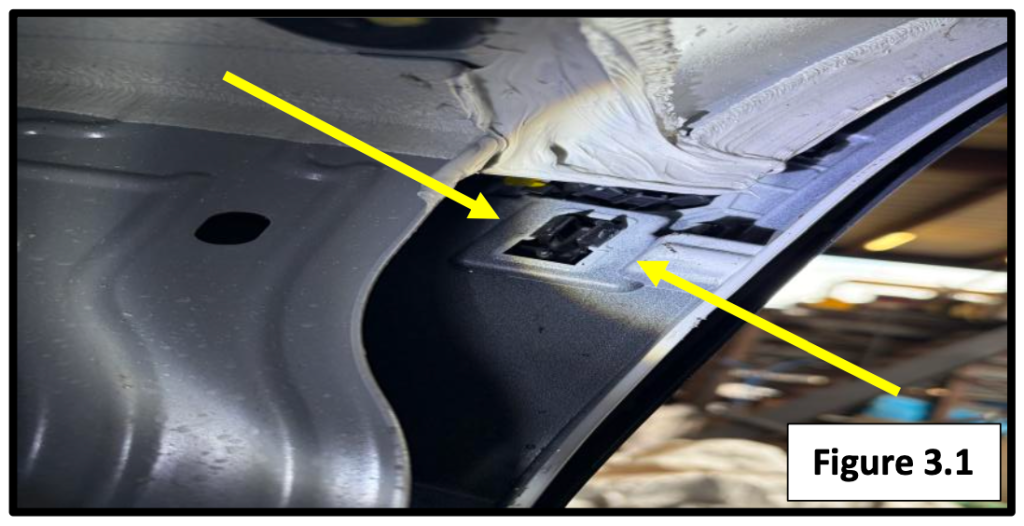
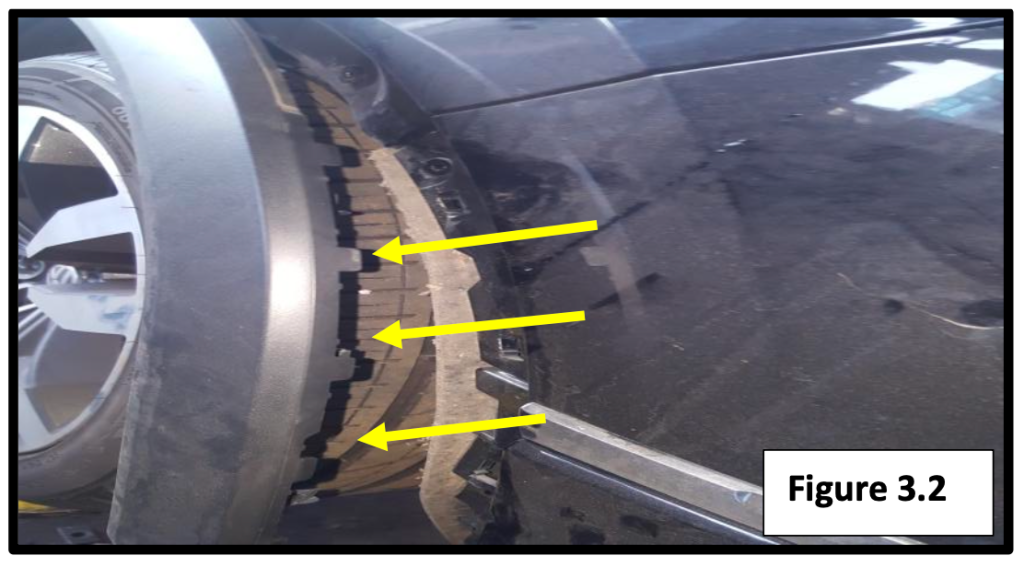
- Carefully pinch the wheel clips together
- Gently pry outward to release the fender trim
- Start at the bottom rear and work upward
Work slowly and evenly to avoid breaking clips. Trim tools make this much easier.
Step 4: Remove Upper Bumper Corner Screws
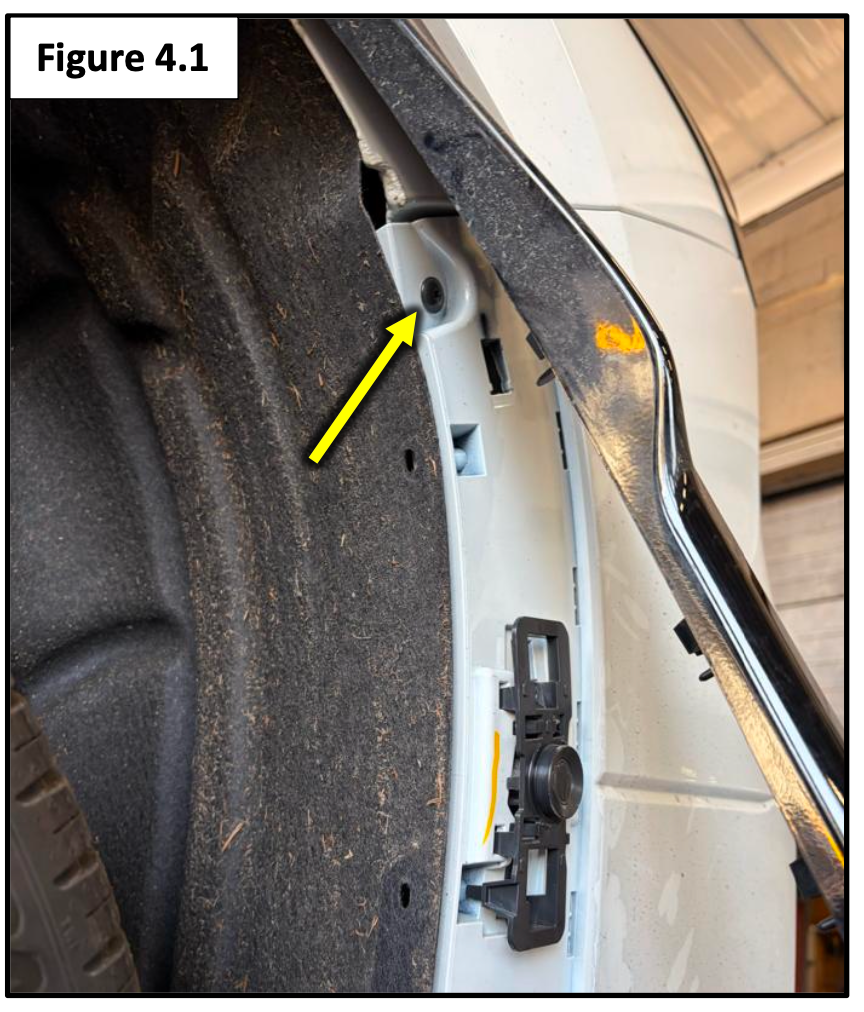
Remove the screws securing the upper bumper corners on both sides (Figure 4.1).
This frees the bumper cover from the body.
Step 5: Remove Taillight Screws
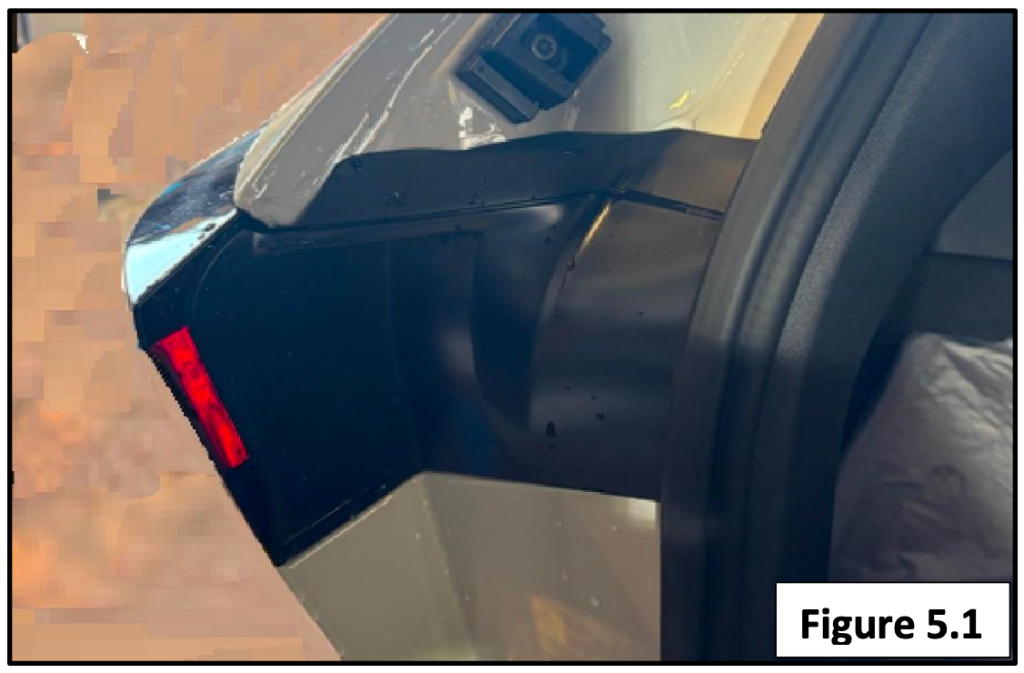
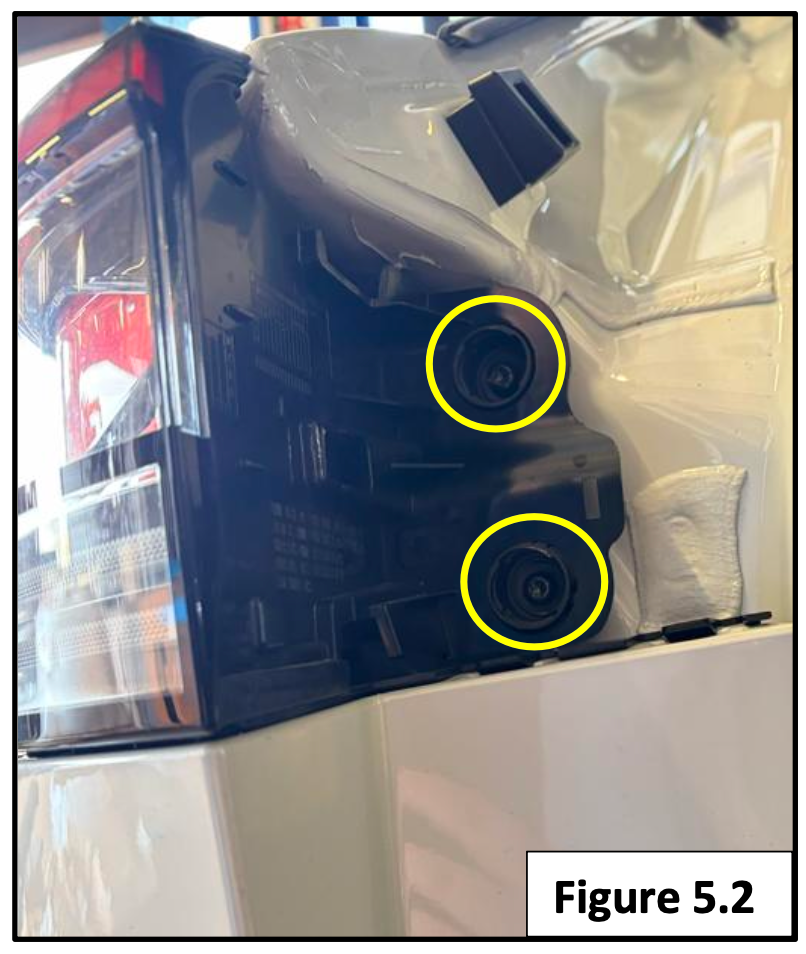
Pop off the small screw covers located inward of the taillights.
- Remove the two screws per side holding each taillight in place.
Step 6: Remove Taillights
Slide each taillight straight backward.
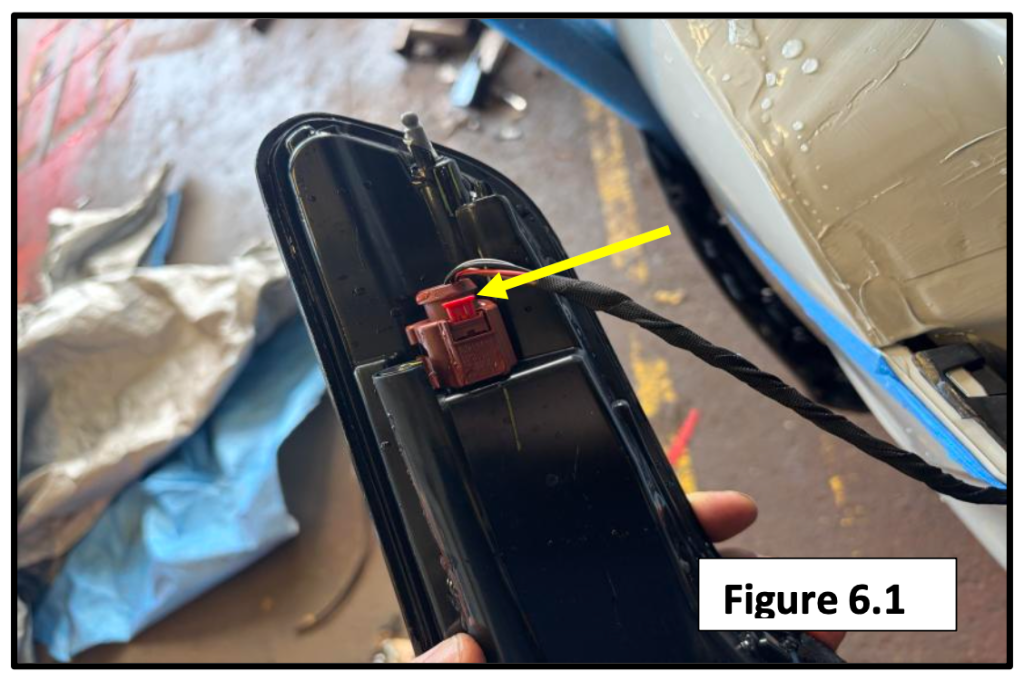
To disconnect:
- Release the red safety tab
- Press the connector release tab
Set the taillights aside somewhere safe.
Step 7: Remove Lower Bumper Retainers
Underneath the rear bumper:
- Remove both inner and outer retainers
This clears the final attachment points.
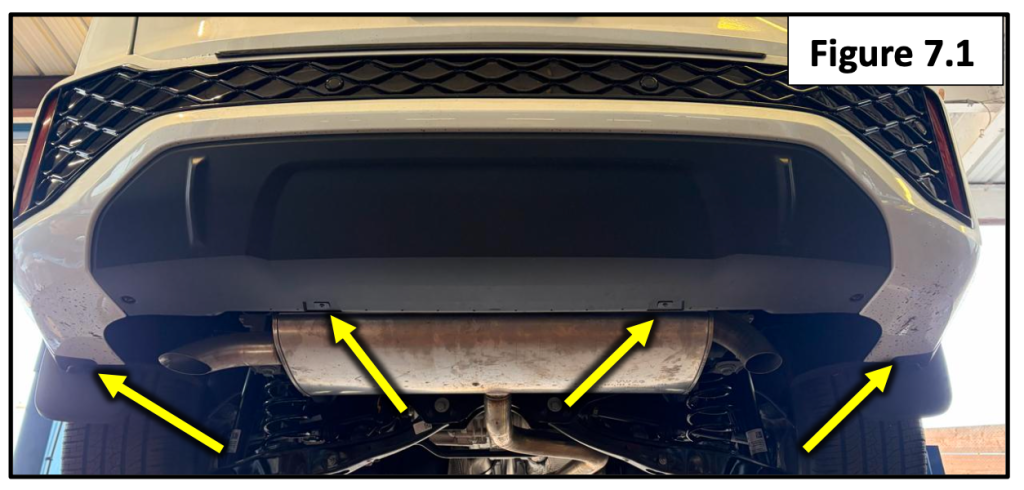
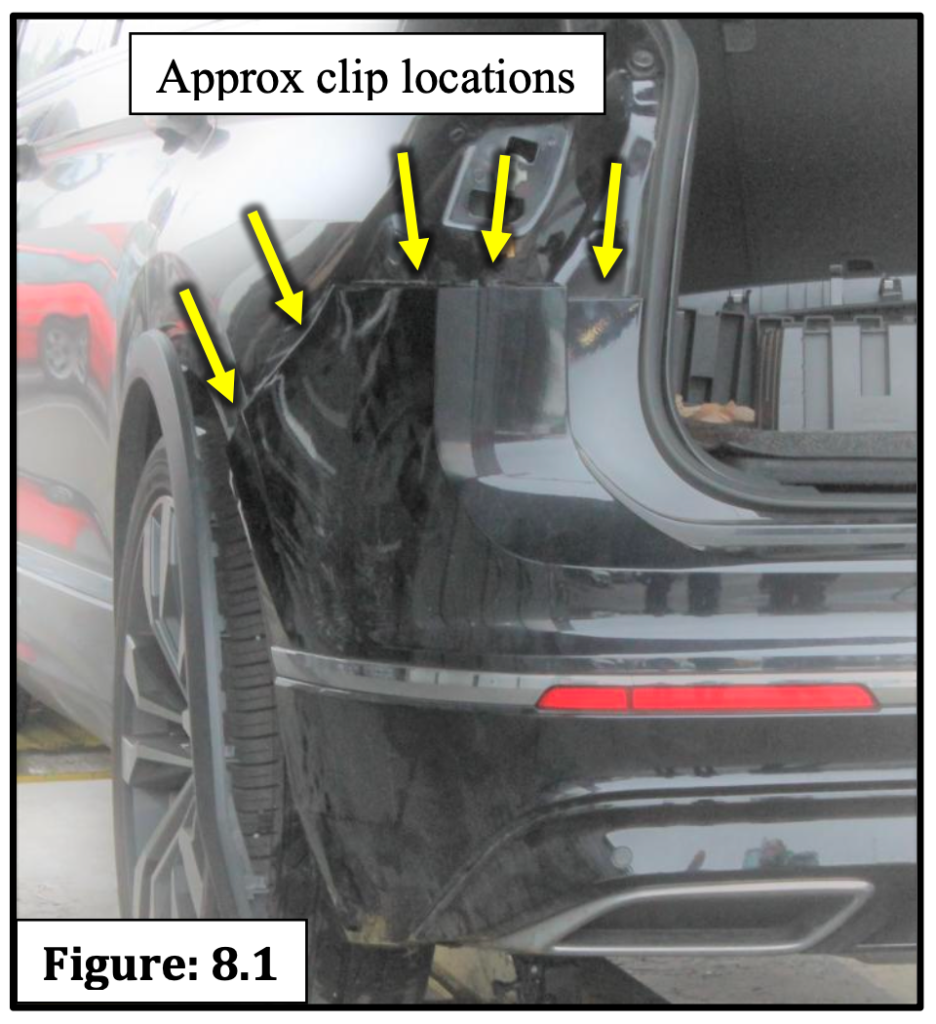
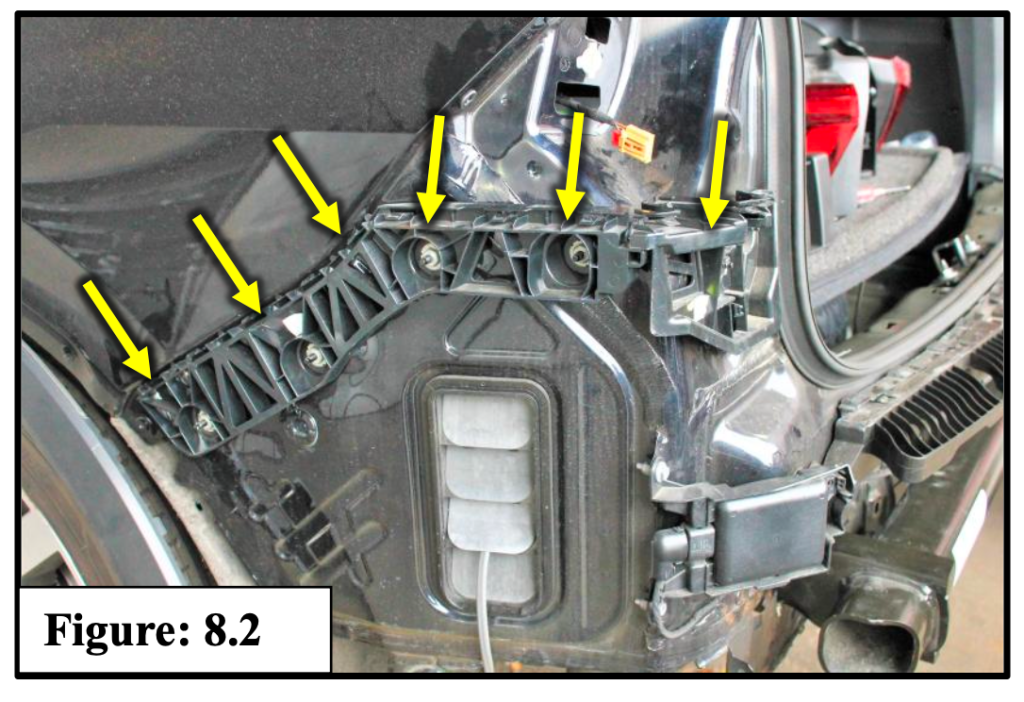
Step 8: Remove the Rear Bumper
Double-check that all hardware is removed.
Then:
- Starting at the corners, gently pull the bumper outward
- Work toward the center
- Use trim tools if needed
- Have a helper if possible
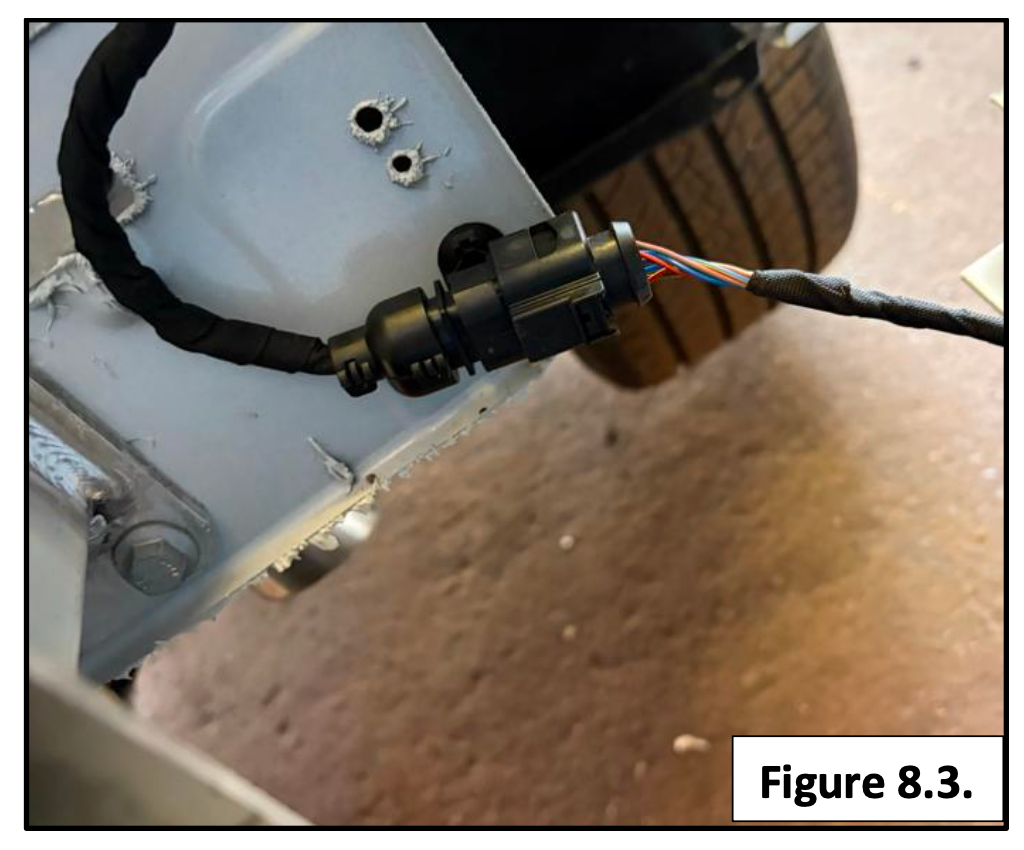
Disconnect the passenger-side wiring harness before fully removing the bumper.
Set the bumper aside carefully.
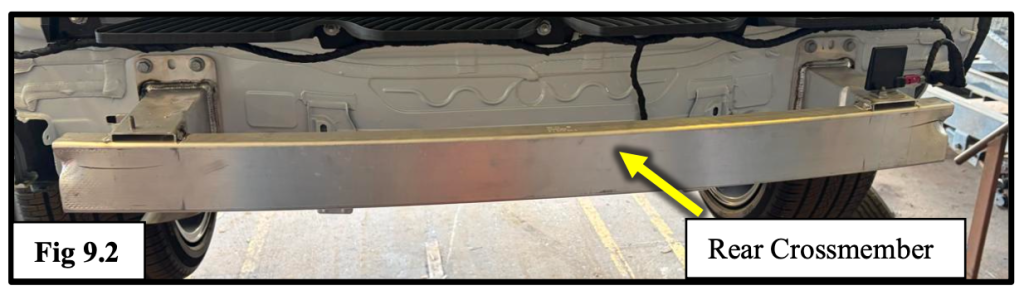
Step 9: Remove Factory Crossmember
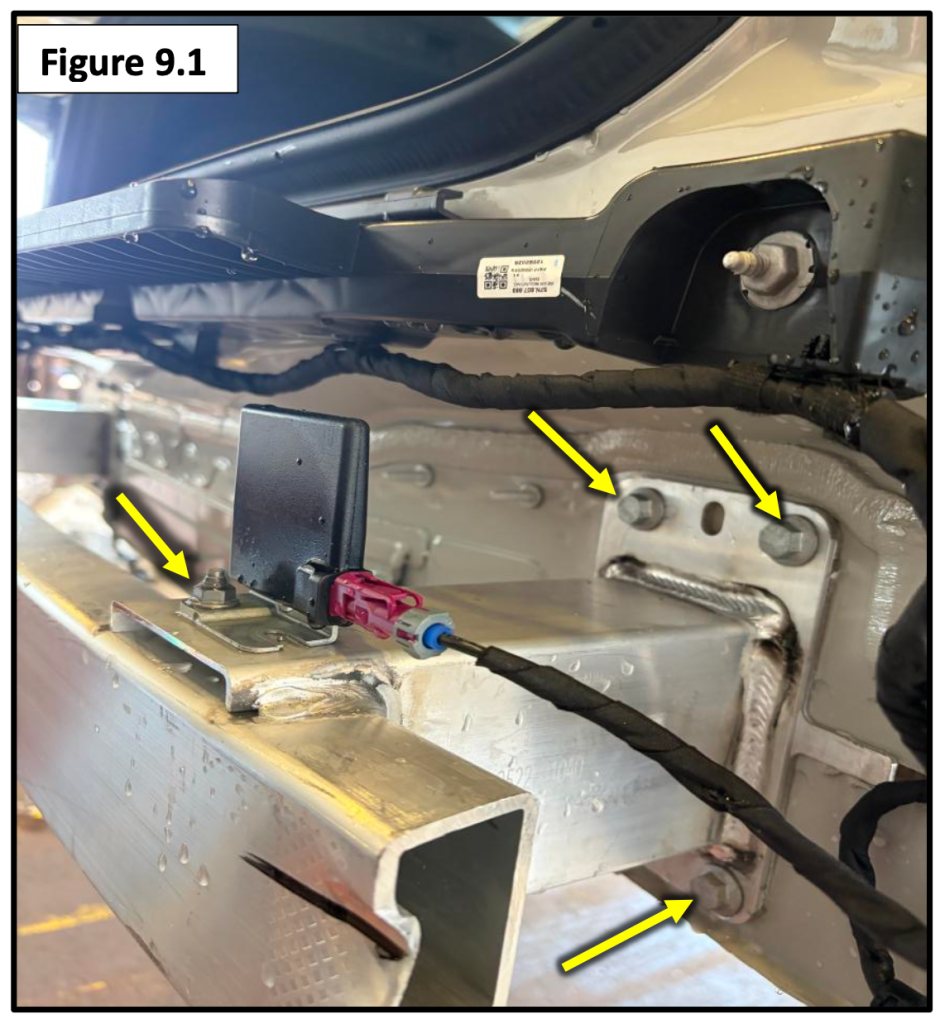
- Unbolt the rear antenna sensor and hang it safely out of the way.
- Remove four factory bolts per side from the crossmember.
- Remove the crossmember completely. It will not be reinstalled.
This is where the EcoHitch takes its place.
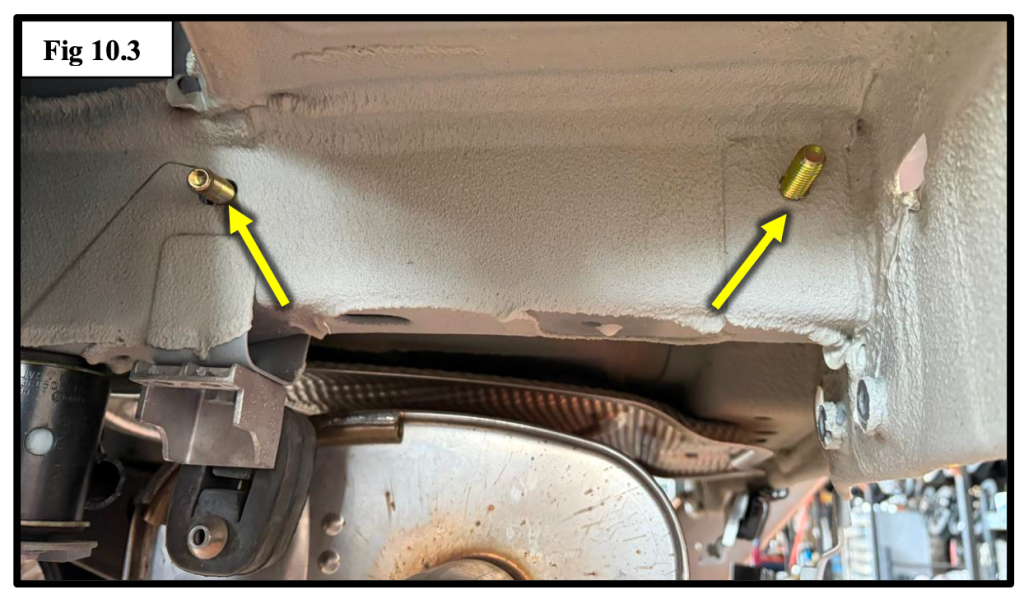
Step 10: Fish Frame Bolts Into Position
On the driver side:
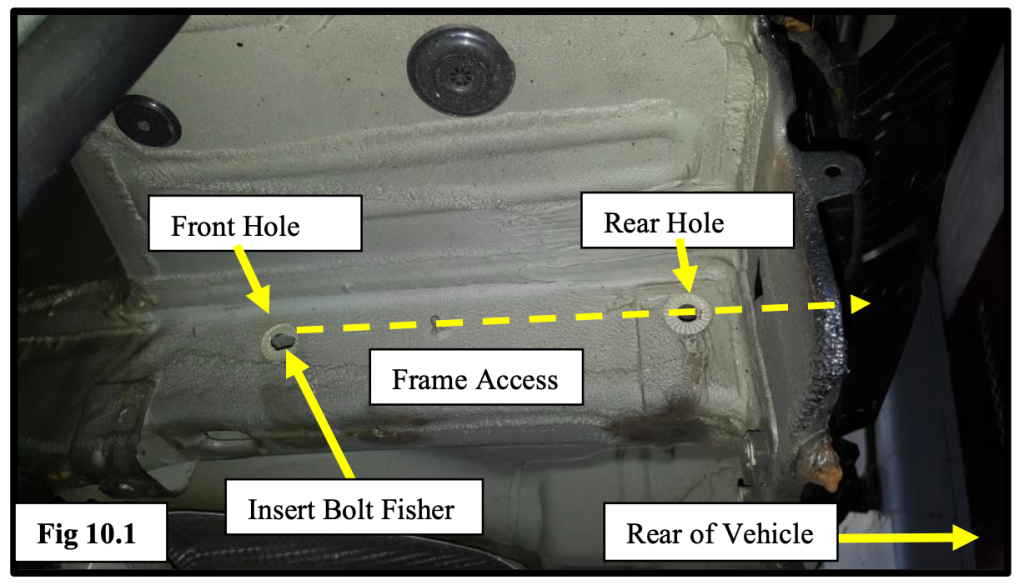
- Insert the 7/16" bolt fisher into the front frame hole.
- Guide it through the frame access opening.
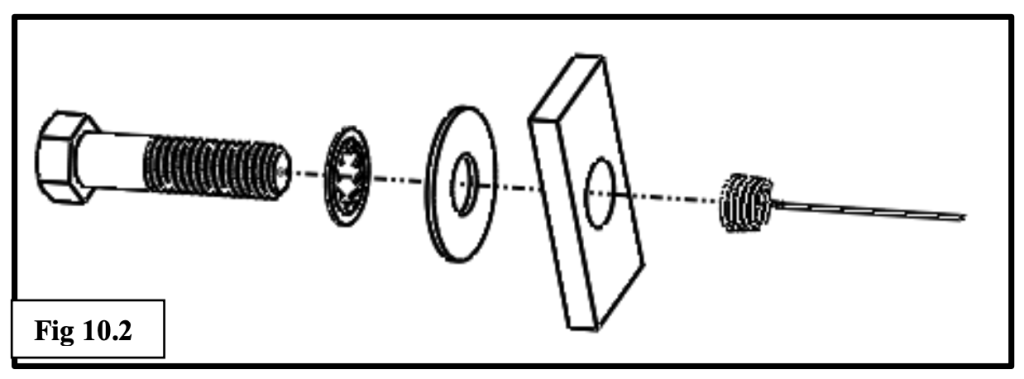
- Attach:
- 1x2 plate washer
- 7/16" flat washer
- 7/16" internal tooth washer
- 7/16" x 1-3/4" bolt
- 1x2 plate washer
Pull it through until the bolt protrudes.
Insert the same hardware into the rear hole (bolt fisher not required).
Repeat for passenger side.
Step 11: Install Frame Support Plates
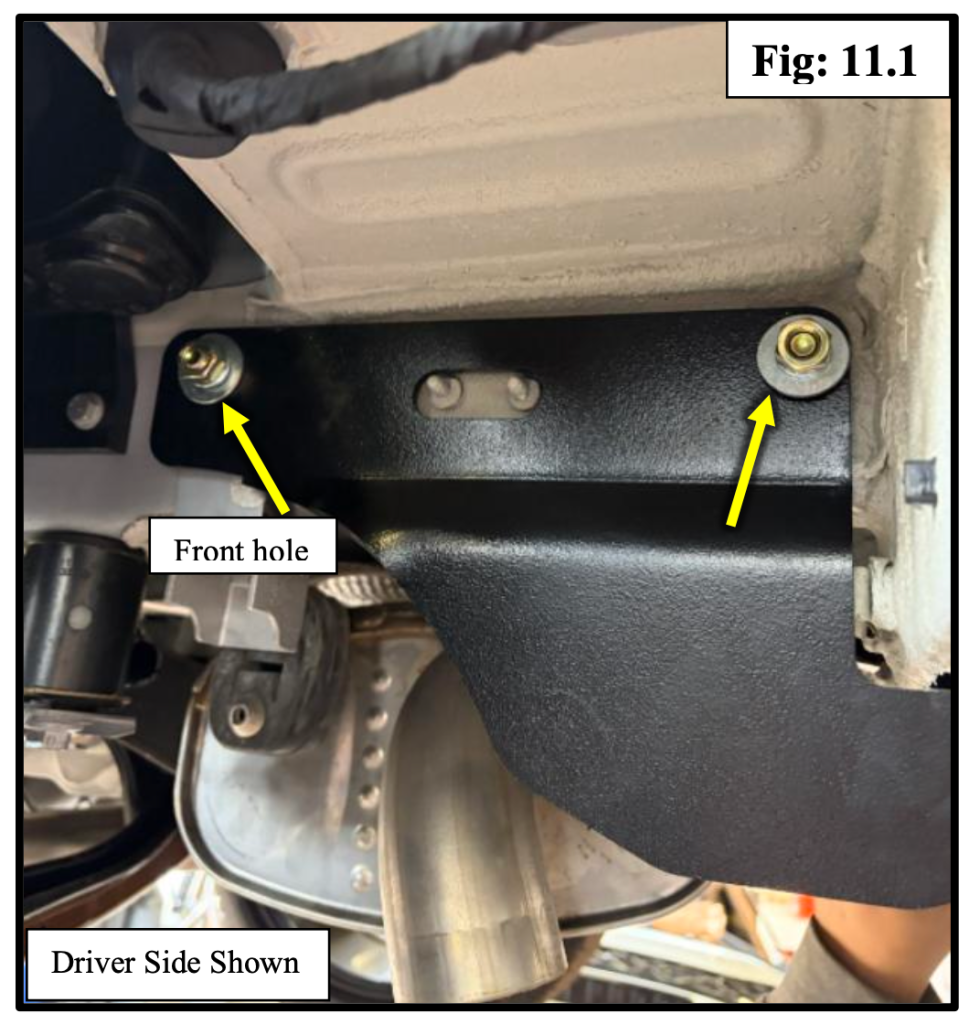
Identify the driver side support plate (lower portion jogs outward).
- Insert the bolt fisher through the front hole.
- Position the plate against the frame.
- Secure each bolt using:
- 7/16" flat washer
- 7/16" split lock washer
- 7/16" hex nut
- 7/16" flat washer
Leave hardware loose for now.
Repeat for the opposite side.
Step 12: Install the Hitch
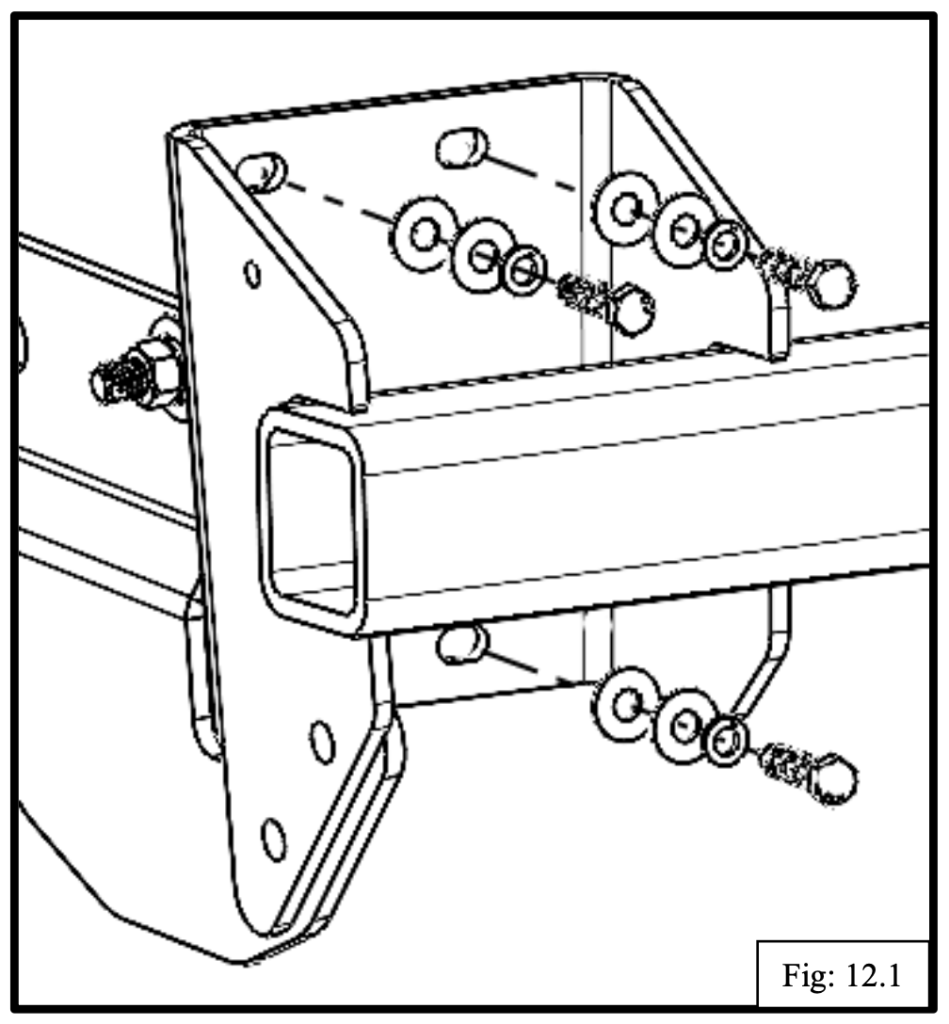
Lift the EcoHitch into place where the crossmember was removed.
Important:
- Frame Support Plates must sit inside the hitch mounting plates.
Secure using three bolts per side.
Install the M8 bolts with:
- M8 split washer
- Two 5/16" flat washers
Step 13: Secure Frame Plates to Hitch
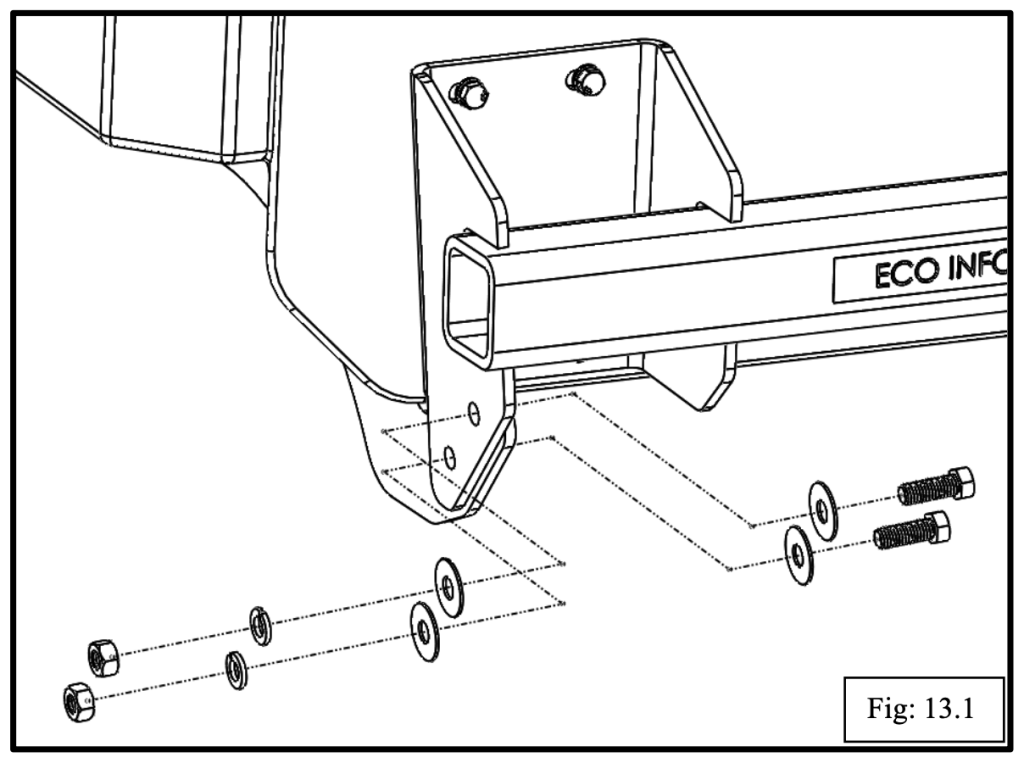
Attach the Frame Support Plates to the hitch using:
- 7/16" x 1-1/4" bolts
- 7/16" flat washers
- 7/16" lock washers
- 7/16" hex nuts
Torque specs:
- 7/16" hardware: 65 ft-lbs
- M8 hardware: 25 ft-lbs
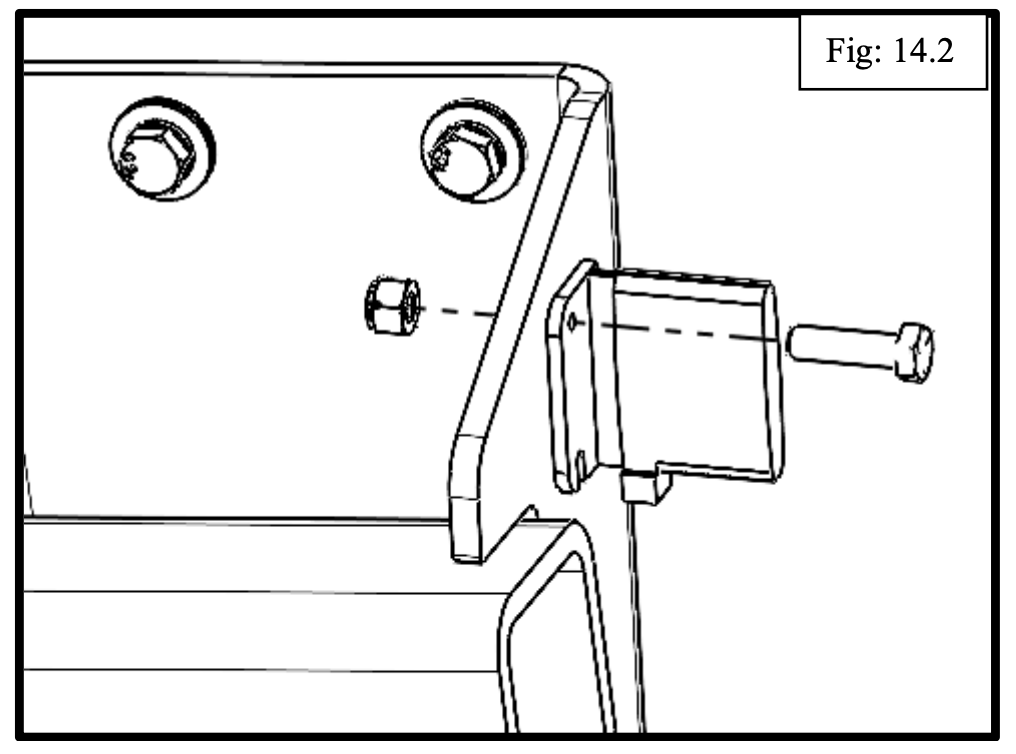
Reinstall the antenna sensor onto the side plate using:
- 1/4" x 1" bolt
- Nylock nut
Torque to 76 in-lbs
Step 14: Trim Bumper Opening
Mask the bumper area to prevent scratches.
Mark the centerline.
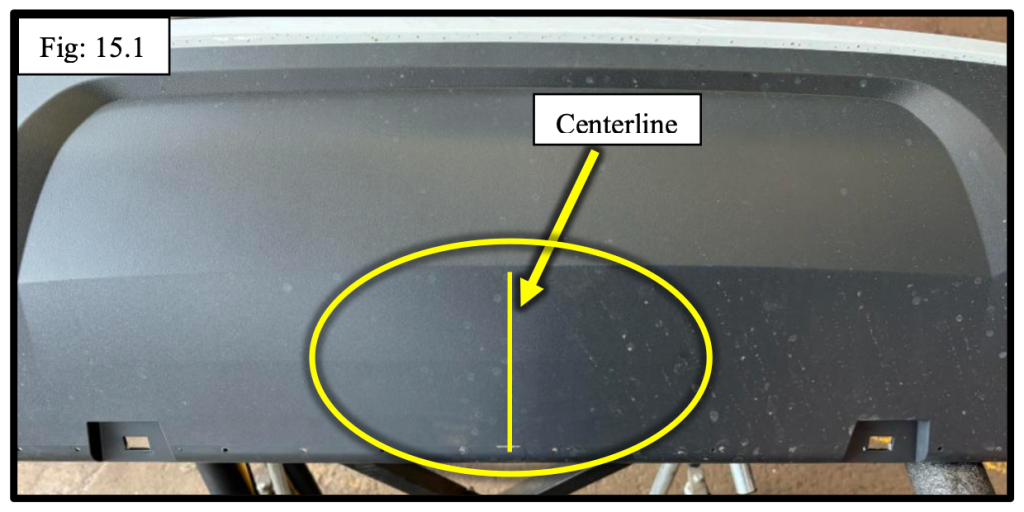
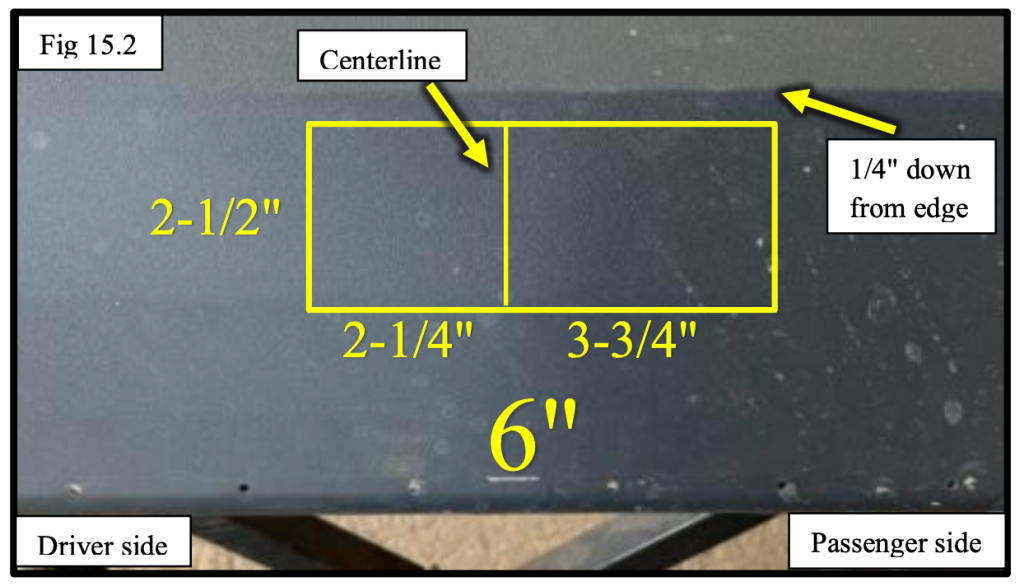
Trim a 2-1/2” x 6” rectangle for receiver clearance:
- Offset toward passenger side
- 1/4" down from edge
This is minimum clearance. You may enlarge slightly for easier access to safety chain loops.
Take your time, clean trimming makes the finished install look OEM.
Step 15: Reinstall Bumper & Components
Reverse all removal steps:
- Reinstall bumper
- Reconnect wiring harness
- Reinstall taillights
- Reinstall mudflaps and trim
- Reinstall all clips and screws
Test all lighting functions before finishing.
Step 16: Install Insert Adapter
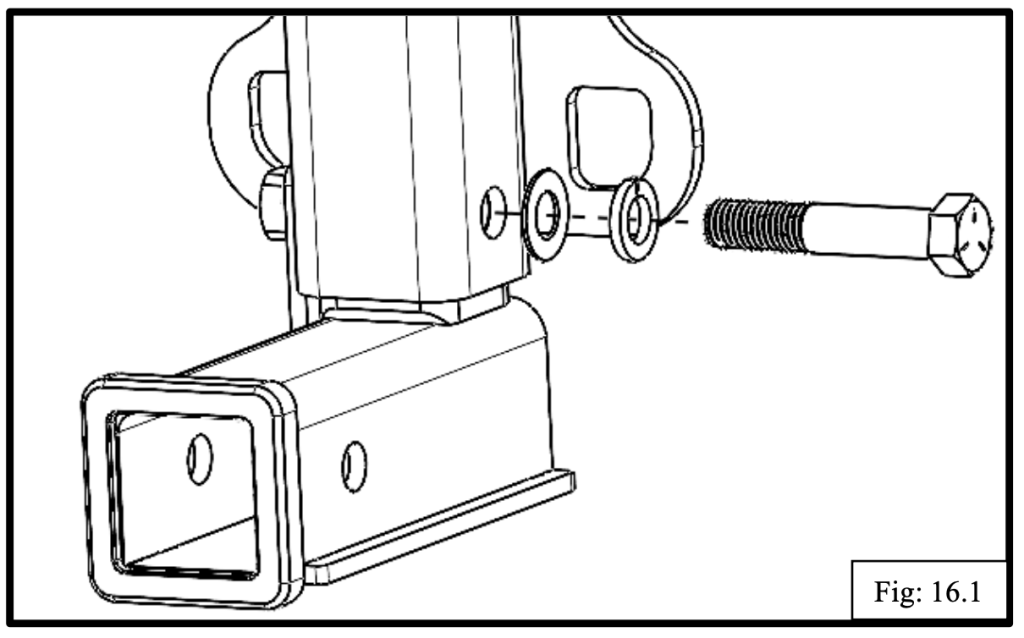
Slide the insert adapter into the receiver.
Secure with:
- 5/8" split lock washer
- 1-3/16” OD flat washer
- 5/8"-11 x 3-1/2" Grade 5 bolt
Torque to 112 ft-lbs
Retorque before each use.
Installation Complete
Your 2025+ Volkswagen Tiguan is now equipped with the EcoHitch X6097S, a clean, high-clearance solution built to handle bikes, cargo, and light towing with confidence.
Take a step back and admire the finished look. Minimal, clean, and ready for adventure.